
Pipeline integration with jenkinsfile – Jenkins pipeline
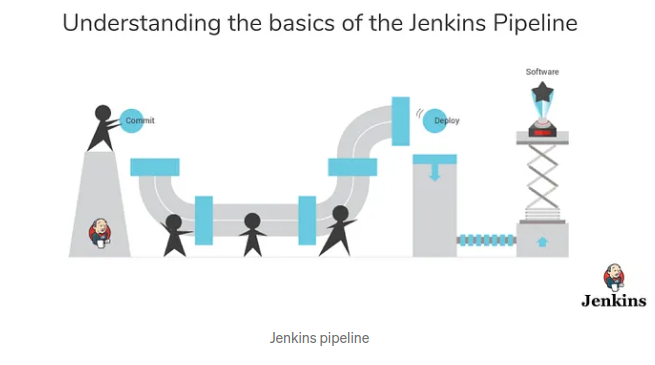
Jenkins pipeline allows us to define a complete list of events that occur in the code lifecycle. From build to test and deployment.
We can use a set of plugins that help in the implementation of some processes as a continuous delivery pipeline. Where pipelines are defined using code using the Groovy language to define the processes that run in the pipeline.
To invoke the pipeline as code, the Jenkinsfile must exist in the root repository of the project.
Read Also – Jenkins Setup Using Docker
Jenkins file supports two different syntax:
- Narrative
- Script
Declarative pipelines were recently released and provide better syntax support over scripted pipelines.
Here’s why you should use the Jenkins pipeline:
- A pipeline can be run in a loop.
- It supports larger projects that may involve high CPU work, provided the Jenkins infrastructure is scalable enough to support it.
- Since Jenkins Pipeline is written in code, any user can use it as a template, modify it, and run customized tests and processes.
- Multiple tasks can run in parallel.
The Jenkins pipeline is robust. A pipeline that has been stopped for any reason can be restarted automatically.
Understanding the Pipeline
Pipeline
A user-defined block, which contains all the processes like building, testing, deployment, etc. All steps and steps are defined in this block.
Node
A node is a machine on which Jenkins runs. A node block is used in the scripted pipeline syntax.
Stage
This block contains a series of steps in the pipeline. That is, build, test, deploy processes on one platform.
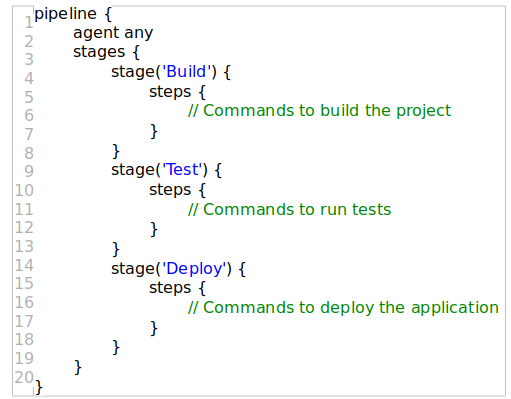
Let’s look at an example for multiple steps, where each step performs a specific task:
For Jenkins Pipelines, install the Pipelines plugin. Go to Manage Jenkins > Manage Plugins > Available Section > Find Pipelines. If you have already installed Pipeline it will display in the Installed section. Create a new project with Pipeline.
Creating your first Jenkins pipeline.
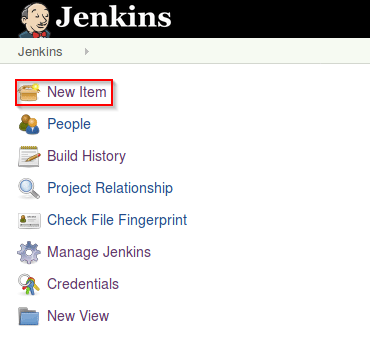
Step 1: Log in to Jenkins and select ‘New Item’ from the dashboard.
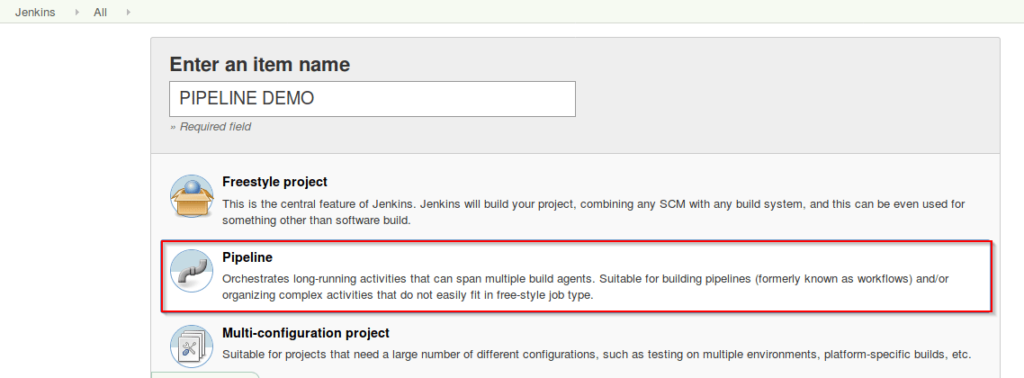
Step 2: Next, enter a name for your pipeline and select ‘pipeline’ project. Click on ‘ok’ to proceed.
Step 3: Scroll down to the pipeline and choose if you want a declarative pipeline or a scripted one.
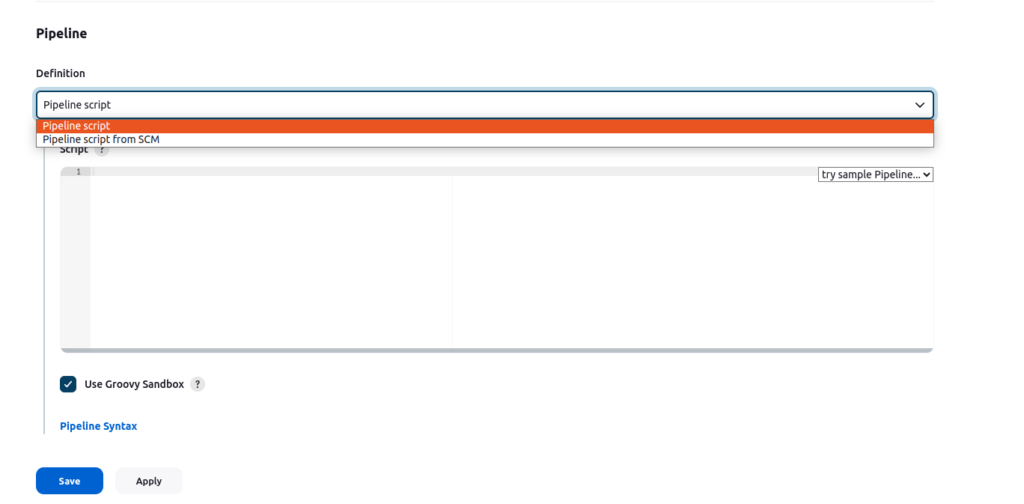
Step 4a: If you want a scripted pipeline then choose ‘pipeline script’ and start typing your code.

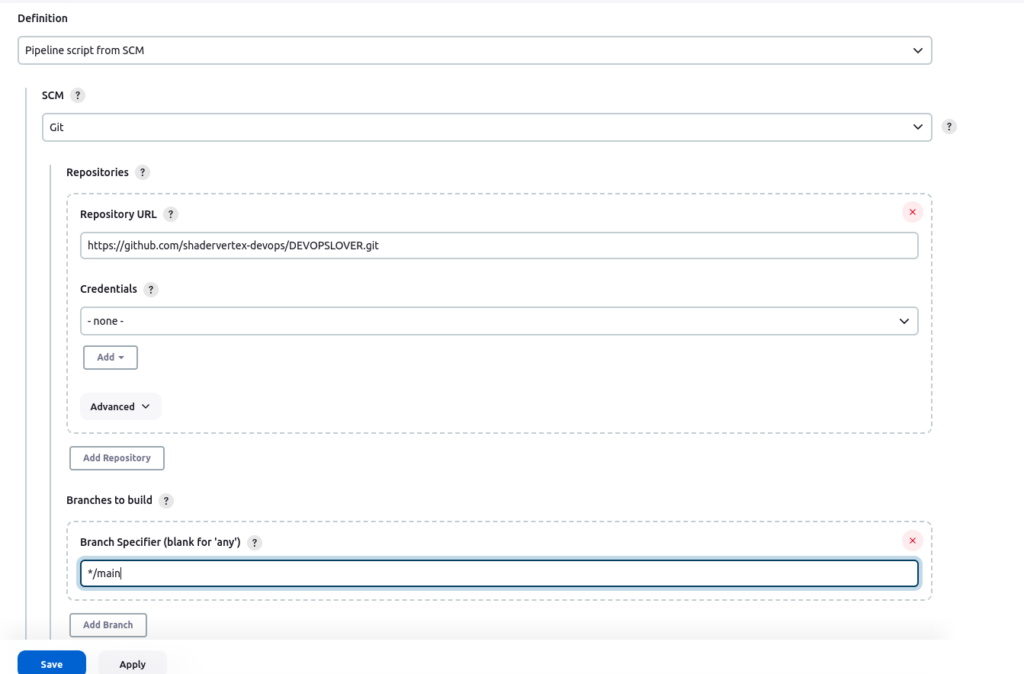
Step 4b: If you want a declarative pipeline then select ‘pipeline script from SCM’ and choose your SCM. In my case I’m going to use Git throughout this demo. Enter your repository URL.
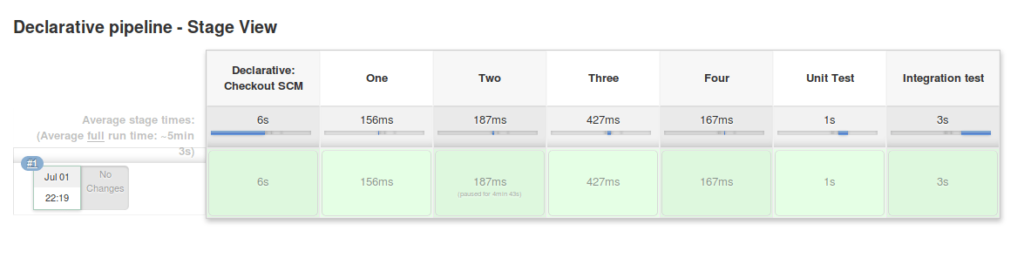
Declarative Pipeline Demo
The declarative pipeline provides a more structured and simpler syntax for defining pipelines. It is designed to be easy to read and understand, especially for those new to Jenkins and CI/CD concepts.
pipeline {

         agent any

         stages {

                 stage('One') {

                 steps {

                     echo 'Hi, this is declarative pipeline'

                 }

                 }

                 stage('Two') {

                 steps {

                    input('Do you want to proceed?')

                 }

                 }

                 stage('Three') {

                 when {

                       not {

                            branch "master"

                       }

                 }

                 steps {

                       echo "Hello"

                 }

                 }

                 stage('Four') {

                 parallel {

                            stage('Unit Test') {

                           steps {

                                echo "Running the unit test..."

                           }

                           }

                            stage('Integration test') {

                              agent {

                                    docker {

                                            reuseNode true

                                            image 'ubuntu'

                                           }

                                    }

                              steps {

                                echo "Running the integration test..."

                              }

}

                           }

                           }

              }

}
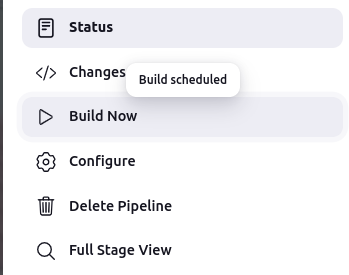
click on Aply and save , click on build now
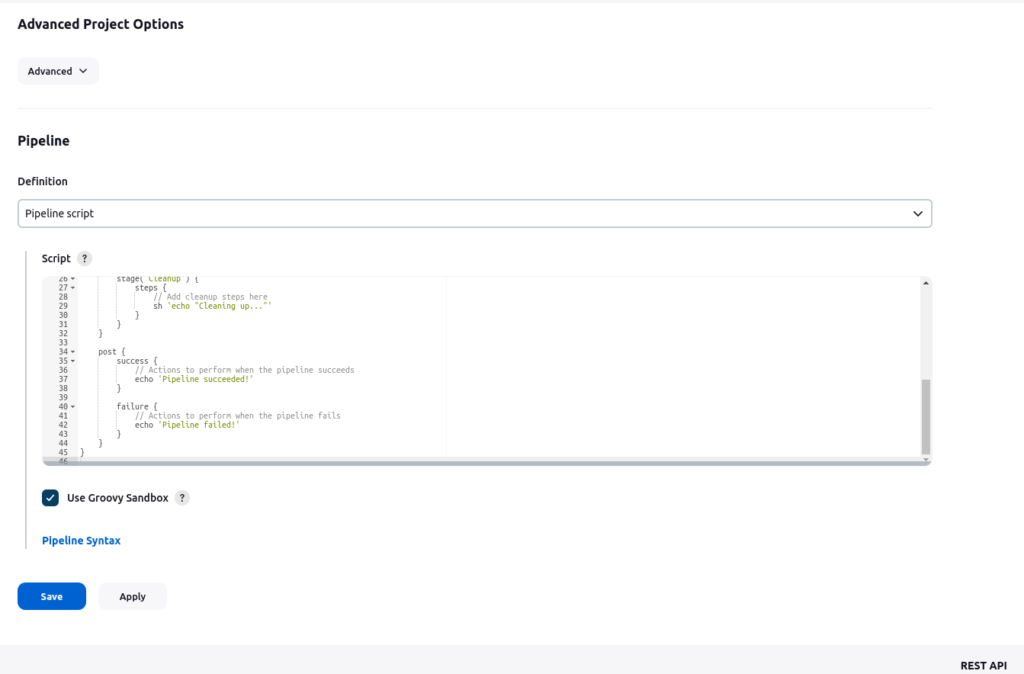
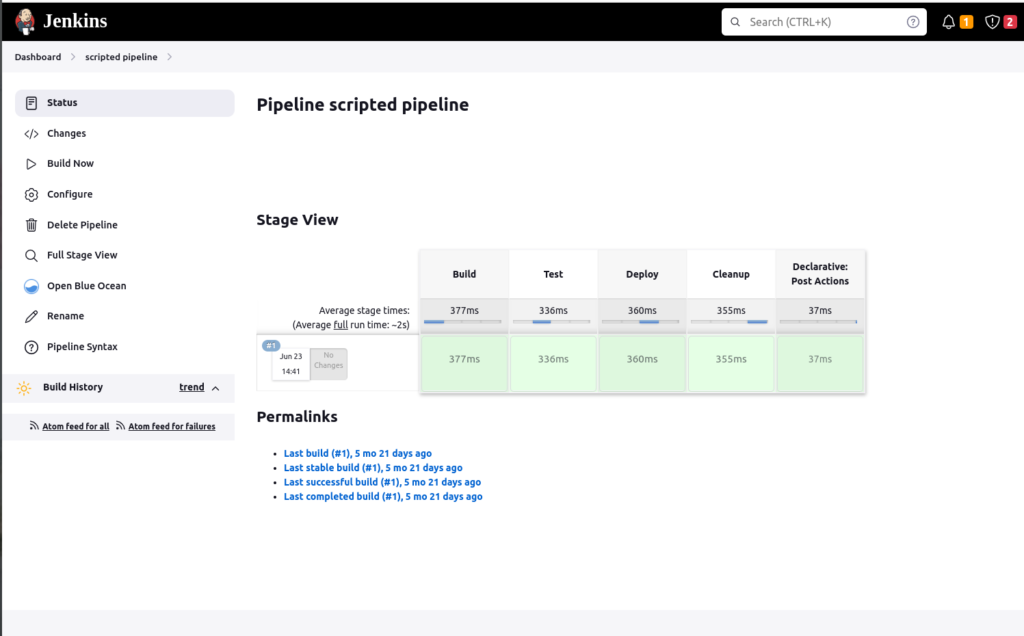
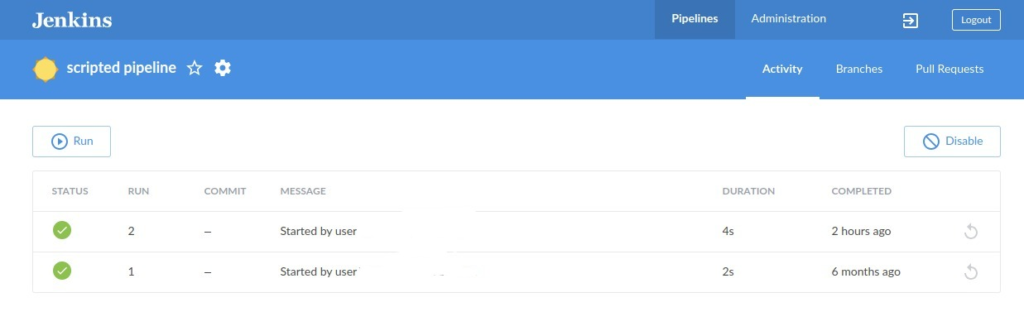
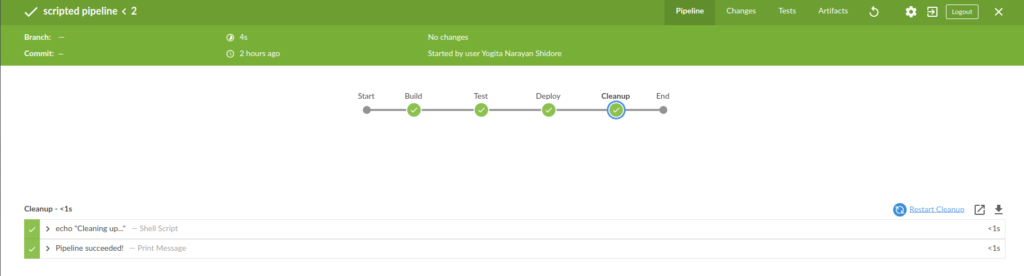
Scripted Pipeline Demo
The scripted pipeline uses a more flexible and complex scripting syntax, allowing for advanced customization and conditional logic. It provides more control and is suitable for complex build processes.

pipeline {

    agent any

    stages {

        stage('Build') {

            steps {

                // Add build steps here
                sh 'echo "Building..."'

            }

        }

        stage('Test') {

            steps {

                // Add test steps here
                sh 'echo "Running tests..."'

            }

        }

        stage('Deploy') {

            steps {

                // Add deployment steps here
                sh 'echo "Deploying..."'

            }

        }

        stage('Cleanup') {

            steps {

                // Add cleanup steps here
                sh 'echo "Cleaning up..."'

            }

        }

    }

    post {

        success {

            // Actions to perform when the pipeline succeeds
            echo 'Pipeline succeeded!'

        }

        failure {

            // Actions to perform when the pipeline fails
            echo 'Pipeline failed!'

        }

    }

}
Getting Started with Blue Ocean
What is blue ocean?
Blue Ocean rethinks the Jenkins user experience. Designed from the ground up for Jenkins Pipelines, but still compatible with freestyle jobs, Blue Ocean reduces clutter and increases clarity for every team member.
Sophisticated visualizations of continuous delivery (CD) pipelines allow fast and intuitive understanding of pipeline status.
The Pipeline Editor makes the creation of pipelines accessible by guiding the user through an intuitive and visual process for creating a pipeline.
Personalization to suit the role-based needs of each team member.
Indicate accuracy when intervention is required and/or problems arise. Blue Ocean shows where attention is needed in the pipeline, allowing exception management and increased productivity.
Native integration for branch and pull requests enables maximum developer productivity when collaborating on code with others in GitHub and Bitbucket.
- Log in to your Jenkins server
- Click Manage Jenkins in the sidebar and then click Manage Plugins
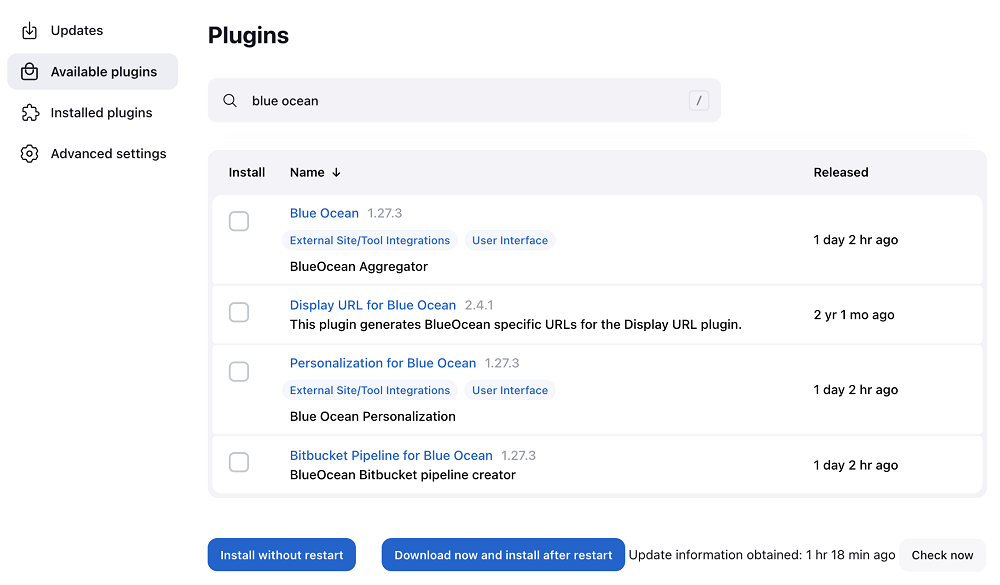
- Select the available tabs and use the search bar to find Blue Ocean
- Click the checkbox in the Install column
- Either install without restarting or download now and click install after restarting
After you install Blue Ocean, you can start using it by clicking on Open Blue Ocean in the navigation bar of the Jenkins web UI

Hope you like this blog….

- What is Platform Engineering? A Beginner’s Guide - July 23, 2026
- Devops and Cloud Batch 12 Assignment - July 21, 2026
- Deploy a Java Application Using Ansible | Step-by-Step Guide - July 16, 2026