
Kubernetes– Jenkins deployment on kubernetes
Kubernetes (K8s) is an open-source tool for automating the deployment, scaling, and management of containerized applications.
Kubernetes clusters add a new automation layer to Jenkins. Kubernetes ensures that resources are used effectively and that your servers and underlying infrastructure are not overloaded. Kubernetes’ ability to orchestrate container deployments ensures that Jenkins always has the right amount of resources available.
Hosting Jenkins on a Kubernetes cluster is beneficial for Kubernetes-based deployments. Here, we go through the step-by-step process to install Jenkins on a Kubernetes cluster.
Read Also – Kubernetes Architecture and core Components
Prerequisites
- Make sure you have a Kubernetes cluster running (you can refer to a tool like Minikube, GKE, AKS or any other Kubernetes service).
- Install
kubectlfor managing Kubernetes resources. - Basic understanding of Docker containers and Kubernetes concepts.
Create a Kubernetes Cluster with minikube –
Minikube is a tool that creates a single-node Kubernetes cluster on your machine. If you don’t have a Kubernetes cluster running, follow these steps:
$ Install kubectl
$ Install minikube
- You can now start minikube y entering the following command:
$minikube start

$minikube status
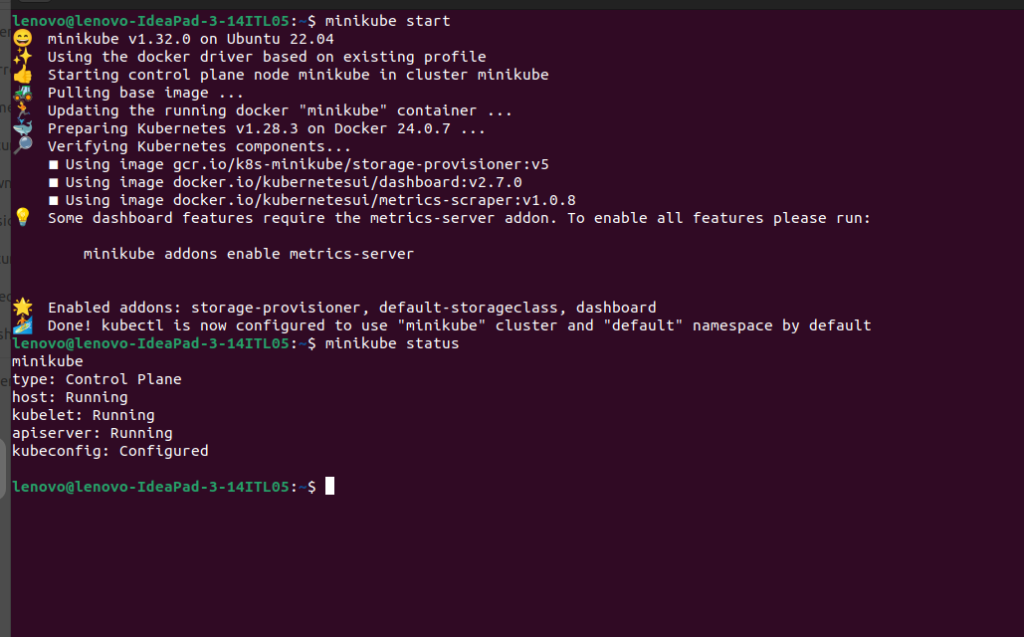
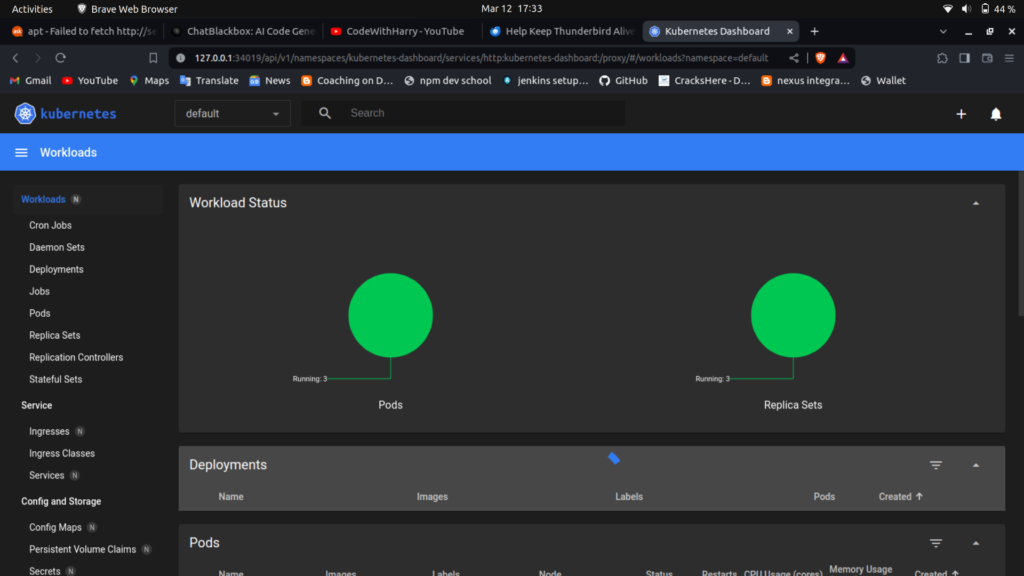
$minikube dashboard

Getting Set Up for Jenkins
- Create a namespace that allows you to segregate Jenkins objects within the Kubernetes cluster.
- Create a PersistentVolume to store your Jenkins data. This will preserve data across restarts.
- Create a file called jenkins-namespace.yaml
$sudo nano jenkins-namespace.yaml
apiVersion: v1
kind: Namespace
metadata:
  name: jenkins
This YAML defines a Kubernetes namespace named “jenkins.”
- Save the changes in
nanoby pressingCtrl+O, then pressEnterto confirm the file name, and exit by pressingCtrl+X. - Apply the namespace configuration to create the namespace in your Kubernetes cluster:
$kubectl apply -f jenkins-namespace.yaml

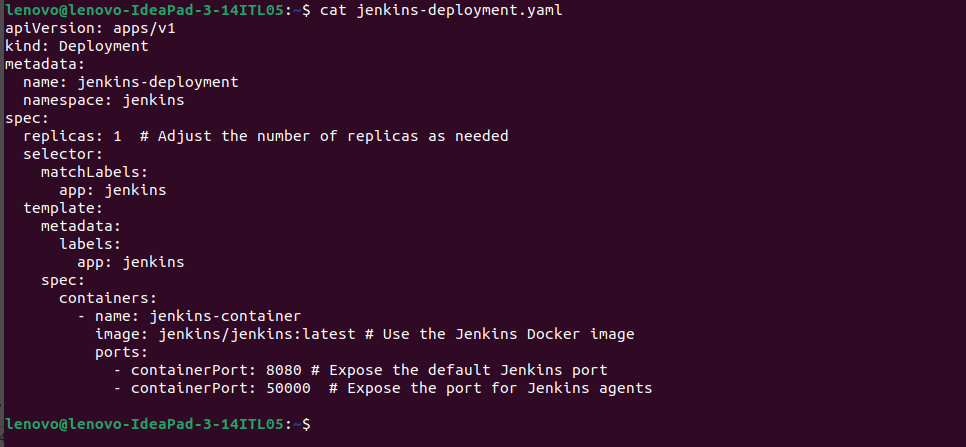
$sudo nano jenkins-deployment.yaml
apiVersion: apps/v1
kind: Deployment
metadata:
  name: jenkins-deployment
  namespace: jenkins
spec:
  replicas: 1 # Adjust the number of replicas as needed
  selector:
    matchLabels:
      app: jenkins
  template:
    metadata:
      labels:
        app: jenkins
    spec:
      containers:
      - name: jenkins-container
        image: jenkins/jenkins:latest # Use the Jenkins Docker image
        ports:
        - containerPort: 8080 # Expose the default Jenkins port
        - containerPort: 50000 # Expose the port for Jenkins agents
$cat jenkins-deployment.yaml
$kubectl create -f jenkins-deployment.yaml
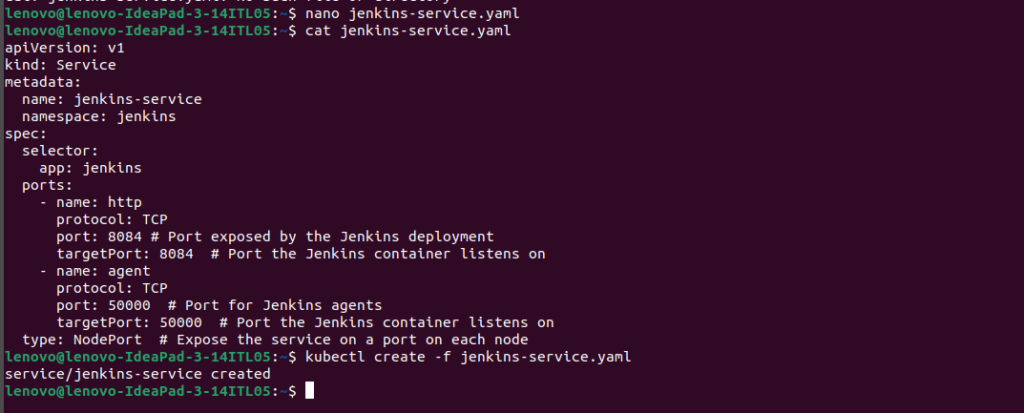
$sudo nano jenkins-service.yaml
$cat jenkins-service.yaml
apiVersion: v1
kind: Service
metadata:
  name: jenkins-service
  namespace: jenkins # Make sure to set the namespace to the one you've created
spec:
  selector:
    app: jenkins
  ports:
  - protocol: TCP
    port: 8080
    targetPort: 8080
    nodePort: 8080
  type: NodePort
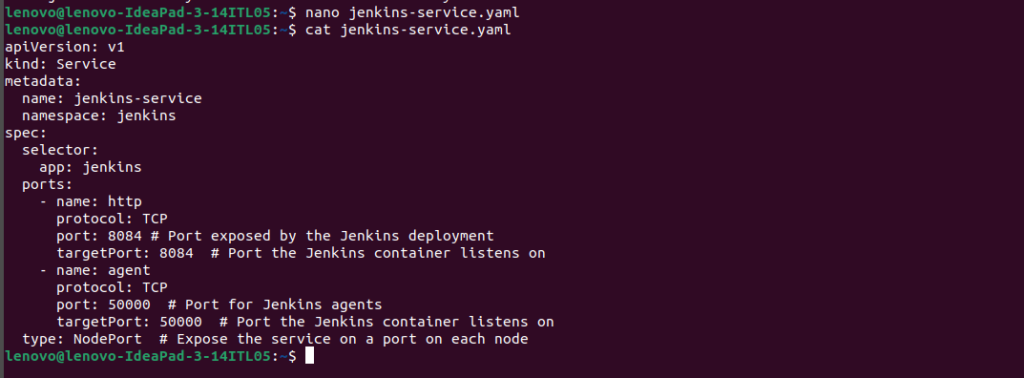
$kubectl apply -f jenkins-service.yaml
$sudo nano jenkins-configmap.yaml
$cat jenkins-configmap.yaml
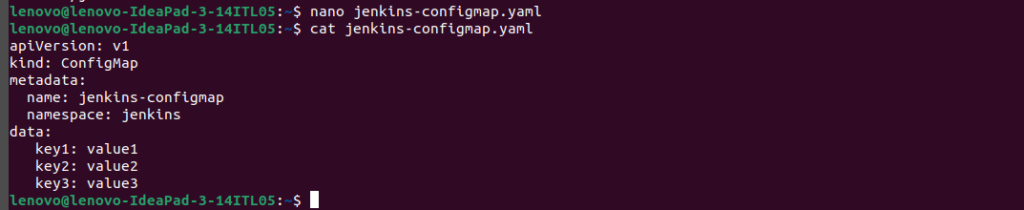
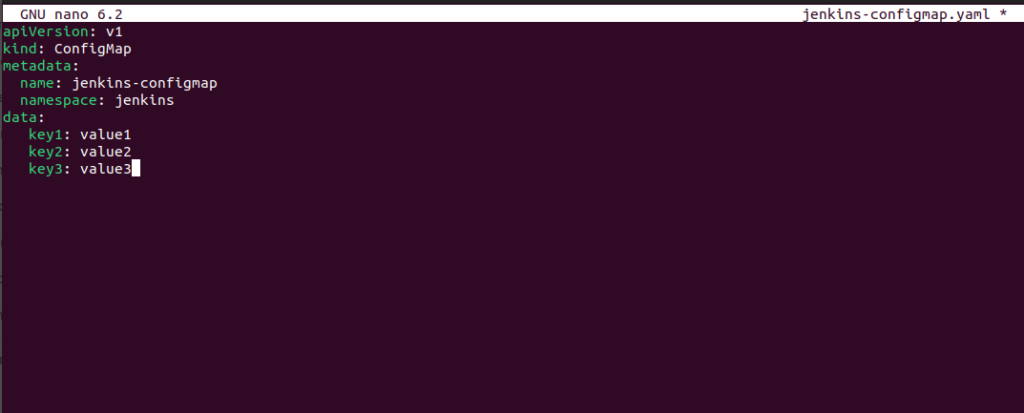
apiVersion: v1

kind: ConfigMap

metadata:

name: jenkins-configmap

namespace: jenkins

data:

key1: value1

key2: value2

key3: value3
$kubectl create -f jenkins-configmap.yaml

$kubectl get pods -n jenkins

$kubectl logs jenkins-deployment-74bd32df-tmxj4 -n jenkins
Replace jenkins-deployment-74bd32df-tmxj4 with the actual name of your Jenkins pod
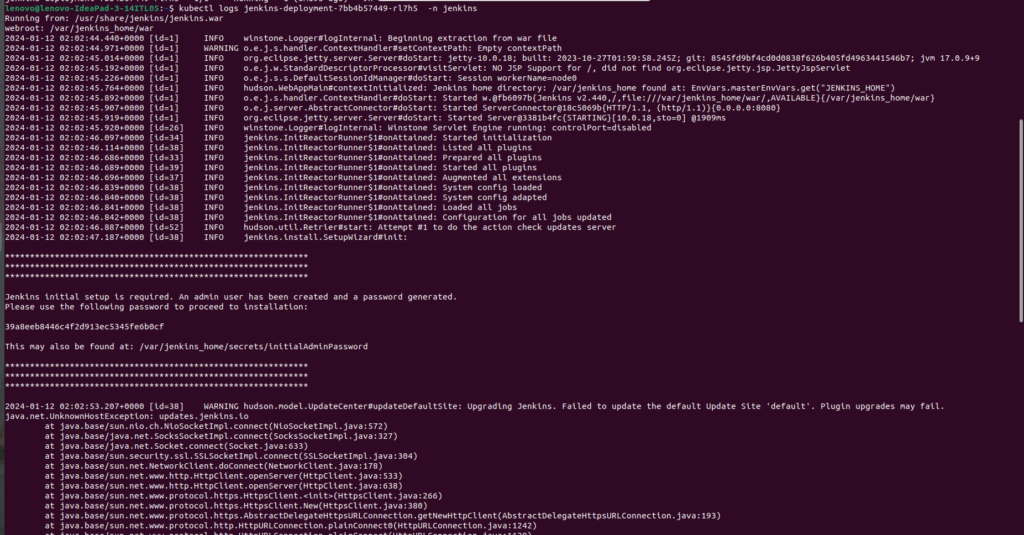
copy that password and paste it on Administrator Password.
$kubectl get services -n jenkins
NAME TYPE CLUSTER-IP EXTERNAL-IP PORT(S) AGE
jenkins NodePort 10.103.31.217 <none> 8080:30148/TCP 59s
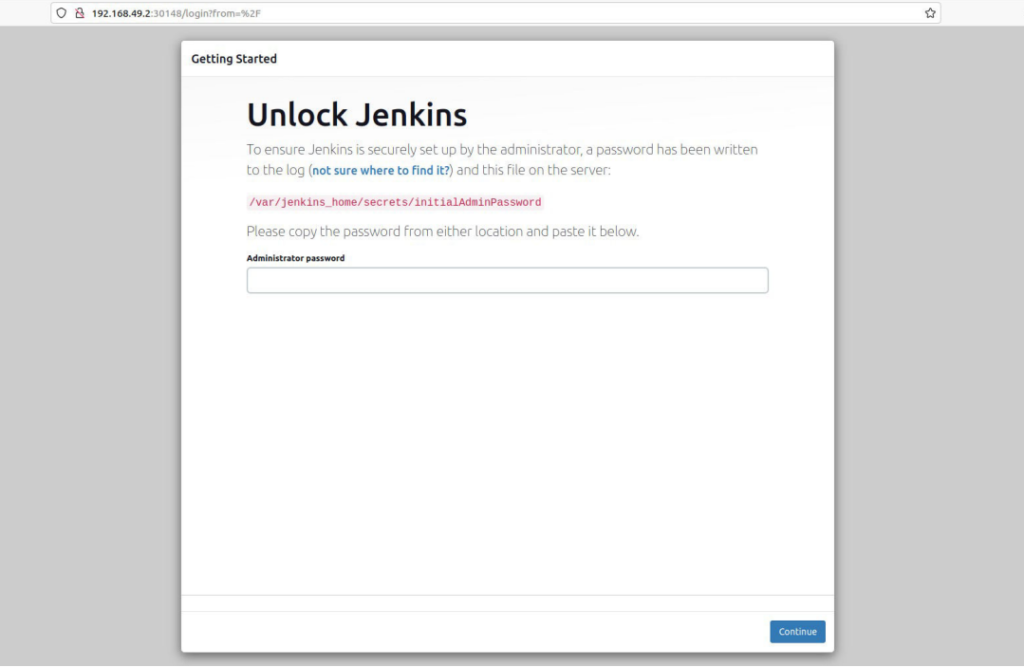
Access Jenkins dashboard
So now we have created a deployment and service, how do we access Jenkins?
From the above output we can see that the service is exposed on port 32664. We also know that since the service is of type NodeType the service will send requests to any node on this port to the Jenkins pod. All that remains for us is to determine the IP address of the Minicube VM. Minikube makes this really easy by including a specific command that outputs the IP address of the current cluster:
$minikube ip

Go to browzer and search
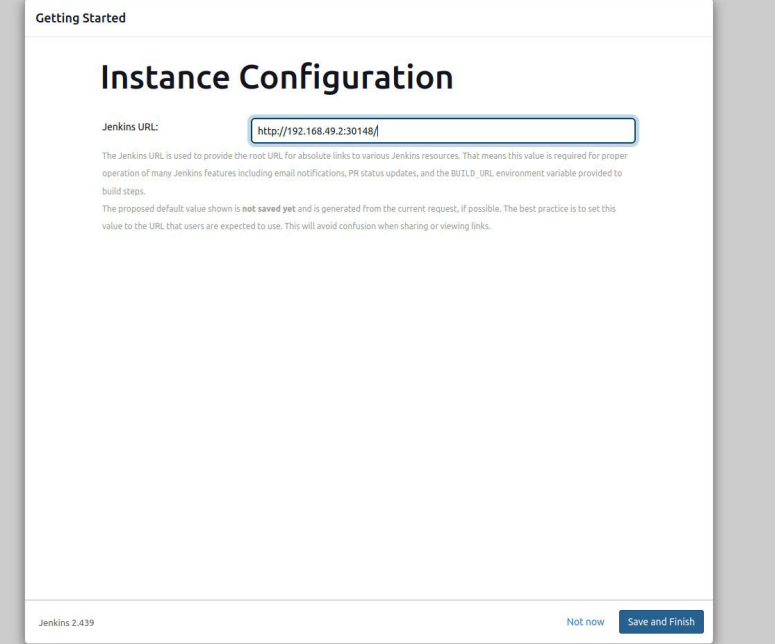
192.168.49.2:30148
You will be redirected to a page offering suggested plugins to install. After that, click on “Install recommended plugins”. Please note that if users want to install only selected essential plugins, it is recommended to select the “Select plugins to install” option.

After clicking on the suggested plugin button, the standard plugin installation will be started automatically

Finally, after installation of all suggested plugins, you will be redirected to the User Account Page
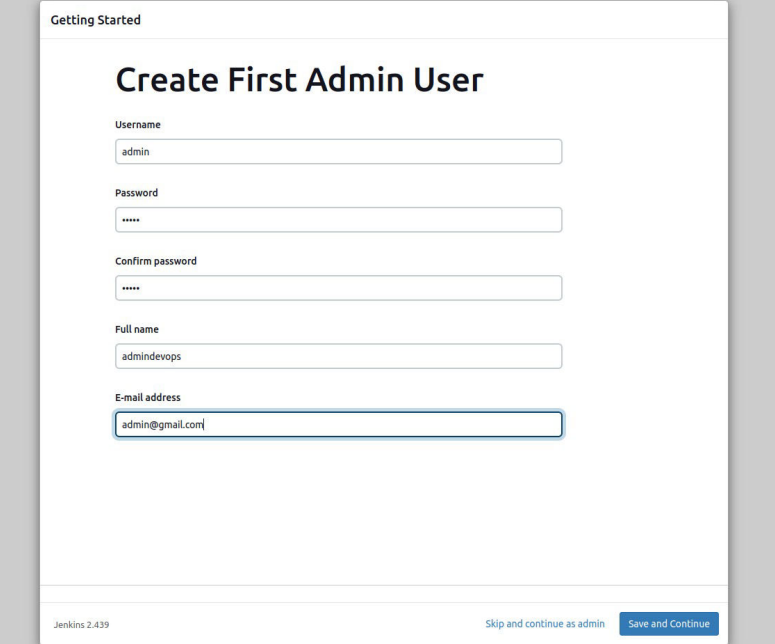
Enter the username, new password that you want to keep. Confirm password, full name, email address and click “Save and Continue” button. You can select the option “Skip and continue as administrator” next to the “Save and continue” button and in this case, you need to keep the password you put in the previous steps. It is recommended that you need to enter a new password of your choice.
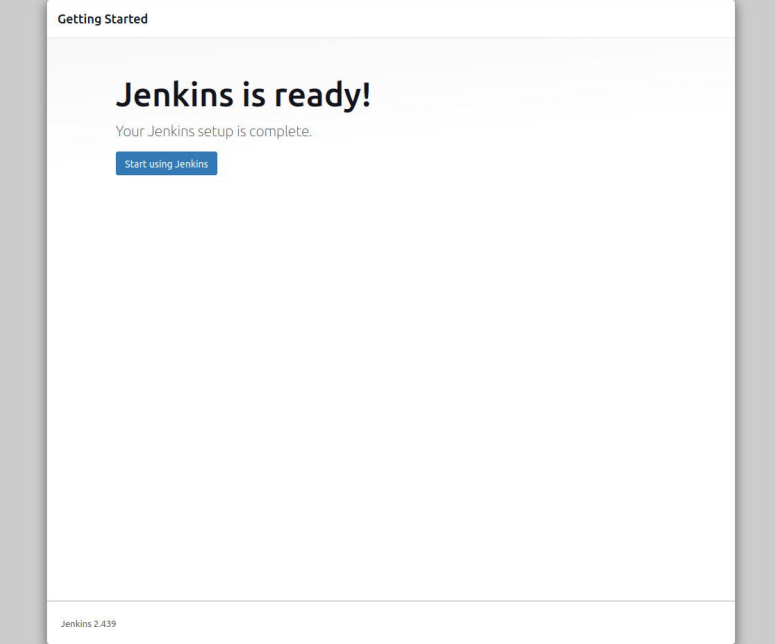
After clicking, you will be redirected to a new screen that will display a message like “Jenkins is Ready”. Now click on the “Start using Jenkins” button.
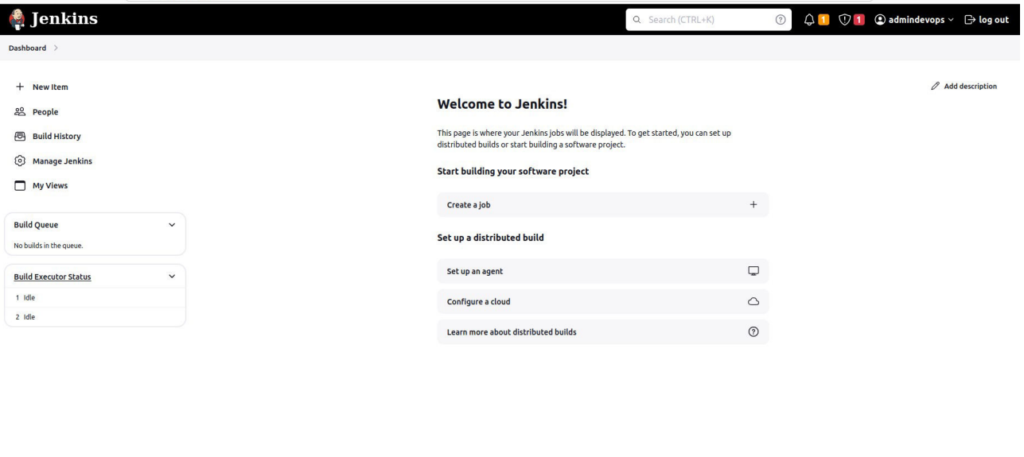
After clicking on the “Start using Jenkins ” button, you will be redirected to the Jenkins Dashboard.
Hope you like this Blog .

- Deploy a Java Application Using Ansible | Step-by-Step Guide - July 16, 2026
- ArgoCD Okta integration - July 2, 2026
- Jenkins Okta Integration - June 22, 2026