

Github setup for ssh key – Introduction
In the world of version control, Git that is, in the world of version control, Git has become an essential tool for developers. GitHub, being one of the most popular platforms for hosting Git repositories, offers various authentication methods. One of the most secure and convenient ways is to use SSH keys. In this blog post, we will guide you through the process of setting up SSH for GitHub, making your interactions with the repository seamless and secure.
One of the most secure ways to communicate over the public Internet is to use SSH. That’s why GitHub SSH key setup is a top priority for users of the popular Git service.
Fortunately, the GitHub and SSH key configuration process is relatively simple, especially on Linux distributions like Ubuntu.
Read Also – Setting up SSH key with GitHub for Ubuntu
GitHub SSH Key Setup Steps
To setup GitHub SSH keys and use them on Ubuntu, follow these steps:
- Create GitHub SSH key pair with ssh-keygen command
- Copy the value of a public SSH key to the clipboard
- Log in to GitHub and go to your account settings
- Click on the ssh and gpg link
- Click Add Key to register the public SSH key with your account
- Name the key and paste the copied value into the text field
- Save your changes
In your Git client, use an SSH based GitHub URL to clone your repo
Let’s take a look at each of these steps to setup GitHub SSH keys.
Create GitHub SSH keys
In Ubuntu, the SSH keys you create for GitHub should go in the .ssh folder. Perform the task of creating all GitHub SSH keys in this folder:
github@ubuntu:~$ cd ~/.ssh Command
$ssh-keygen
GitHub command to create SSH key pairs:
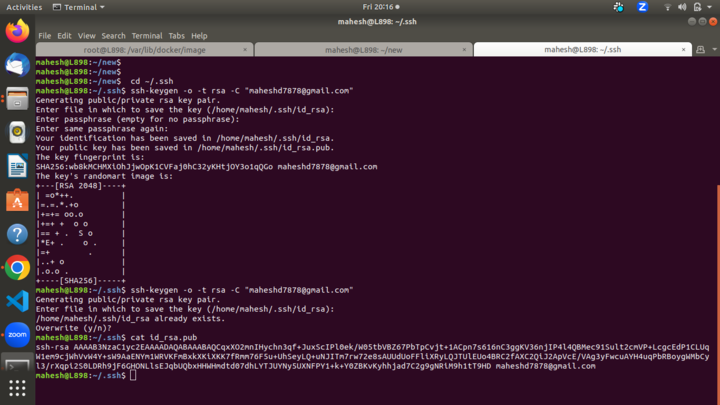
github@ubuntu:~/.ssh$ ssh-keygen -o -t rsa -C “email@example.com”
The operation will prompt you to choose a location to save the public and private keys. Simply click Return to leave them in the .ssh folder. The SSH command will appear here when a connection to a remote server is attempted.
GitHub Setup: Installation and how to manage it on UBUNTU 22.04 LTS. There are a few key steps involved in installing GitHub on a Linux system, and you can use the command-line interface (CLI) to interact with your GitHub repository. Below, I’ll outline the steps to set up GitHub and some important Git commands: 1. Create a GitHub account: Go to GitHub’s website and sign up for a free GitHub account. Do it. If you already have an account, log in.

once it opened you will see like this.. click on signup button and try create
your own github account
And click continue …. varify and
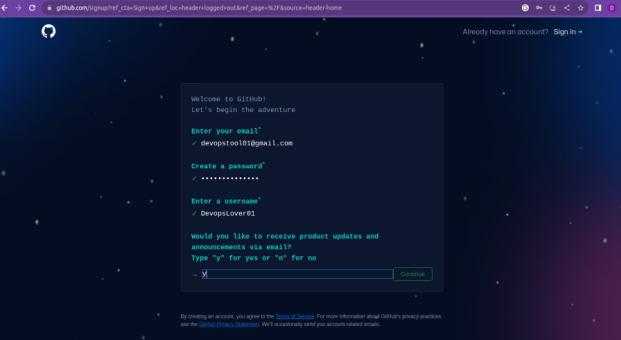
And click continue …. varify and create account
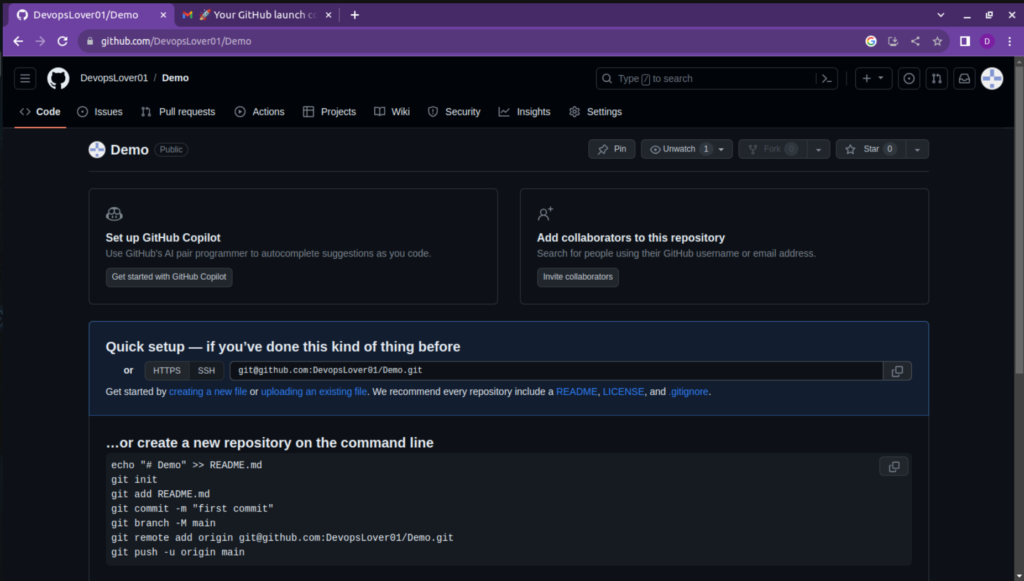
Click on Create Repository

Just go through the public repository ..select public repository and click on create button..
You will see look like this
Click on setting where u can find SSH key GPG keys
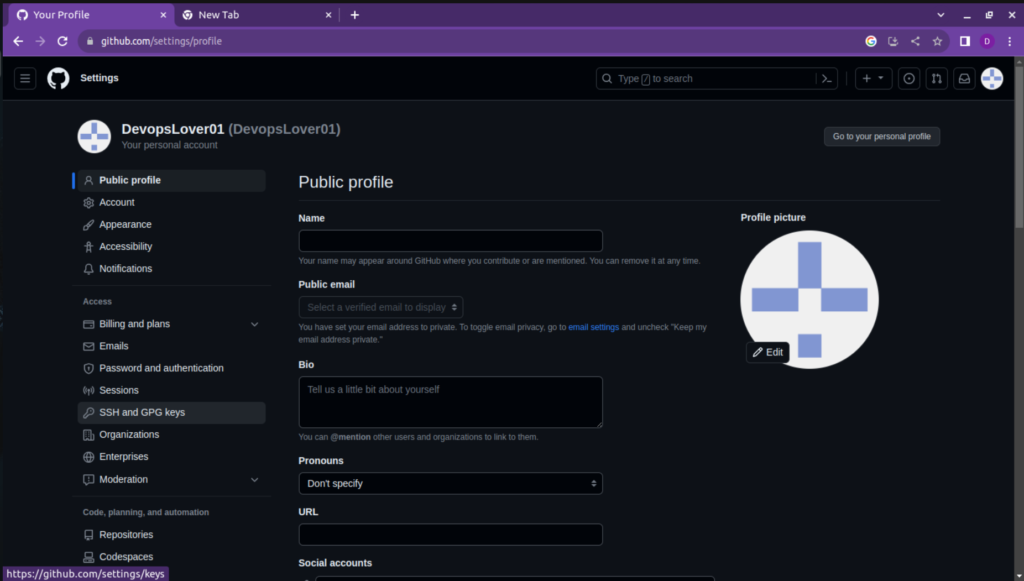
Select and open New SSH key button
Git is the version control system that GitHub is built on. Most Linux
distributions come with Git pre-installed. To check if Git is installed, open a
terminal and run:
$ git –version
If Git is not installed, you can install it using your distribution’s package
manager. For example, on Debian/Ubuntu:
$ sudo apt-get update

$ sudo apt-get install git
Configure Git
Set your name and email address for Git, which will be associated with your commits.
Replace Your name and your email with your actual git email and username
$ git config --global user.name "Your Name"

$ git config --global user.email "your.email@example.com"

Example :

$ git config --global user.name "devopslover"

$ git config --global user.email "devopslover@gmail.com"
Add Your Key SSH to GitHub:
After generating an SSH key, add the public key to your GitHub account. You can copy your public key to your clipboard and then add it to GitHub using the following steps
$ cd ~/.ssh

$ ssh-keygen -o -t rsa -c “devopslover@gmail.com”
GitHub SSH key location
When the GitHub SSH key create operation completes, the Ubuntu terminal will display a very satisfying piece of randomart.
You will also find public and private GitHub SSH keys in the current directory.
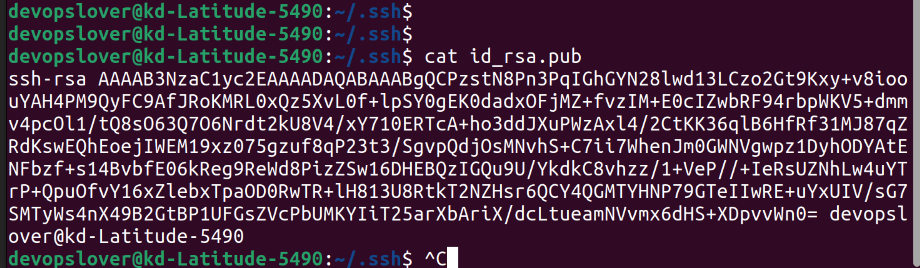
You will need to paste the contents of your public SSH key into GitHub. Cat the file to view its contents in the Ubuntu Terminal and then copy it:
$ cat id_rsa.pub
GitHub SSH key config
Next, you must configure the GitHub SSH key in the settings of your online account. Log into GitHub, navigate to your account settings, and find the link named “SSH and GPG keys.” Click on this link to create a new GitHub SSH key. Provide a unique name, and paste the value of the private GitHub SSH key you copied earlier.
Copy this SSH Key And go again to your github account where u are creating a new SSH key..
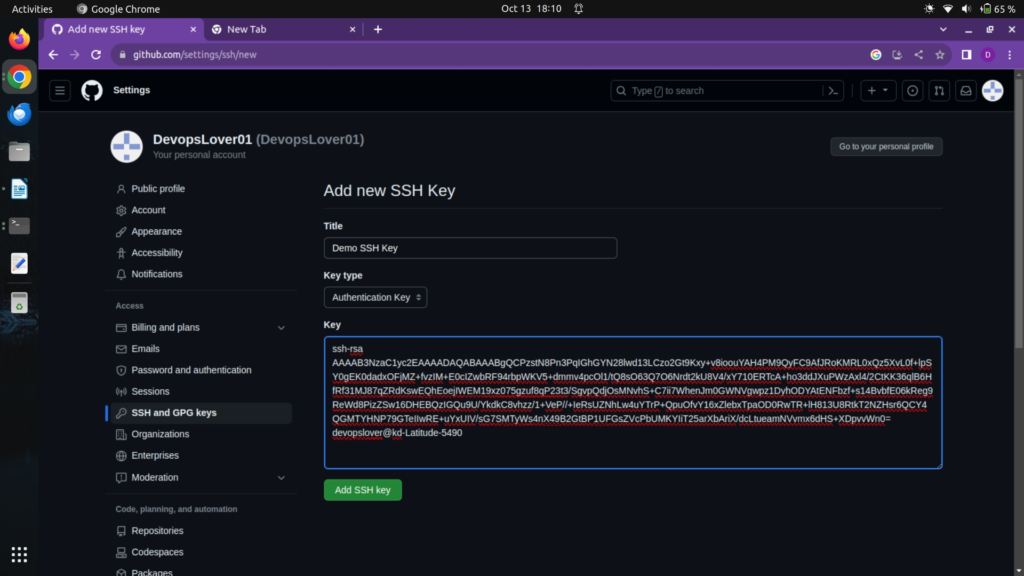
If you are following instructions step by step you will be able to create New SSH key successfully.
Copy this SSH command And Copy this on your Terminal
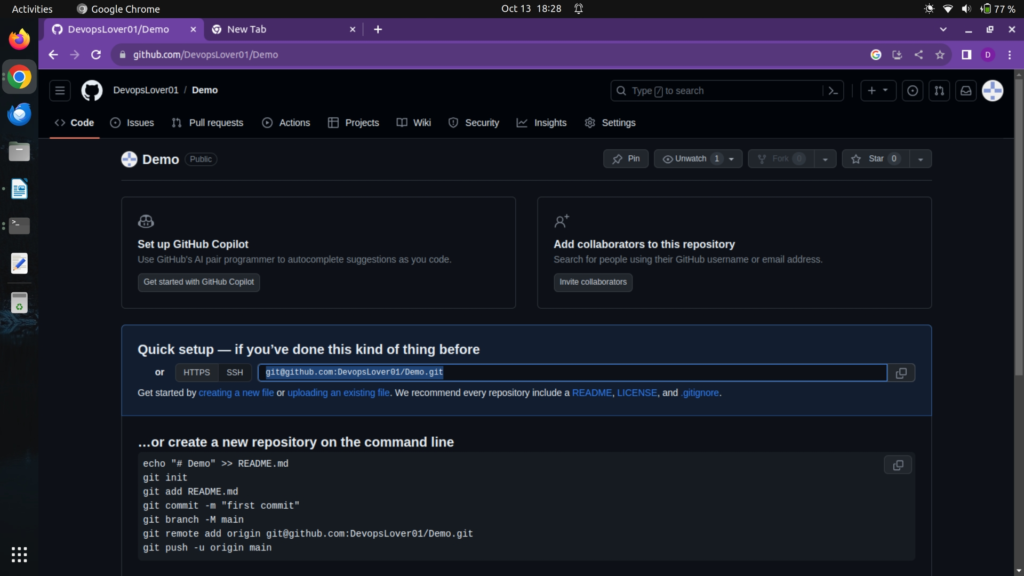
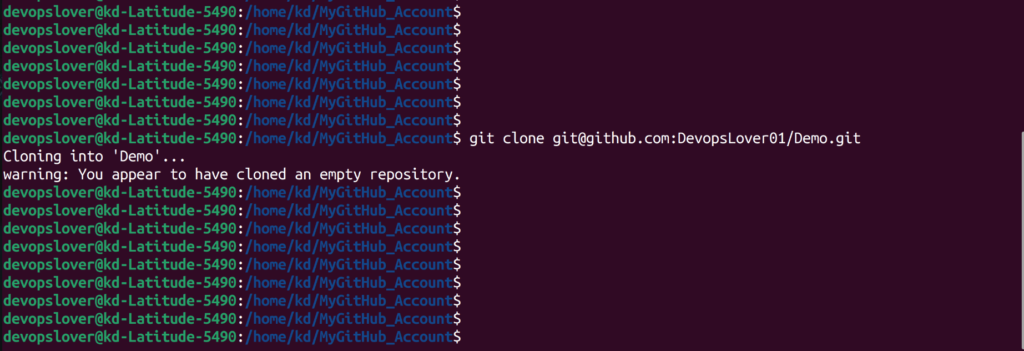
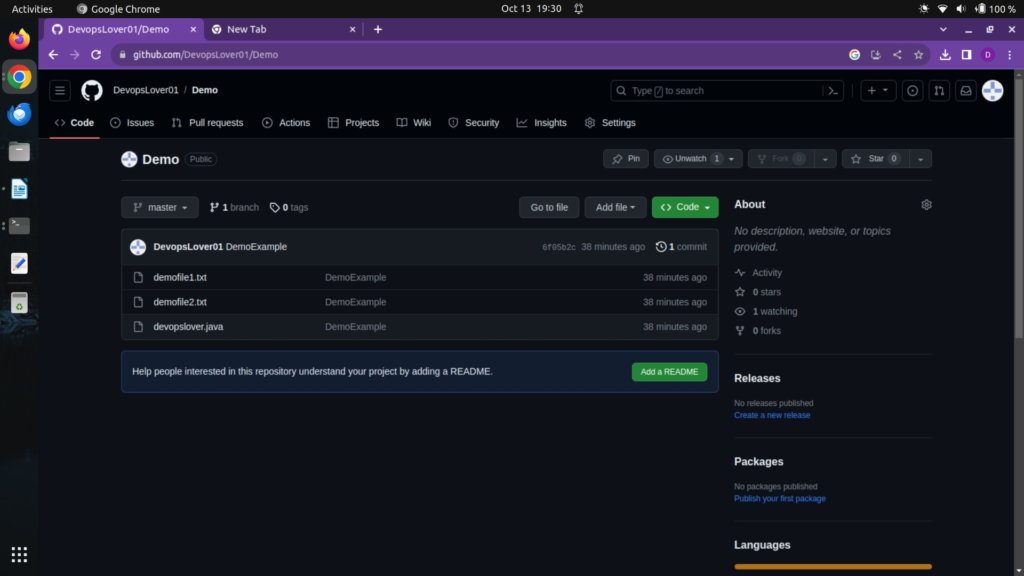
$ sudo mkdir MyGitHub_Account

$ cd MyGitHub_Account

$ git clone git@github.com:DevopsLover01/Demo.git

Git commands

1.Initialize a new repository:

$git init

2.Clone a repository:
$git clone <repository_url>
(How to Clone Your Created Repository)
just created some files using commands and will trying to push it on Github
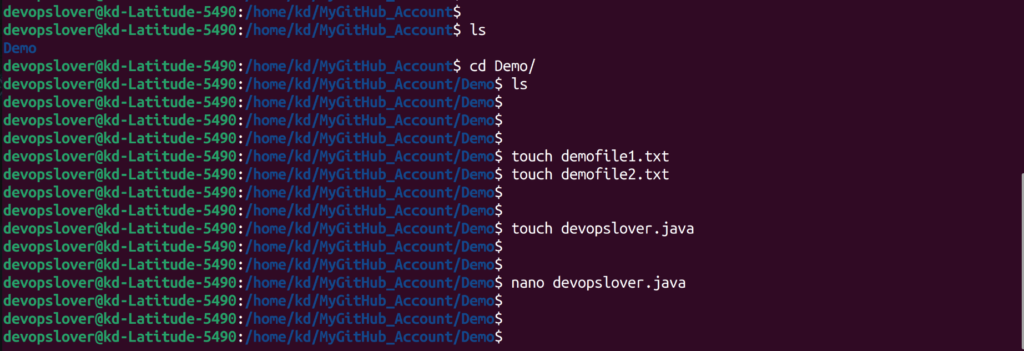
$ touch demofile1.txt

$ touch demofile2.txt

$ touch devopslover.java

$ls
After making changes to your project, commit them to your local repository:
3.Add changes to the staging area:
$ git add <file(s)>

4.Commit changes:

$ git commit -m "Your commit message"

5.View the status of your changes:
$git status

6.View the commit history:
$git log
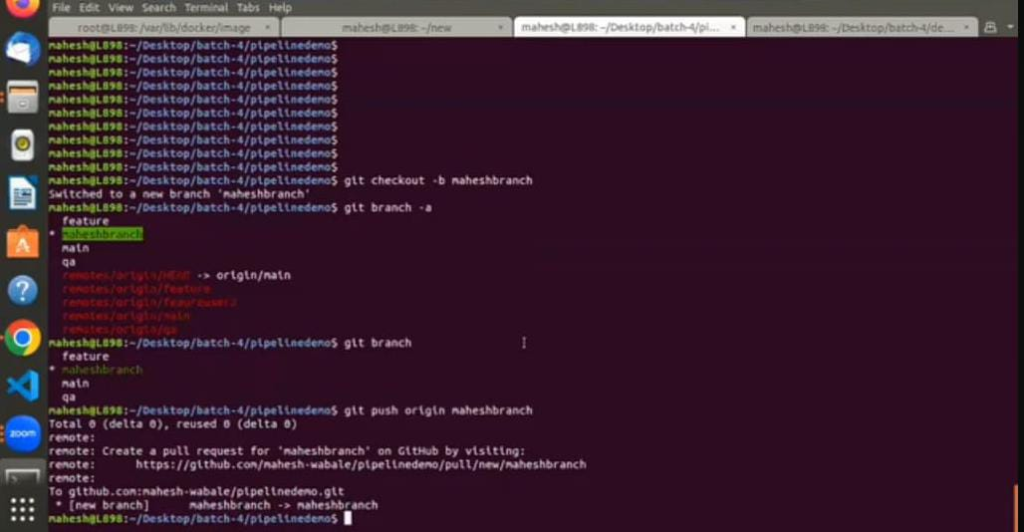
7.Create a new branch:
$git branch <branch_name>
8.Switch to a branch:
Create Branch Using this command
$ git checkout -b master

$ git push origin masterSwitch Branches:

9.Create and switch to a new branch:
$git checkout -b <branch_name>

or

$git switch -c <branch_name>
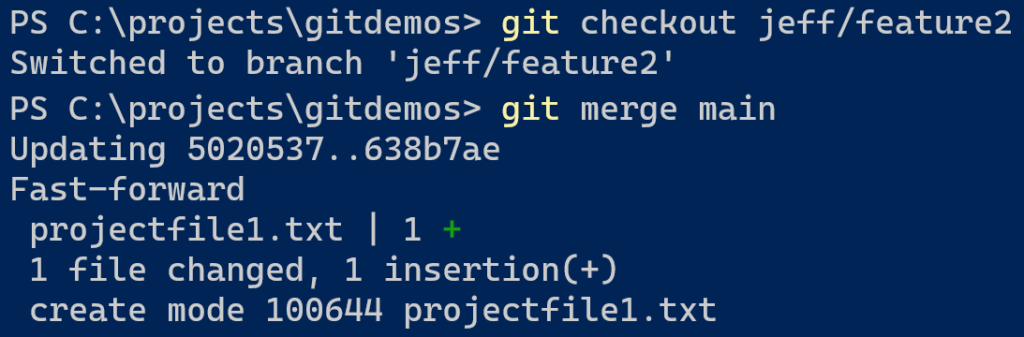
10.Merge branches:
$git merge <branch_name>
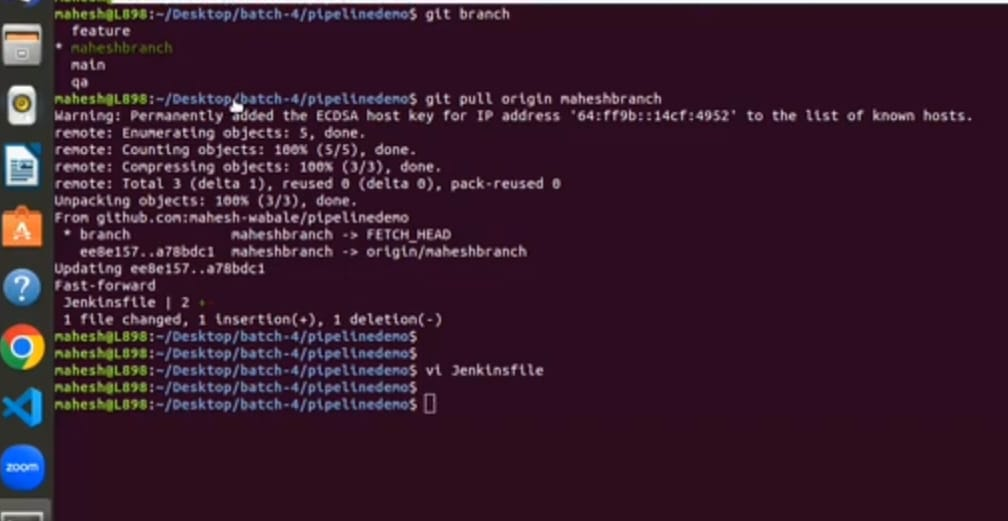
11.Pull changes from a remote repository:
$git pull origin <branch_name>
12.Push changes to a remote repository:
$ git push origin master
Switch Branches:
13.See remote repositories:

$git remote -v

14.Add a remote repository:

$git remote add <remote_name> <repository_url>

15.Remove a file from the working directory and staging area:

$git rm <file>

16.Discard changes in the working directory:

$git checkout -- <file>

17.Discard changes in the staging area:

$git reset HEAD <file>

18.Undo the last commit (soft reset):

$git reset --soft HEAD^

19.Undo the last commit (hard reset):

$git reset --hard HEAD^

20.List all branches:

$git branch

21.Fetch changes from a remote repository:

$git fetch origin

22.Create a tag:

$git tag <tag_name>

23.Show changes between commits, branches, or tags:

$git diff <commit/branch/tag>..<commit/branch/tag>

$git diff

24.Stash changes:

$git stash

25.Apply stashed changes:

$git stash apply
Tag – Github setup for ssh key
Hope you like this blog….


- What is Platform Engineering? A Beginner’s Guide - July 23, 2026
- Devops and Cloud Batch 12 Assignment - July 21, 2026
- Deploy a Java Application Using Ansible | Step-by-Step Guide - July 16, 2026