
Jenkins for beginners
What is Jenkins?
Jenkins is an open-source Continuous Integration server written in Java to orchestrate a series of actions to achieve the Continuous Integration process in an automated fashion. Jenkins supports the entire development life cycle of software, from building, testing, documentation, deployment and other stages of the software development life cycle.
Jenkins is a widely used application around the world with around 300k installations and increasing day by day. By using Jenkins, software companies can speed up their software development process, as Jenkins can rapidly automate builds and testing.
It is a server-based application and requires a web server such as Apache Tomcat. The reason Jenkins software is so popular is to monitor repetitive tasks that arise during the development of a project. For example, if your team is developing a project, Jenkins will constantly test your project builds and show you errors in the early stages of your development.
Read Also – Running Maven build with Jfrog Artifactory
Jenkin history
Kohsuke Kawaguchi, a Java developer who worked at SUN Microsystems, was tired of creating code and fixing errors over and over again. In 2004, an automation server called Hudson was created that automates build and testing tasks.
In 2011, Oracle, which owned Sun Microsystems, had a dispute with the Hudson open source community, so they spun off Hudson and renamed it Jenkins.
Both Hudson and Jenkins continued to work independently. But in a short time, Jenkins acquired a lot of projects and contributors, while Hudson was left with only 32 projects. Over time, Jenkins became more popular, and Hudson no longer had any maintenance.
What is continuous integration?
Continuous integration is a process of integrating code changes from multiple developers into the same project multiple times. Software is tested immediately after the code is committed. With each code commit, the code is built and tested. If testing passes, the build is tested for deployment. If the deployment is successful, the code is pushed to production.
This commit, build, test and deploy is a continuous process and hence named as continuous integration/deployment.
How to create new build job in Jenkins Freestyle project
What is Jenkins Freestyle Project?
A Jenkins Freestyle project is a repeatable build job, script or pipeline that includes steps and post-build actions. It is a better function or function that can accomplish multiple tasks. It allows you to configure build triggers and provides project-based security for your Jenkins project. It also offers plugins to help you create steps and post-build actions.
The types of actions you can perform in the Jenkins build phase or post-build action are quite limited. There are several standard plugins available in Jenkins Freestyle projects to help you overcome this problem.
How to create a new build job in Jenkins
Freestyle Build Job is a highly flexible and easy-to-use option. You can use it for any type of project; It’s easy to install, and many of its options appear in other construction applications. Below is the step by step process of creating a job in Jenkin.
Step 1) Login to Jenkins
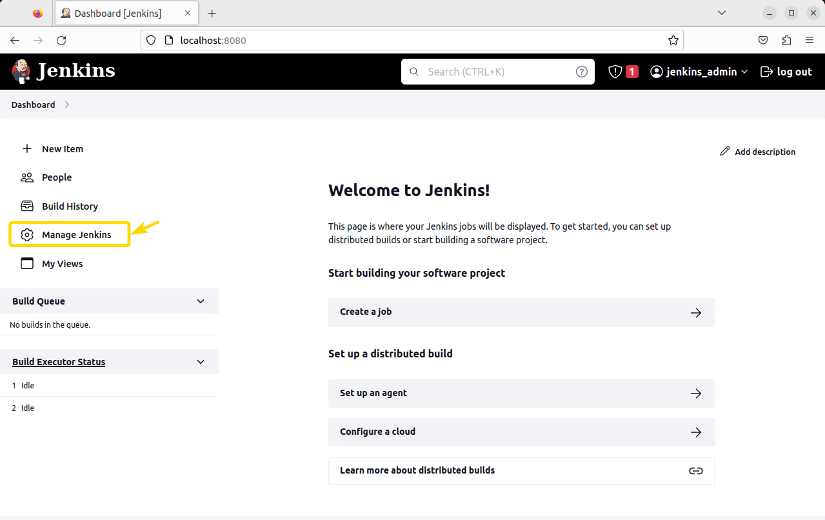
To create a Jenkins Freestyle job, log on to your Jenkins dashboard by going to your Jenkins installation path. Typically, it will be hosted on localhost at http://localhost:8080. If you installed Jenkins in another path, use the appropriate URL to access your dashboard as shown in the Jenkins job creation example below.

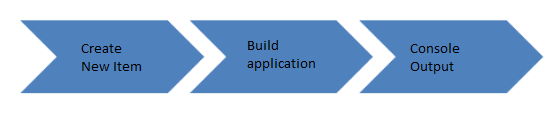
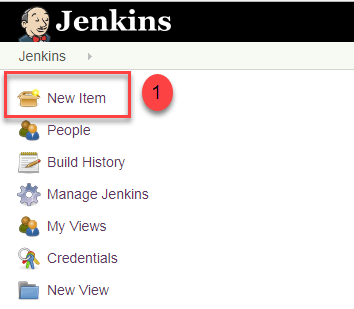
Step 2) Create New Item
Click on “New Item” at the top left-hand side of your dashboard.
Step 3) Enter Item details
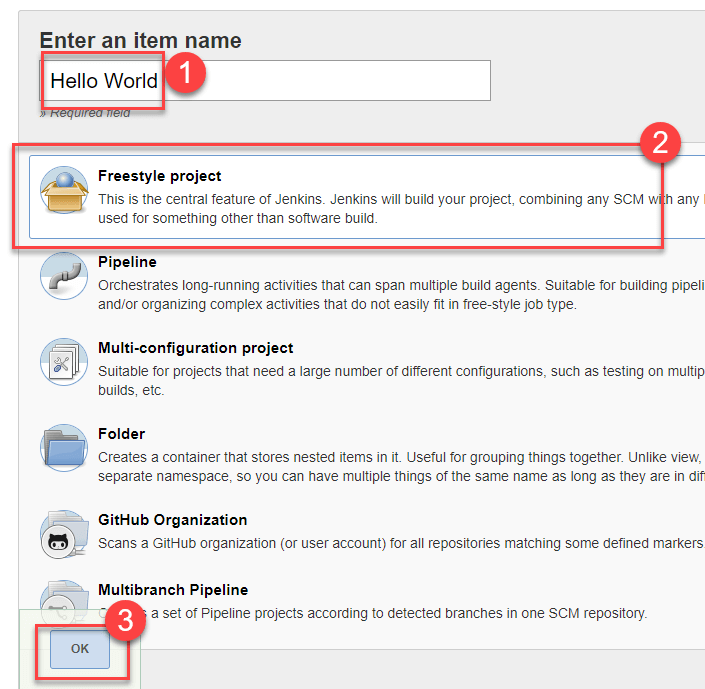
In the next screen,
- Enter the name of the item you want to create. We shall use the “Hello world” for this demo.
- Select Freestyle project
- Click Okay
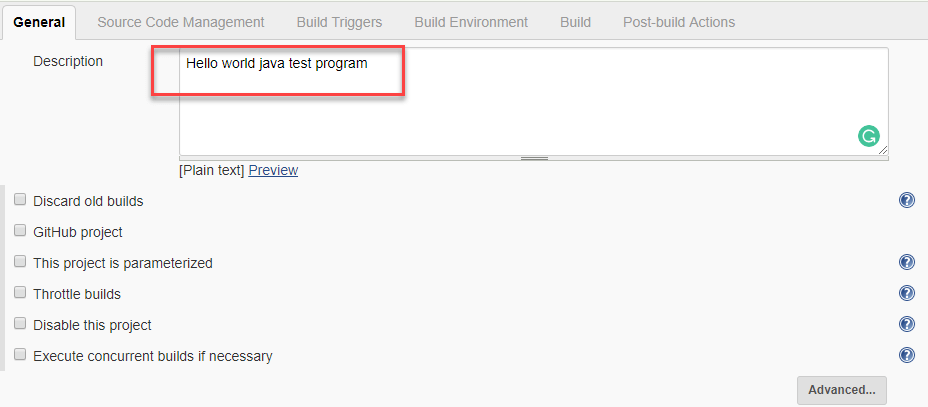
Step 4) Enter Project details
Enter the details of the project you want to test.
Step 5) Tweak the settings
Now that you have provided all the details, it’s time to build the code. Tweak the settings under the build section to build the code at the time you want. You can even schedule the build to happen periodically, at set times.
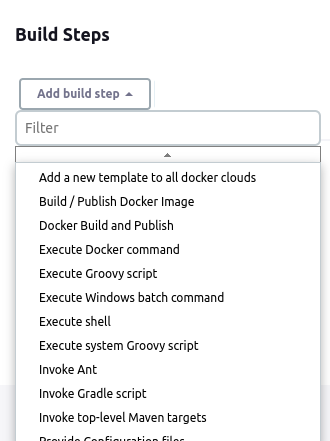
Under build,
1. Click on “Add build step”
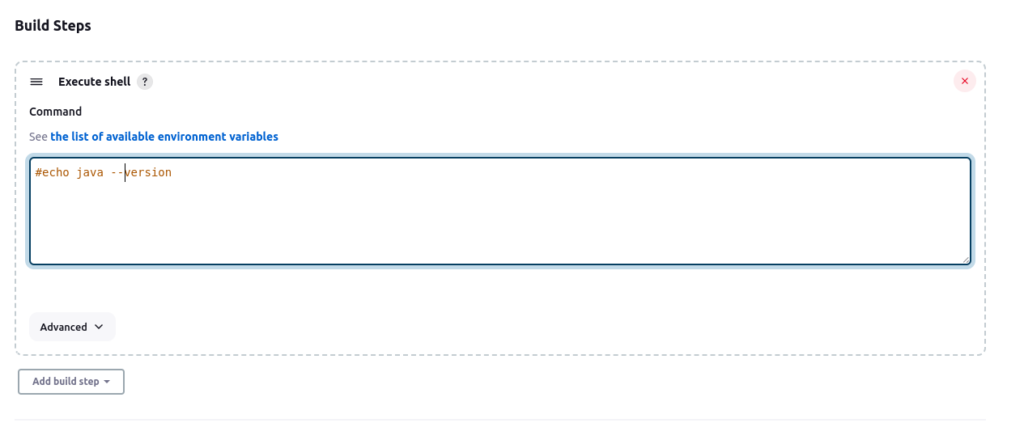
2. Click on “Execute shell” and add the commands you want to execute during the build process.
Here, I have added the java commands to compile the java code.
I have added the following shell commands:
#echo java –version
Step 7) Save the project
When you have entered all the data,
- Click Apply
- Save the project.
Step 8) Check the status
After clicking on Build now, you can see the status of the build you run under Build History.
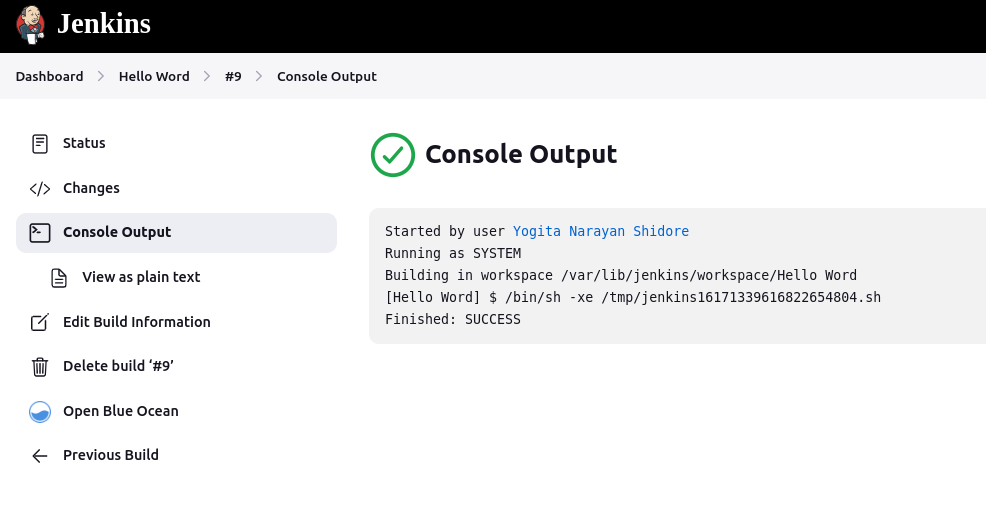
Step 9) See the console output
Click on the build number and then Click on console output to see the status of the build you run. It should show you a success message, provided you have followed the setup properly as shown inthe below Jenkins create new job example.
Where are Jenkins logs stored?
Where Jenkins logs are stored depends on the underlying operating system.
Linux and macOS – Jenkins logs are stored in the /var/log directory along with other log files.
Windows – Jenkins log files are stored in the Jenkins home folder, which is determined during installation.
It is possible to change the Jenkins log location by modifying its service configuration file. The name and location of that file depends on the underlying OS:
Debian-based systems – /etc/default/Jenkins
Red Hat-based systems – /etc/sysconfig/Jenkins
MacOS – org.jenkins-ci.plist
Windows – [Jenkins Home]/jenkins.xml
How to view Jenkins logs?
To view the Jenkins log file, open it with your text editor of choice. Below are the default locations of Jenkins log files depending on the operating system.
jenkins ui
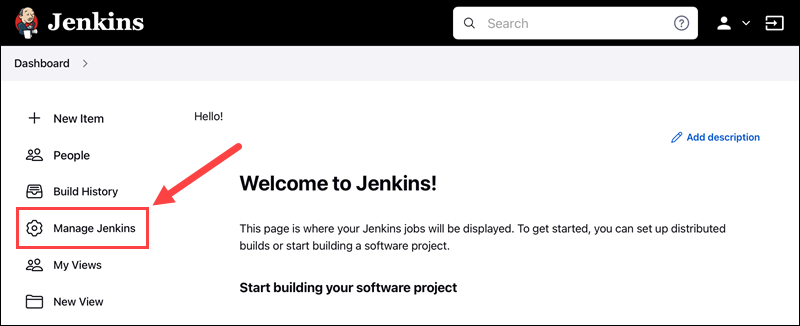
By default, Jenkins keeps a continuous log of all activities as a part of the Jenkins Dashboard.
- To access this log, click the Manage Jenkins link on the right side of the dashboard.
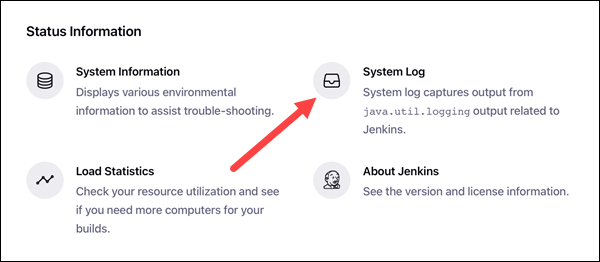
2. Click the System Log button in the Status Informationsection.
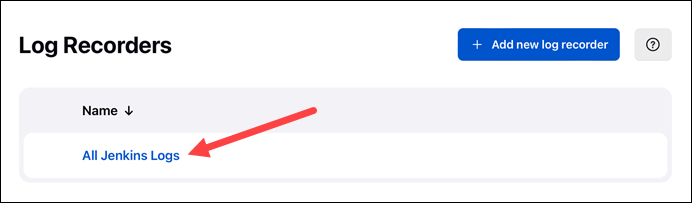
3. Click the All Jenkins Logs link to access the default log.
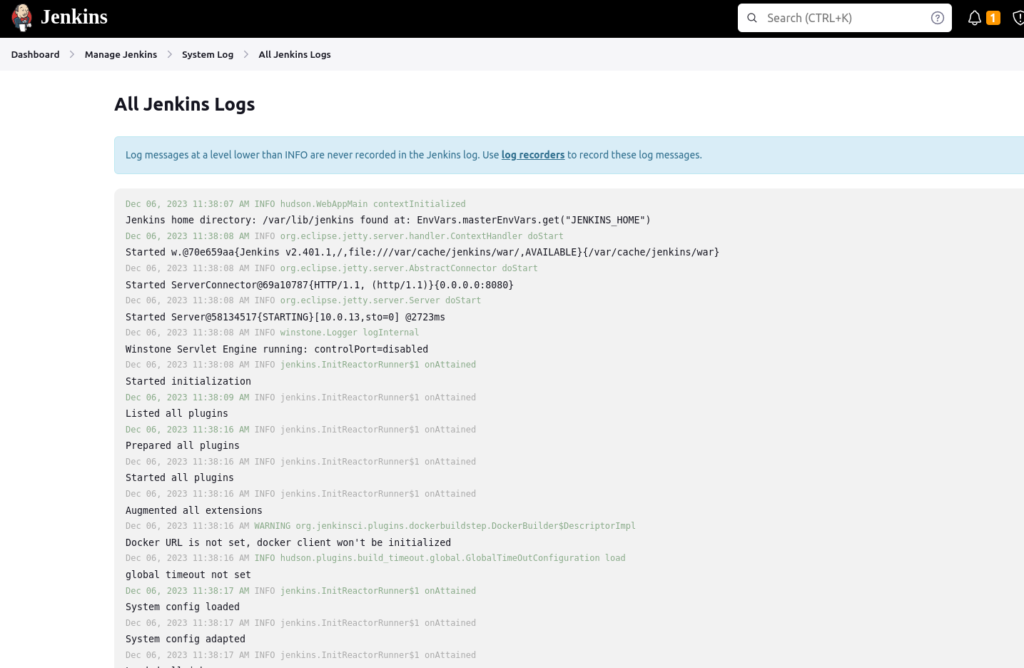
Each line of the log details the time and date of the action, the level of logging, the element of Jenkins performing the action, and the action being performed, followed by a brief description.
Note: Logs for individual project and pipeline builds are available in the console output section of the build. Learn more about creating pipelined builds in our ultimate guide to Jenkins environment variables.
linux
The default location for Jenkins logs on Linux is /var/log/jenkins/jenkins.log. To view the log file, open it using a text editor like nano:
sudo nano /var/log/jenkins/jenkins.log
discard old build
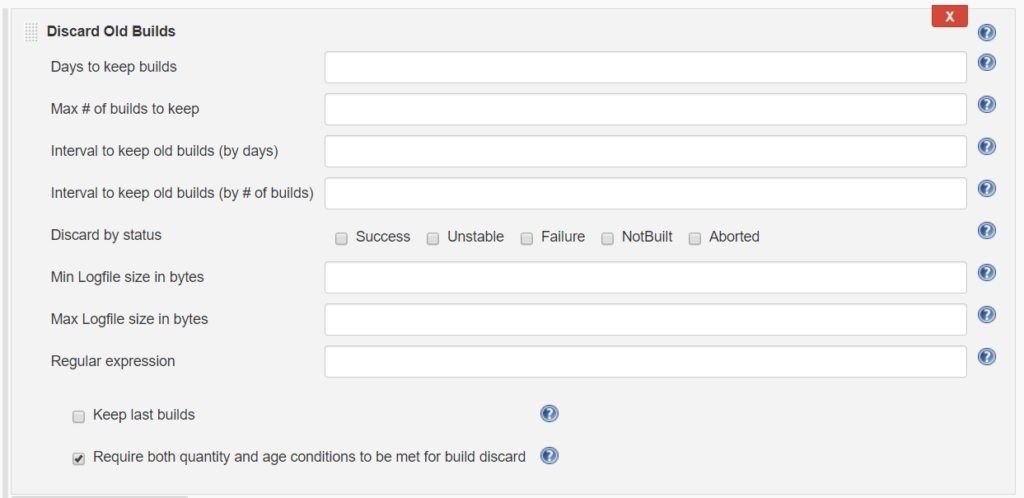
Discard Old Builds is a Jenkins plugin that allows setting build discard conditions with more specificity than Jenkin’s main function. it is recommended that
Discard Old Builds is a Jenkins plugin that allows setting build discard conditions with more specificity than Jenkin’s main function. It is recommended that users test plugin configurations carefully before implementing them in critical projects to avoid any plugin misconfigurations that may cause unwanted build history discards.
The plugin acts as a post-build action with the interface below used for configuration:
Configuration settings allow builds to be rejected based on age, volume, interval of these properties, status, logfile size, and expressions parsed from the logfile.
The discard conditions are executed in the order shown in the UI. The only exception to this is that both the quantity and age requirements must be met for the build to be discarded when using it. Examples of the use of this special feature are given below. The case examples were all executed using the default plugin settings, with the above feature enabled with the maximum days and maximum build quantity values set.
Enemy Best Practices in Jenkins
1.Version Control Integration:
Integrate Jenkins with your version control system (e.g., Git). The trigger is created automatically whenever changes are pushed to the repository.
Automated Creation:
Automate the build process to ensure consistency and reliability.
Use a build tool like Maven, Gradle or others to manage dependencies.
Pipeline as code:
Define your build and deployment pipelines as code using tools like Jenkins Pipeline DSL or YAML. This allows versioning, collaboration, and easy maintenance.
Artifact Management:
Use an artifact repository (for example, Nexus, Artifactory) to store and manage created artifacts. This helps with versioning and promotes re-use of artifacts.
Automated Testing:
Integrate automated testing into your pipeline. This includes unit testing, integration testing, and any other relevant testing to your application.
Parallel and distributed manufacturing:
Take advantage of parallel and distributed builds to speed up the build and testing process. This can be especially beneficial for larger projects.
Environment configuration as code:
Define infrastructure and environment configuration as code (Infrastructure as Code, IaC). Tools like Terraform or Ansible can be used to automate the provisioning of infrastructure.
continuous integration:
Practice continuous integration by frequently merging code changes into a shared repository. This helps in early detection of integration issues.
Continuous deployment:
Automate the deployment process to seamlessly move code from development to test, staging, and production environments. Consider using blue-green deployment or canary releases.
Monitoring and Logging:
Integrate monitoring tools and log management solutions to capture and analyze application and infrastructure logs. This helps detect problems and improve overall system health.
Security Scanning:
Incorporate security scanning tools into your pipeline to identify and address security vulnerabilities early in the development process.
Role-Based Access Control (RBAC):
Implement RBAC to control access to Jenkins resources. Define roles and permissions based on the principle of least privilege.
backup and recovery:
Regularly back up Jenkins configuration and job definitions. Create a disaster recovery plan to restore Jenkins in case of failures.
Code Quality Metrics:
Integrate tools for code quality analysis (e.g., SonarQube) into your pipeline to monitor and improve code quality over time.
Documentation:
Document your pipeline configuration, job setup, and any custom scripts. This helps with onboarding new team members and troubleshooting.
Regular Maintenance:
Keep Jenkins and its plugins up to date. Perform regular maintenance tasks to ensure best performance.
Installing plugin
The simplest and most common way of installing plugins is through the Manage Jenkins > Plugins view, available to administrators of a Jenkins environment.
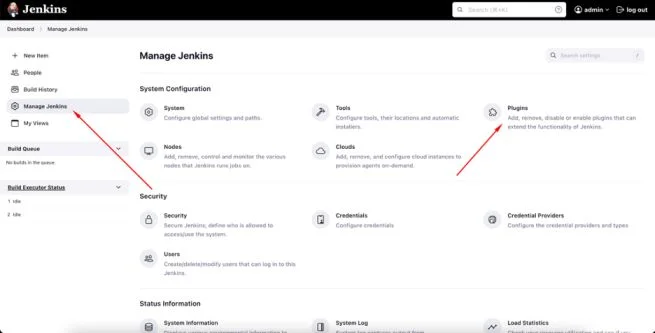
just open the Jenkins Plugins Manager page and you will be able to search for your favorite plugins there:
Under the Available tab, plugins available for download from the configured Update Center can be searched and considered:
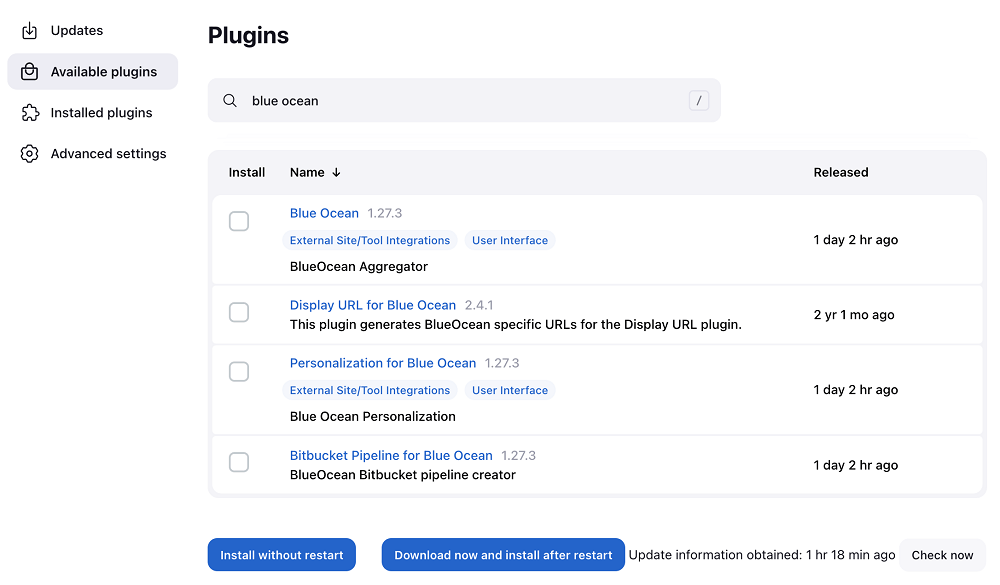
Most plugins can be installed and used immediately by checking the box adjacent to the plugin and clicking Install without restart.
Creating user
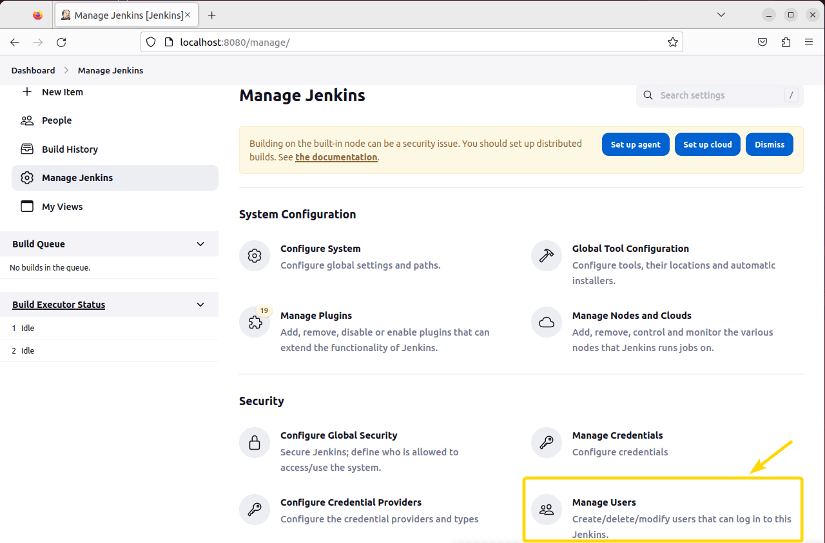
Once logged in as the Admin User, navigate and CLICK on the “Manage Jenkins” menu.
Scroll down to find the “Manage Users” option and then CLICK on it.
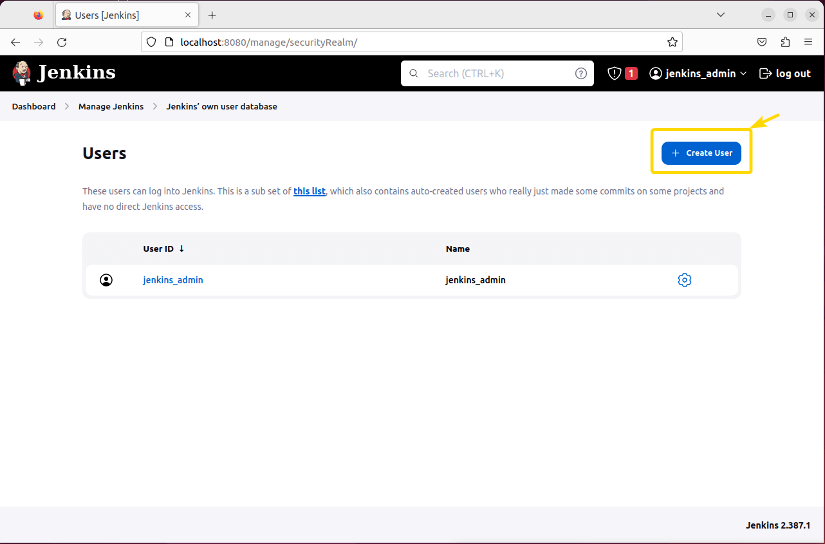
Now, PRESS the “Create User” button located in the top right corner.
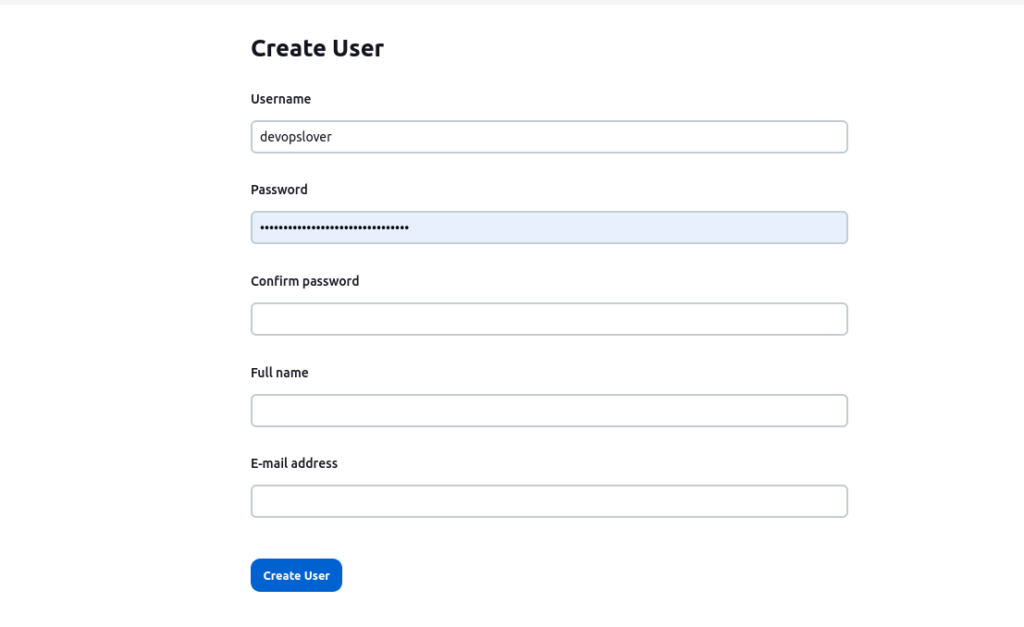
Finally, fill up the new user credentials and then PRESS the “Create User” button.
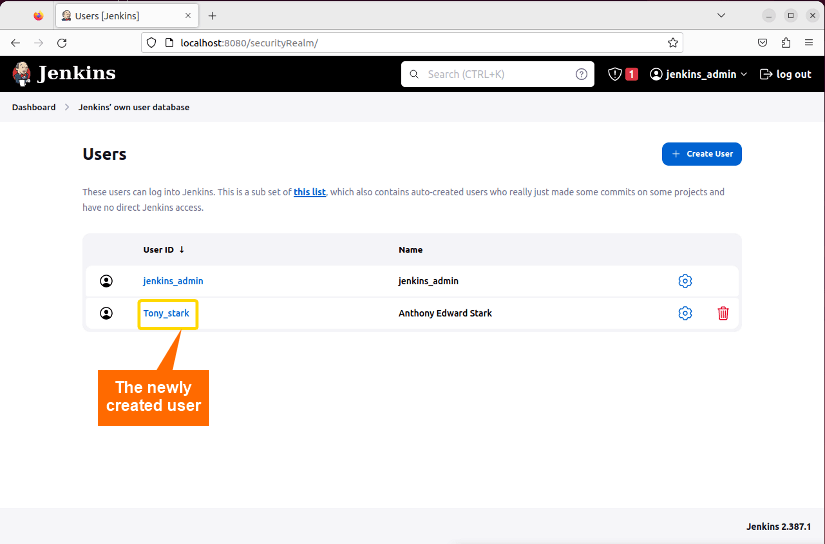
You can find the newly created user listed with the Jenkins server’s other available users.
Deleting jobs
click on delete project then click on ok

Hope you like this blog….

- What is Platform Engineering? A Beginner’s Guide - July 23, 2026
- Devops and Cloud Batch 12 Assignment - July 21, 2026
- Deploy a Java Application Using Ansible | Step-by-Step Guide - July 16, 2026