
How Maven Build with Hello Word Spring Application –
Introduction: Spring Tool Suite (STS) provides a comprehensive environment to seamlessly develop Spring applications. In this blog post, we will learn the process of using Maven to build a Hello World Spring application within the Spring Tool Suite. This combination of tools provides a powerful and integrated development experience for Java developers.
In this article, I am going to explain the steps to create a Spring Boot Hello World application using Spring Tool Suite (STS) and Maven. Follow this article carefully, as this is the first Spring Boot application, I am going to explain each step with screenshots.
Read Also – Ansible: Zero to Hero
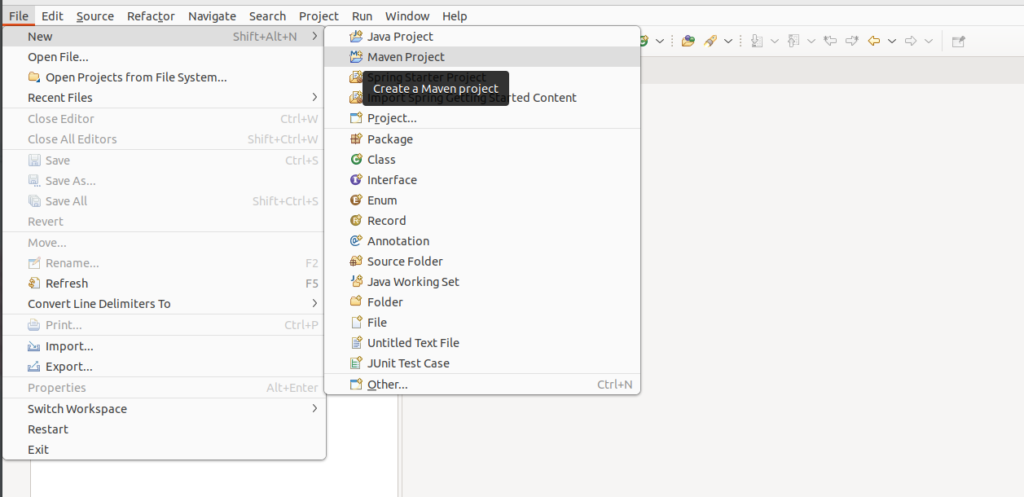
- Open STS (Spring Tool Suite) > File > New > Maven Project
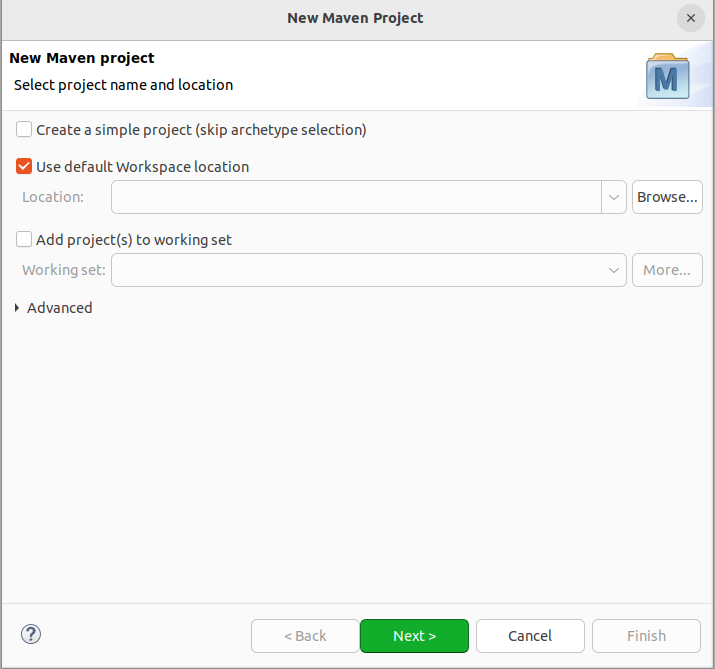
2. Tick ‘Create a simple project (skip archetype selection)‘ check box > click Next
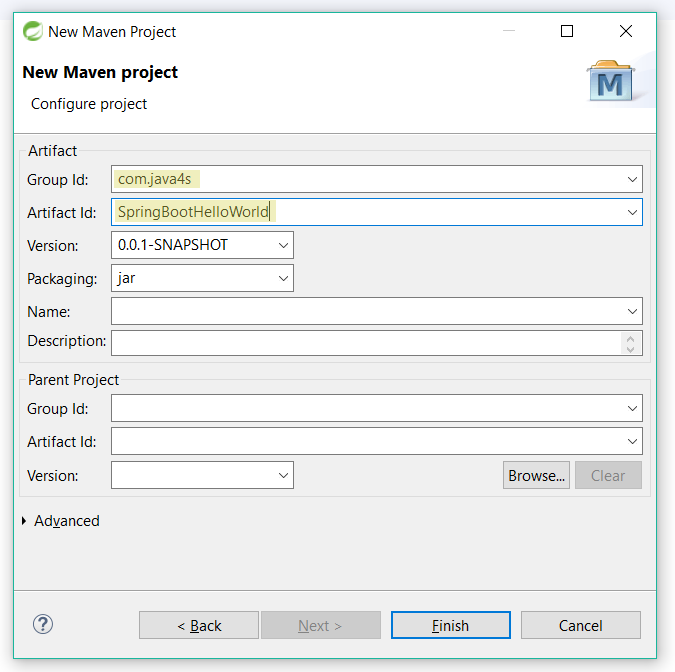
3. Provide Group Id (its your package), Artifact Id (project name) and click Finish
4. Now you will see a Maven project in your work space, something like..
Note: If you observe, its showing ‘JRE System Library [J2SE-1.5]’as default java version, lets keep it a side for now.
5. So, Maven project is created with default setup, lets add Spring Boot related stuff in the pom.xml ( Guys, hope you have a basic idea about Maven, in pom.xml we will include all dependencies ), open pom.xml
By default pom.xml contains
<project xmlns="http://maven.apache.org/POM/4.0.0" xmlns:xsi="http://www.w3.org/2001/XMLSchema- instance" xsi:schemaLocation="http://maven.apache.org/POM/4.0.0 http://maven.apache.org/xsd/maven-4.0.0.xsd">
<modelVersion>4.0.0</modelVersion>
<groupId>com.java4s</groupId>
 <artifactId>SpringBootHelloWorld</artifactId>
 <version>0.0.1-SNAPSHOT</version>

 </project>
<project xmlns="http://maven.apache.org/POM/4.0.0" xmlns:xsi="http://www.w3.org/2001/XMLSchema-instance" xsi:schemaLocation="http://maven.apache.org/POM/4.0.0 http://maven.apache.org/xsd/maven-4.0.0.xsd"> <modelVersion>4.0.0</modelVersion>
 <groupId>com.java4s</groupId>
 <artifactId>SpringBootHelloWorld</artifactId>
<version>0.0.1-SNAPSHOT</version>


<parent>
 <groupId>org.springframework.boot</groupId>
<artifactId>spring-boot-starter-parent</artifactId>
 <version>1.5.6.RELEASE</version>
 </parent>
<dependencies>
<dependency>
 <groupId>org.springframework.boot</groupId>
<artifactId>spring-boot-starter-web</artifactId>

</dependency>
</dependencies>
<properties>
<java.version>1.8</java.version>
</properties>


</project>
Explanation I have added spring-boot-starter-parent, spring-boot-starter-web and I want to show Spring Boot tutorials in Java 8, so I have added java version at line number 21 What is spring-boot-starter-parent? Actually this is an existing project given by spring team which contains Spring Boot supporting configuration data (remember just configuration data, it wont download any jars), we have added this in a tag means, we are instructing Maven to consider our SpringBootHelloWorld project as a child to it, wait for a second, I will show you practically why we have to add spring-boot-starter-parent parent In the dependencies, I have added spring-boot-starter-web for web module
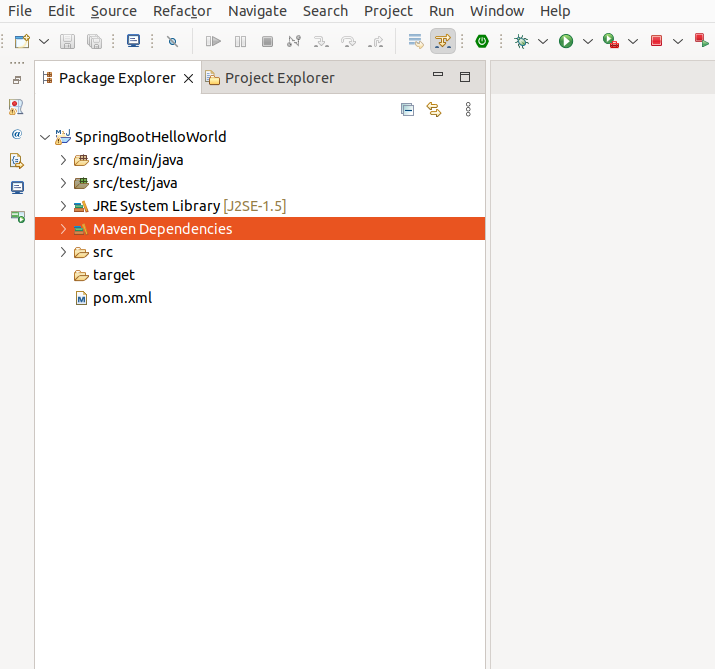
- Now right click on the application > Maven > Update Project, If you now observe the directory structure of the project, it will create a new folder named “Maven Dependencies” which contains all supporting .jars to run the Spring Boot application and the Java version also changed to 1.8

Note: Did you see lines 13-18 of pom.xml? I haven’t included the version number for spring-boot-starter-web, but maven has downloaded some jar files with some version related to spring-boot-starter-web, how is this possible? This is because of Maven’s parent-child relationship. When adding the Spring Boot parent project, I have included the version as 1.5.6.Release, so again we don’t need to add version numbers to the dependencies. As I told you earlier, spring-boot-starter-parent contains configuration meta data, that means, it knows which version of the dependencies it needs to download. So we don’t need to worry about dependency versions, saving us a lot of time
- Now create a java class in src/main/java > I have created a class named SpringBootApp.java in com.java4s.app package. I mean the final directory structure looks like this…
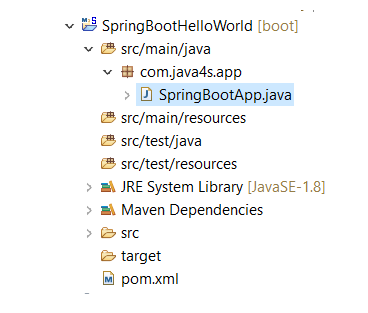
Note: put your java class in some package, it is mandatory.* If you haven’t created a package it gives the following error while running your Spring Boot application.
Your ApplicationContext is unlikely to start due to a @ComponentScan of the default package.
package com.java4s.app;

import org.springframework.boot.SpringApplication;
import org.springframework.boot.autoconfigure.SpringBootApplication;

@SpringBootApplication
public class SpringBootApp
 {
 public static void main(String[] args)
   {
SpringApplication.run(SpringBootApp.class, args);
   }
 }
Explanation
In line number 6
, I have added @
SpringBootApplication annotation, means this is the starting point for our Spring Boot application
In line number 11, I am bootstrapping the application
For now just remember, for every spring boot application we have to create a main class and that need to be annotate with @
SpringBootApplication and bootstrap it
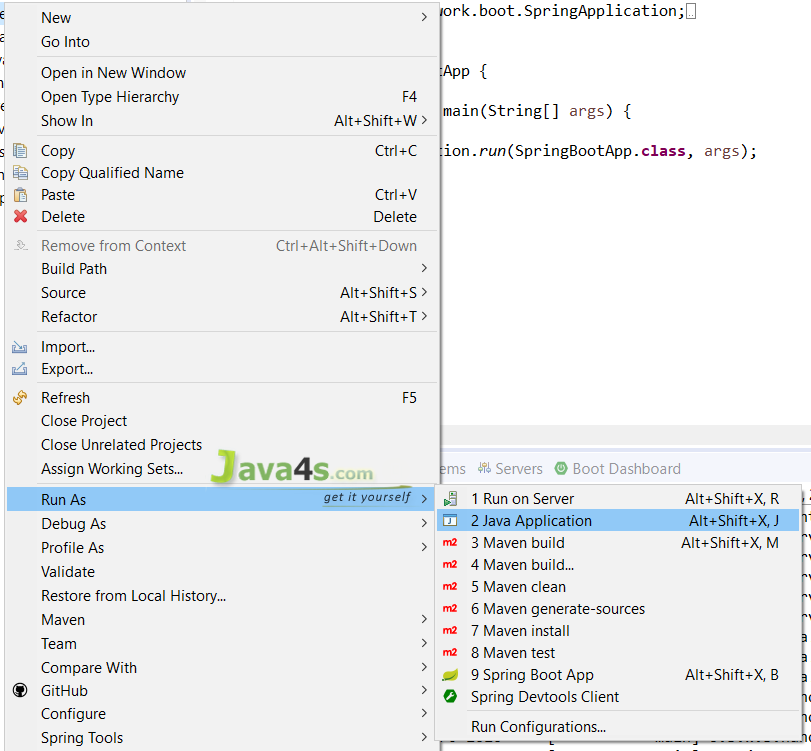
8. Finally, right click on the application > Run As > Java Application
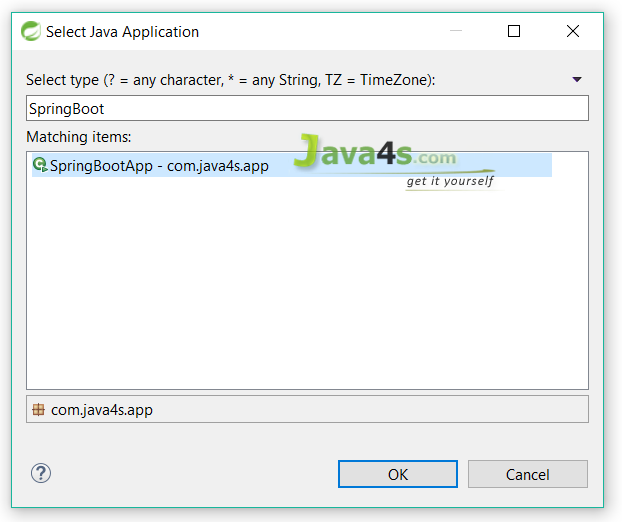
9. Select our java class > ok
10. Open console and check the output

Tag –
Maven Build with Hello Word Spring Application
Hope you like this blog….


- What is Platform Engineering? A Beginner’s Guide - July 23, 2026
- Devops and Cloud Batch 12 Assignment - July 21, 2026
- Deploy a Java Application Using Ansible | Step-by-Step Guide - July 16, 2026