How to Integrate Jenkins with GitHub
Introduction:
Efficiency and automation are the keys to success in the field of modern software development. With the collaboration between Jenkins, the industry-standard automation server, and GitHub, the world’s leading platform for version control and collaboration, teams can achieve new heights of productivity and reliability. In this blog post, we’ll explore Jenkins’ seamless integration with GitHub and how it empowers teams to streamline their development workflow.
Prerequisites
- Server with Jenkins up and running
- Github plugin installed on the Jenkins server
- Github Account
What is GitHub?
GitHub changes the way teams collaborate on code. GitHub is a web-based platform that hosts and manages code repositories using the Git version control system. Pull requests, branching, and issue tracking are some of the features that make it possible for developers to work together, manage changes, and contribute together.
Coding collaboration is made easier by GitHub’s version control features. Individual development is made easier by branching before merging, while pull requests provide a forum to discuss and propose modifications. The platform’s user-friendly interface and integrated capabilities support diverse development workflows, fostering collaboration across code, documentation, and discussions.
Additionally, GitHub’s versatility is highlighted by its seamless integration with automation tools like Jenkins, which strengthens the collaborative development pipeline. This integration ensures a cohesive and automated workflow, further strengthening GitHub’s role as a dynamic force driving efficient and collaborative software development.
To get a basic understanding of GitHub’s functionality and features
Github Repository: A GitHub repository, also called a “repo”, is a centralized location where project files, code, and related data are kept.
Branches: Development teams can set up multiple development paths within a repository using GitHub’s branching feature without interfering with the primary codebase.
Webhooks: GitHub webhooks allow the repository to propagate changes to external services. This capability is very useful for automating workflows such as CI/CD in response to pull requests or code pushes.
Personal Access Tokens: GitHub personal access tokens are an essential component of secure authentication and authorization for a range of operations performed within a repository.
Read Also-Creating Freestyle job in Jenkins
Adding a WebHook in GitHub
Step 1: go to your GitHub repository and click on ‘Settings’.
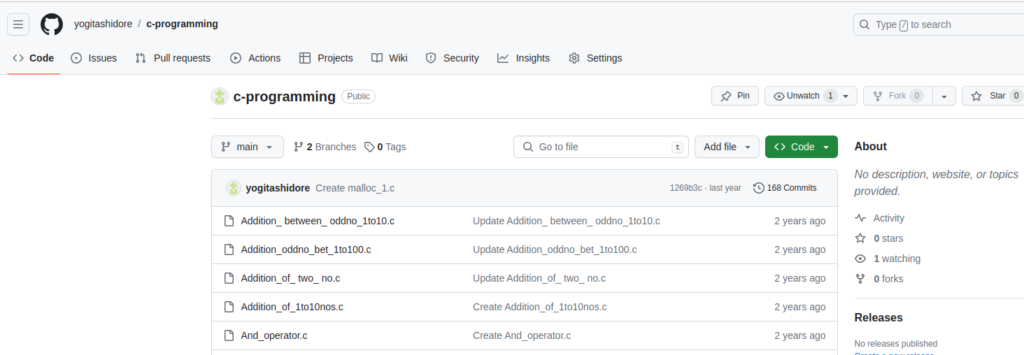
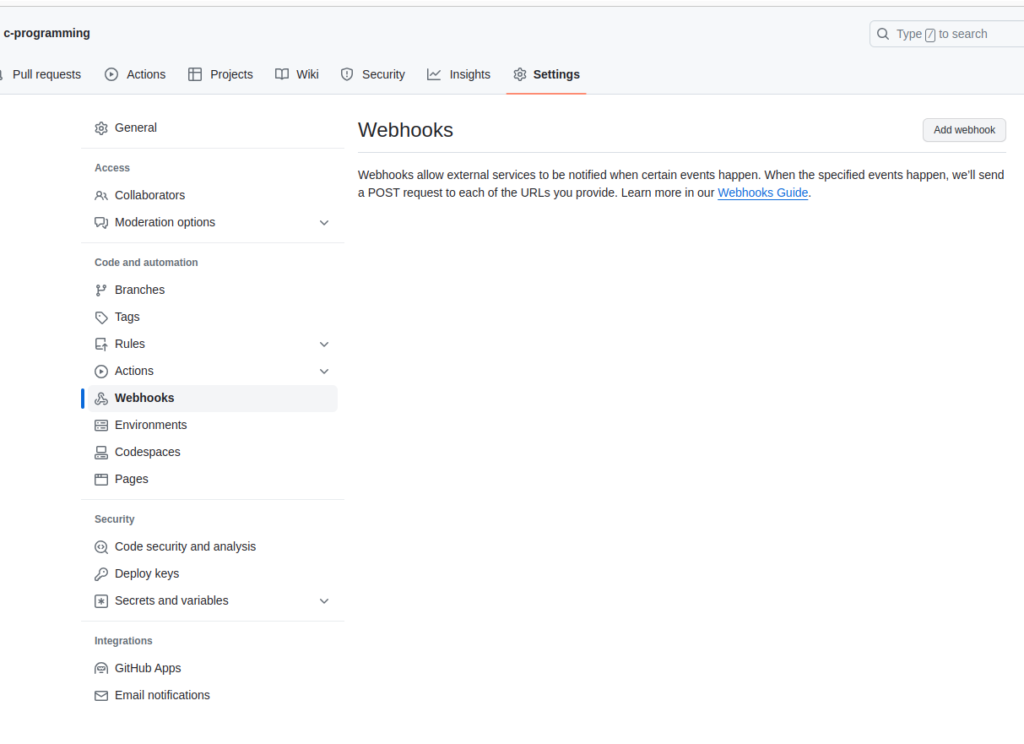
Step 2: Click on Webhooks and then click on ‘Add webhook’.
Step 3:In the Payload URL field paste your Jenkins environment URL. At the end of this URL add /github-webhook/. In th Content type select: application/json and leave the Secret field empty.
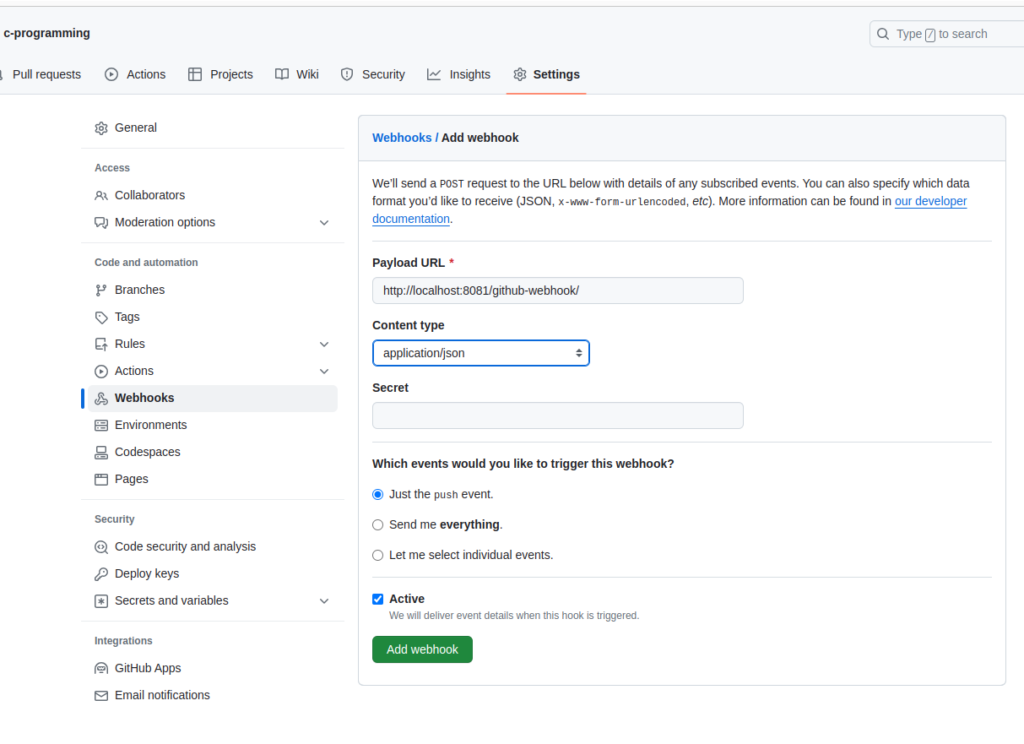
We’re done with the configuration on GitHub’s side! Now let’s move on to Jenkins.
Configuring Jenkins
Step 5: In Jenkins, click on ‘New Item’ to create a new project.
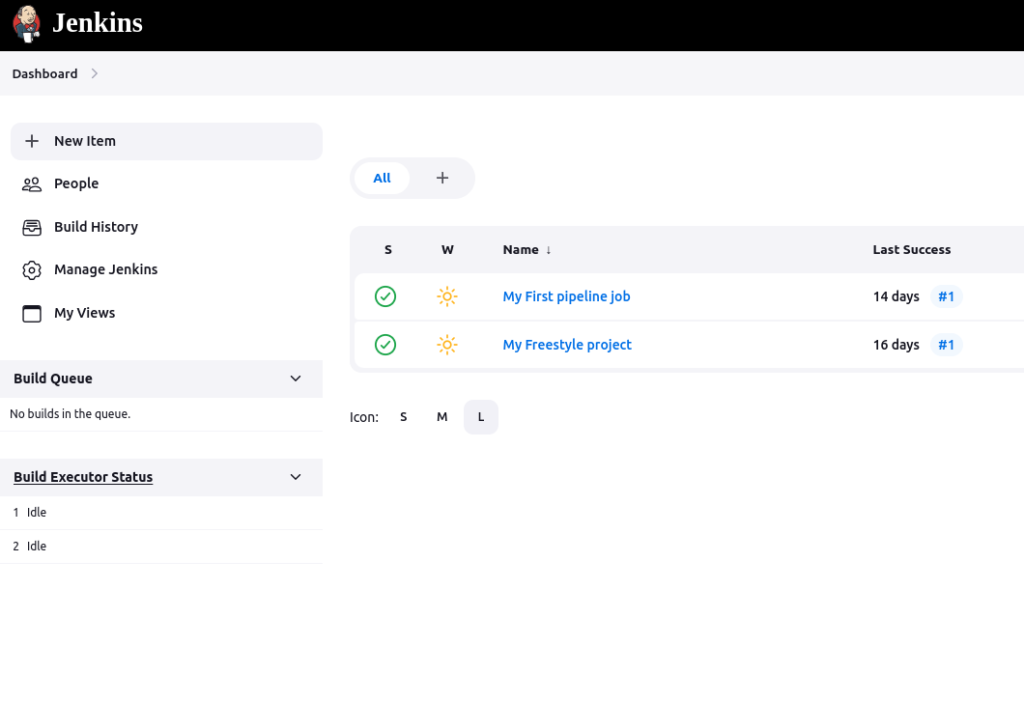
Step 6: Give your project a name, then choose ‘Freestyle project’ and finally, click on ‘OK’.
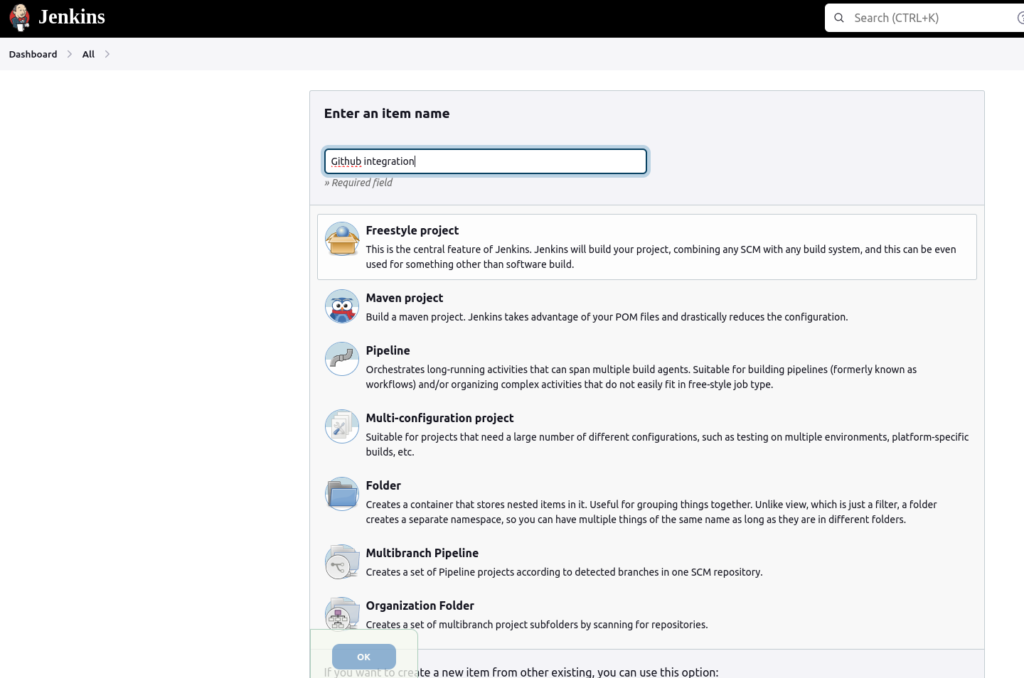
Step 7: Click on the ‘Source Code Management’ tab.
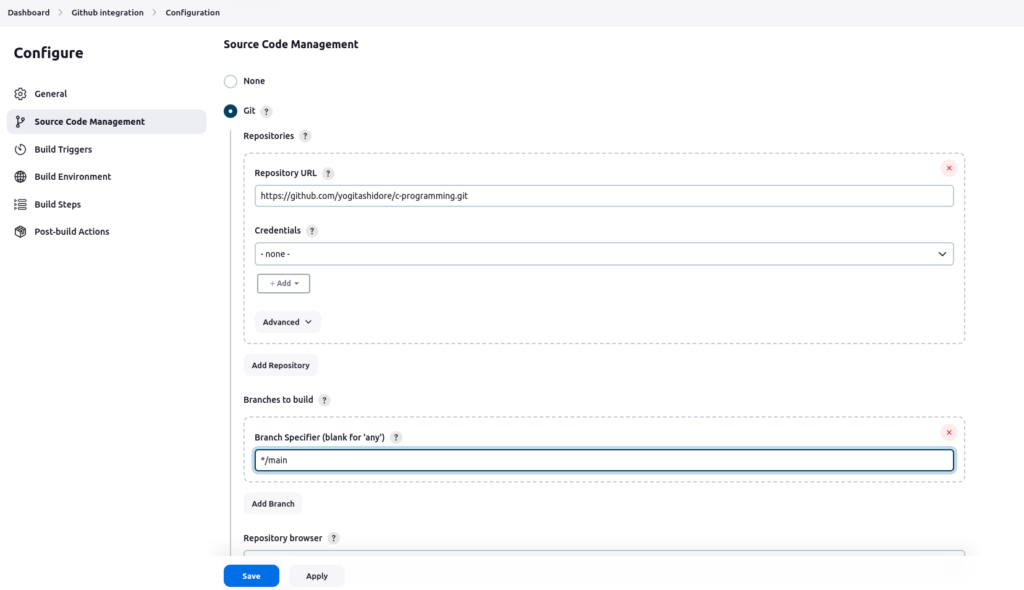
Step 8: Click on Git and paste your GitHub repository URL in the ‘Repository URL’ field.
Step 9: Click on the ‘Build Triggers’ tab and then on the ‘GitHub hook trigger for GITScm polling’. Or, choose the trigger of your choice.
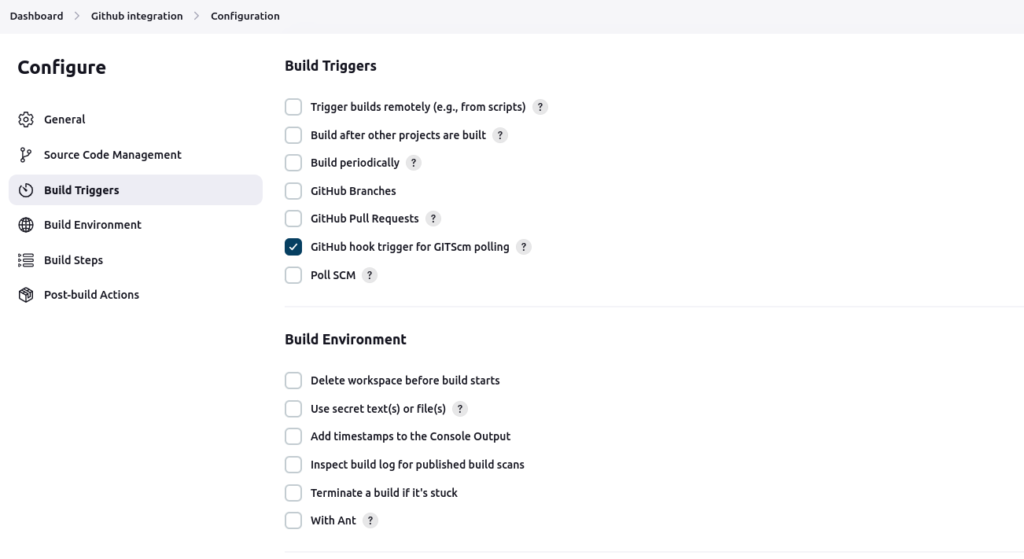
That’s it! Your GitHub repository is integrated with your Jenkins project. With this Jenkins GitHub integration, you can now use any file found in a GitHub repository and trigger a Jenkins job to run with every code commit.
Triggering the Jenkins GitHub Integration With Every Code Commit
Step 10: Click on the ‘Build’ tab, then click on ‘Add build step’ and choose ‘Execute shell’.

Step 11: To run a Hello, simply use the ‘echo’ command, and click on ‘Save’.
step 12: click on build now.

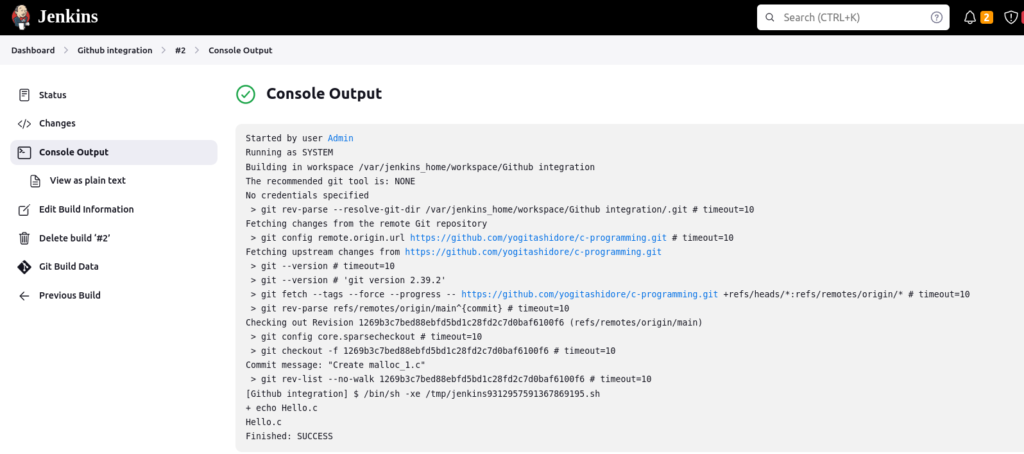
Step 13: Click on the little arrow next to the job and choose ‘Console Output’.
You can see that Jenkins was able to pull the Hello and run it!
- AI Tools for Developers: Top AI Tools Every Developer Should Know in 2026 - February 12, 2026
- What is AI? 7 Powerful and Easy Facts – Complete Beginner Guide - February 12, 2026
- How to Set Up an Okta Account – Easy & Secure Step-by-Step Guide for 2026 - January 9, 2026
