

Apache Maven is an open-source utility that enables you to automate the development procedure of Java projects. It can also be utilized for Ruby, C#, and other programming languages. In Linux-based systems such as Ubuntu 22.04, Apache Maven is a well-known tool for developing projects related to Java. It is hosted by the maven project, which was once a part of the Jakarta Project until splitting off.
Maven build with Jfrog Artifactory
This write-up will demonstrate the method of installing Apache Maven on Ubuntu 22.04 using two different methods. So, let’s start!
Step 1: Installing Apache Maven on Ubuntu 22.04 using apt
You must follow the below-given step-by-step instructions for installing Apache Maven on Ubuntu 22.04 using the official APT repository.
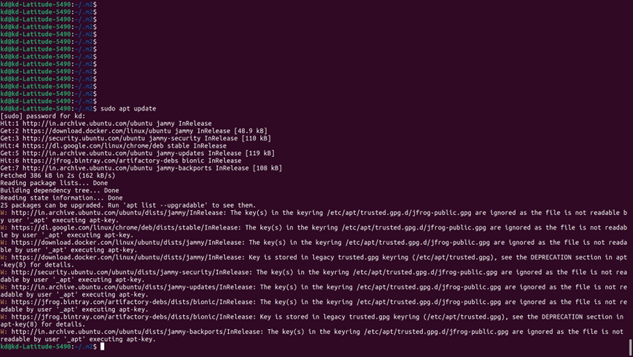
$sudo apt update
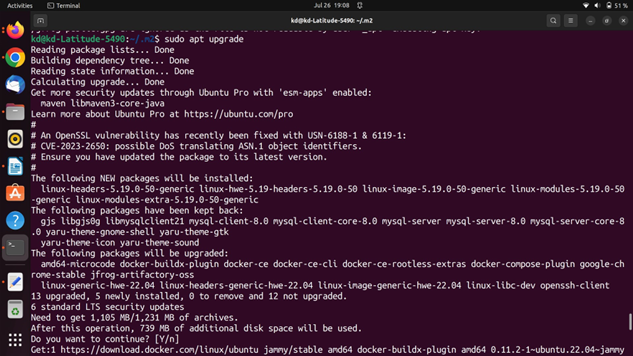
$sudo apt upgrade
Step 2: Apache Maven Installation on Ubuntu 22.04
In the next step, execute the following command for the installation of Apache Maven on Ubuntu 22.04 system:
$ sudo apt install maven -y
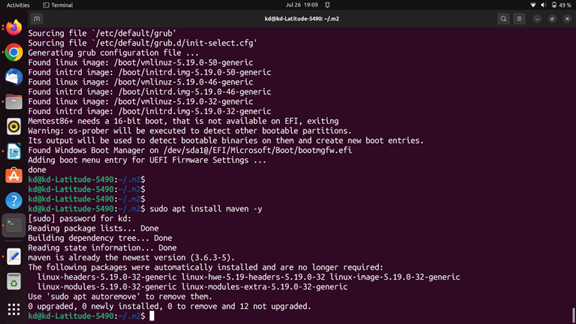
Wait for a few minutes as the Apache Maven will take some time to install:
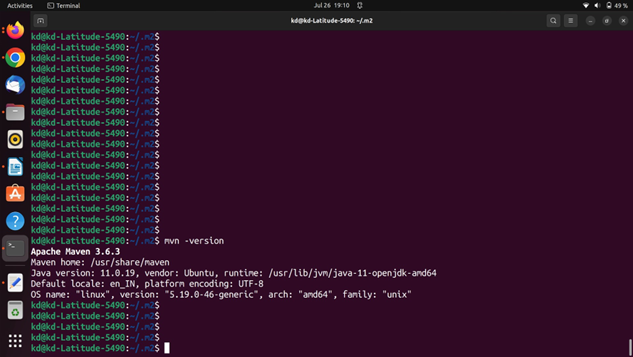
Step 3: Check Apache Maven version
Lastly, verify the version of Apache Maven which you have installed on your Ubuntu 22.04:
$ mvn -version
Now, let’s check out the manual procedure of Apache Maven installation.
Method 2: Installing Apache Maven on Ubuntu 22.04 using Manual method
For experienced Linux users, the manual method for installing Apache Maven is more suitable as it permits you to download and install the latest version.
Want to manually install Apache Maven? Follow the below-given procedure.
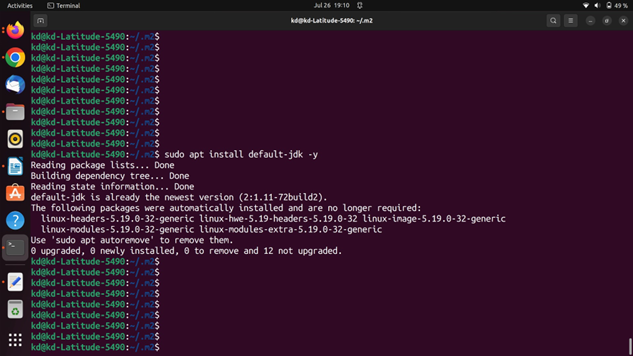
Step 1: Install Java
First of all, make sure that Java is installed on your Ubuntu 22.04; if you do not have it, then utilize the given command for its installation:
$ sudo apt install default-jdk -y
Step 2: Download Apache Maven latest version
Next, write-out the below-given “wget” command for downloading the latest version of Apache Maven from the official website:$ wget https://downloads.apache.org/maven/maven-3/3.6.3/binaries/apache-maven- 3.6.3-bin.tar.gz -P
$ wget https://downloads.apache.org/maven/maven-3/3.6.3/binaries/apache- maven-3.6.3-bin.tar.gz -P /tmp
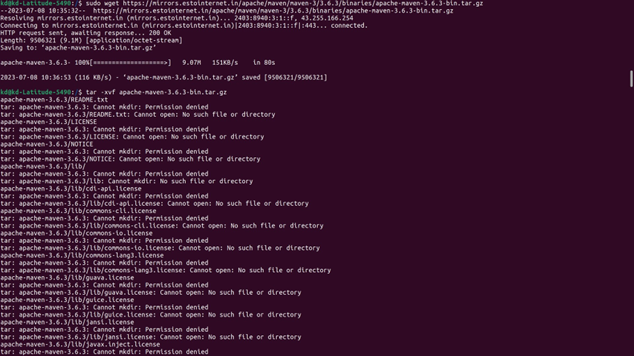
Step 3: Extract downloaded Apache Maven package
Now, move to the “/tmp” directory with the help of the “cd” command:
$ cd /tmp
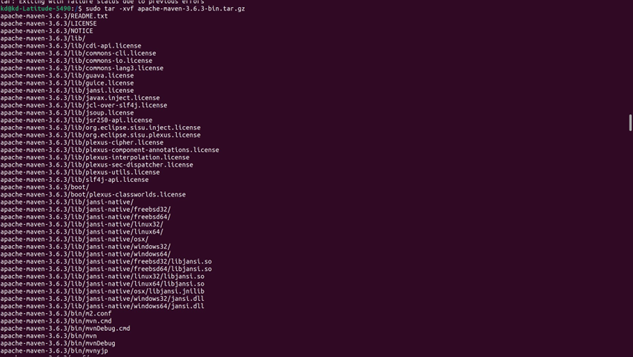
Then, execute the following command to extract the downloaded Apache Maven archive file:
$ tar -xvzf apache-m

$ tar -xvzf apache-maven-3.6.3-bin.tar.gz
Wait for a few minutes:
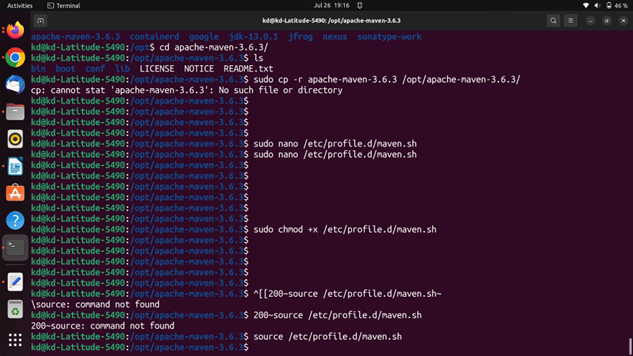
After extracting the required package, copy it to the “/opt/” directory:
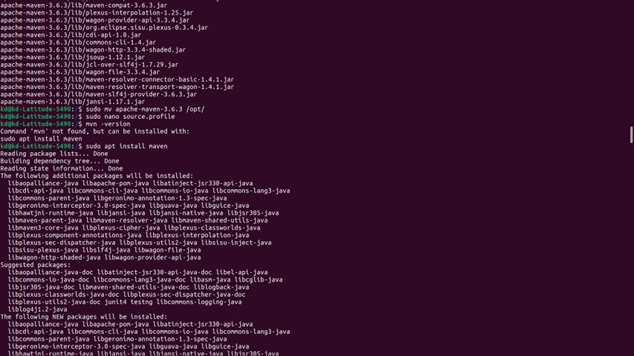
$ sudo cp -r apache-maven-3.6.3 /opt/maven
Maven Deploy to Nexus
We need to create own Maven repository First:
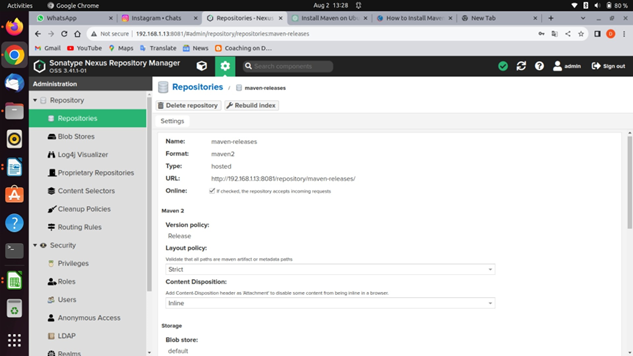
Open Sonatype-Nexus
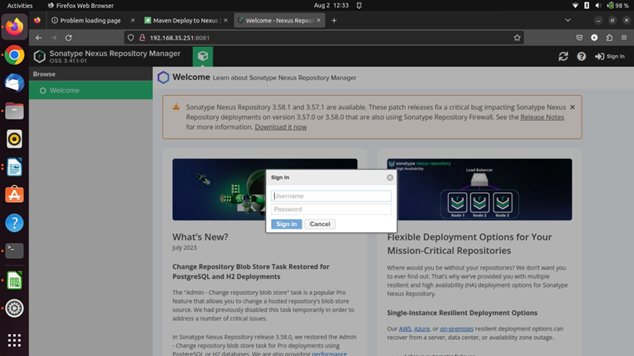
Login using your credentials using repositories menu
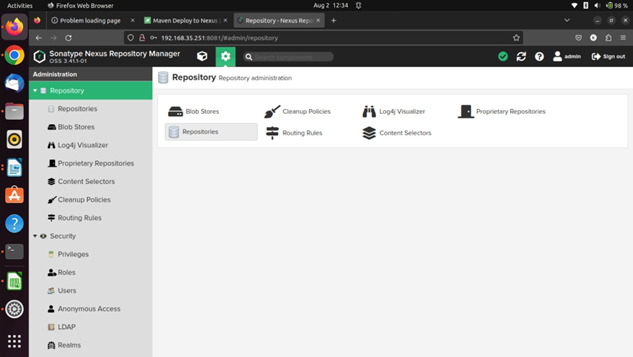
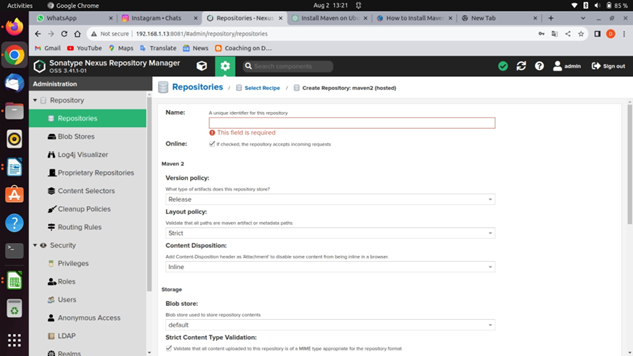
using repositories option create new repository… using maven2(hosted)
check your repository is it right or wrong:
Open Realms option Do it below steop as per screenshot

Step 4: Set up environment variables
In the next step, we will set up the environment variables by creating a maven script file “maven.sh” inside the “/etc.profile.d” directory:
$ sudo nano /etc/profile.d/maven.sh
In the opened “maven.sh” file, paste the follow code and press “CTRL+O” to save it:
export JAVA_HOME=/usr/lib/jvm/default-java
export M2_HOME=/opt/maven
export MAVEN_HOME=/opt/maven
export PATH=${M2_HOME}/bin:${PATH}
Next, write out the following command for enabling the executable permission of the created Apache Maven script:
$ sudo chmod +x /etc/profile.d/maven.sh
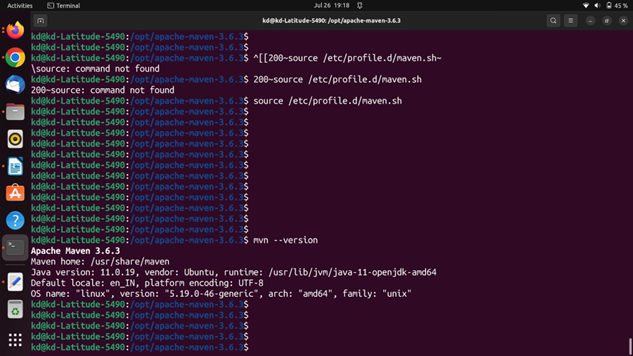
After doing so, load the environment variables with the help of the following “source” command:
$ source /etc/profile.d/maven.sh
Step 5: Check Apache Maven version
Lastly, verify the version of Apache Maven which you have installed on your Ubuntu 22.04:
$ mvn -version
First of all, we need to create a file named “settings.xml” and place it under a folder named “.m2”, which represents the local repository of Maven (in any operational system). This file will contain the “id”, “username” and “password” required to access our internal Nexus, as shown bellow:
// sudo nano /.m2/settings.xml //
<?xml version="1.0" encoding="UTF-8"?>
<settings xmlns="http://maven.apache.org/SETTINGS/1.0.0"
xmlns:xsi="http://www.w3.org/2001/XMLSchema-instance"
xsi:schemaLocation="http://maven.apache.org/SETTINGS/1.0.0
http://maven.apache.org/xsd/settings-1.0.0.xsd">
<pluginGroups>
<!-- Specifies a further group identifier to use for plugin lookup.
<pluginGroup>com.your.plugins</pluginGroup>
-->
</pluginGroups>
<proxies>
<!-- Add proxy configuration if needed -->
</proxies>
<servers>
<server>
<id>nexus</id>
<username>admin</username>
<password>Dk@123</password>
</server>
<!-- Add server authentication information if needed -->
</servers>
<mirrors>
<!-- Add repository mirrors if needed -->
</mirrors>
<profiles>
<profile>
<id>env-dev</id>
<activation>
<property>
<name>target-env</name>
<value>dev</value>
</property>
</activation>
<properties>
<tomcatPath>/path/to/tomcat/instance</tomcatPath>
</properties>
</profile>
<profile>
<id>snapshot</id>
<repositories>
<repository>
<id>nexus</id>
<name>kishor-maven</name>
<url>http://localhost:8081/repository/kishor-maven/</url>
</repository>
</repositories>
</profile>
<profile>
<id>release</id>
<repositories>
<repository>
<id>nexus</id>
<name>kishor-maven-snapshot</name>
<url>http://localhost:8081/repository/kishor-maven-snapshot/</url>
</repository>
</repositories>
</profile>
</profiles>
</settings>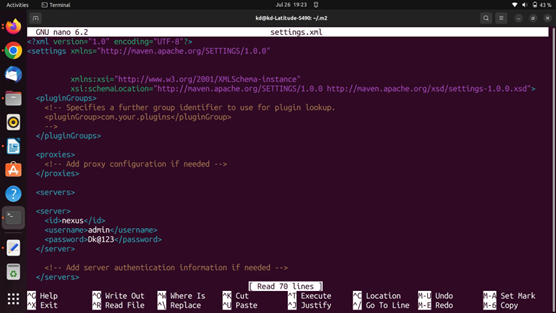
This step is required to run both commands!
// sudo nano /.m2/pom.xml //
Running mvn:deploy
Add the following code snippet inside the “pom.xml” file of our maven project that we want to deploy:
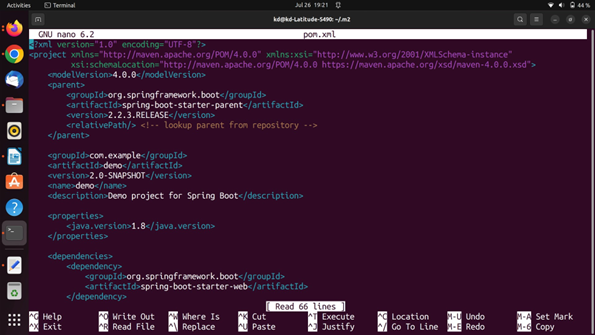
Copy below file paste it… and replace your id pass and url of repositories
<?xml version="1.0" encoding="UTF-8"?>

<project xmlns="http://maven.apache.org/POM/4.0.0" xmlns:xsi="http://www.w3.org/2001/XMLSchema-instance"

 	xsi:schemaLocation="http://maven.apache.org/POM/4.0.0 https://maven.apache.org/xsd/maven-4.0.0.xsd">

    <modelVersion>4.0.0</modelVersion>

    <parent>

 	<groupId>org.springframework.boot</groupId>

 	<artifactId>spring-boot-starter-parent</artifactId>
	<version>2.2.3.RELEASE</version>

 	<relativePath/> <!-- lookup parent from repository -->

    </parent>

    <groupId>com.example</groupId>

    <artifactId>demo</artifactId>

    <version>2.0-SNAPSHOT</version>

    <name>demo</name>

    <description>Demo project for Spring Boot</description>

    <properties>

 	<java.version>1.8</java.version>

    </properties>

    <dependencies>

 	<dependency>

 	<groupId>org.springframework.boot</groupId>

 	<artifactId>spring-boot-starter-web</artifactId>

 	</dependency>

 	<dependency>

 	<groupId>org.springframework.boot</groupId>

 	<artifactId>spring-boot-starter-test</artifactId>

 	<scope>test</scope>
	<exclusions>

 	<exclusion>

 	<groupId>org.junit.vintage</groupId>

 	<artifactId>junit-vintage-engine</artifactId>

 	</exclusion>

 	</exclusions>

 	</dependency>

    </dependencies>

    <build>

 	<plugins>

 	<!-- Add the spring-boot-maven-plugin with the main class configuration -->

 	<plugin>

 	<groupId>org.springframework.boot</groupId>

 	<artifactId>spring-boot-maven-plugin</artifactId>

 	<configuration>

 	<!-- Replace com.example.demo.DemoApplication with your actual main class -->

 	<mainClass>com.example.demo.DemoApplication</mainClass>

 	</configuration>

 	</plugin>

 	</plugins>

    </build>

    <distributionManagement>

 	<snapshotRepository>

 	<id>nexus</id>

 	<url>http://192.168.1.8:8081/repository/kishor-maven-snapshot/</url>

 	</snapshotRepository>

 	<repository>

 	<id>nexus</id>

 	<url>http://192.168.1.8:8081/repository/kishor-maven/</url>

 	</repository>

    </distributionManagement>

</project>
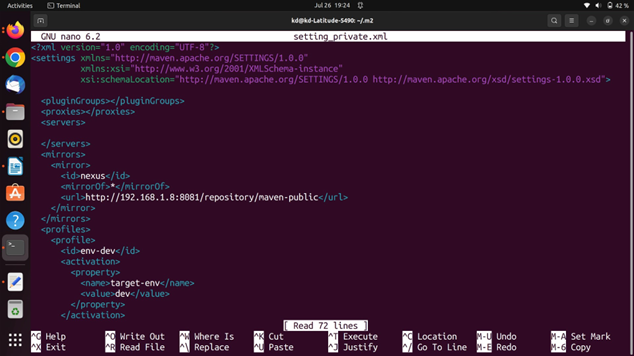
//setting_private.xml//

<?xml version="1.0" encoding="UTF-8"?>

<settings xmlns="http://maven.apache.org/SETTINGS/1.0.0"

 	xmlns:xsi="http://www.w3.org/2001/XMLSchema-instance"

 	xsi:schemaLocation="http://maven.apache.org/SETTINGS/1.0.0 http://maven.apache.org/xsd/settings-1.0.0.xsd">

  <pluginGroups></pluginGroups>

  <proxies></proxies>

  <servers>

  </servers>

  <mirrors>

    <mirror>

 	<id>nexus</id>

 	<mirrorOf>*</mirrorOf>

 	<url>http://192.168.1.13:8081/repository/maven-public</url>

    </mirror>

  </mirrors>

  <profiles>

    <profile>

 	<id>env-dev</id>

 	<activation>

 	<property>

 	<name>target-env</name>

 	<value>dev</value>

 	</property>

 	</activation>

 	<properties>

 	<tomcatPath>/path/to/tomcat/instance</tomcatPath>

 	</properties>

    </profile>

 	<profile>

 	<id>snapshot</id>

 	<repositories>

 	<repository>

 	<id>kishor-maven-snapshot</id>

 	<name>your custom repo</name>

 	<url>http://192.168.1.13:8081/repository/kishor-maven-snapshot/</url>

 	</repository>

 	</repositories>

   </profile>

    <profile>

 	<id>release</id>

 	<repositories>

 	<repository>

 	<id>nexus</id>

 	<name>kishor-maven</name>

 	<url>http://192.168.1.13:8081/repository/kishor-maven/</url>

 	</repository>

 	</repositories>

   </profile>

    <profile>

 	<id>nexus</id>

 	<repositories>

 	<repository>

 	<id>central</id>

 	<url>http://central</url>

 	<releases><enabled>true</enabled></releases>

 	<snapshots><enabled>true</enabled></snapshots>

 	</repository>

 	</repositories>

 	<pluginRepositories>

 	<pluginRepository>

 	<id>central</id>

 	<url>http://central</url>

 	<releases><enabled>true</enabled></releases>

 	<snapshots><enabled>true</enabled></snapshots>

 	</pluginRepository>

 	</pluginRepositories>

    </profile>

  </profiles>

</settings>
With these configurations defined, we can run our “mvn deploy” command (in this case, i ran it under IntelliJ’s maven tab):
It builds our project and uploads it to the repository we defined in our “pom.xml” file. With “-DskipTests” we skip running application’s tests and “- Dmaven.install.skip=true” bypasses local artifact installation. After running it successfully, we can see the following message on IDE’s console:
$ mvn deploy -DskipTests -Dmaven.install.skip=true

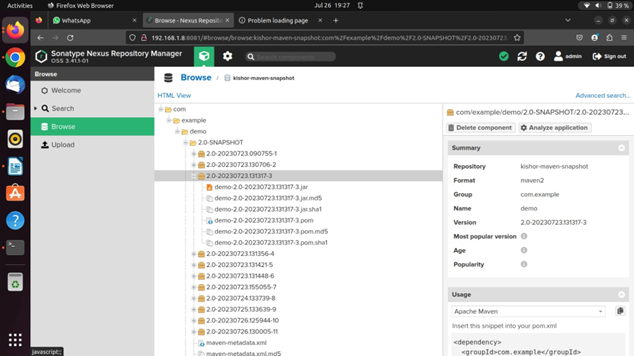
We can also check the uploaded files on our Nexus:
Hope you like this blog….

- What is Platform Engineering? A Beginner’s Guide - July 23, 2026
- Devops and Cloud Batch 12 Assignment - July 21, 2026
- Deploy a Java Application Using Ansible | Step-by-Step Guide - July 16, 2026