Spring Boot Application on Kubernetes – Deployment of a Spring Boot Application on Kubernetes using Helm is a detailed guide that provides step-by-step instructions on how to deploy your application. The guide covers essential tasks such as configuring the kubeconfig file, adding credentials, and using Jenkins for CI/CD. By following the provided commands and accessing the necessary resources, you can successfully deploy your Spring Boot Application on Kubernetes with ease.
- Introduction to Spring Boot and Kubernetes.
- Importance of container orchestration and the role of Helm in simplifying deployments.
- Overview of what will be covered in the blog post.
Prerequisites
- Basic understanding of Spring Boot, Docker, Kubernetes, and Helm.
- Tools and technologies required:
- Spring Boot application
- Docker
- Kubernetes cluster (Minikube or any cloud provider)
- Helm
- Jenkins for CI/CD (optional)
See also – How to Build-Test-Deploy with Kubernetes (CI/CD)
Step1:SettingUptheSpringBootApplication
- Create a simple Spring Boot application.
- Add a simple REST controller that returns a “Hello World!” message.
- Test the application locally to ensure it’s working.
mvn compile

mvn package
Step2: Dockerizing the Spring Boot Application
- Create a Dockerfile for the Spring Boot application.
- Build the Docker image locally.
- Push the Docker image to DockerHub (or any container registry).
Example Dockerfile

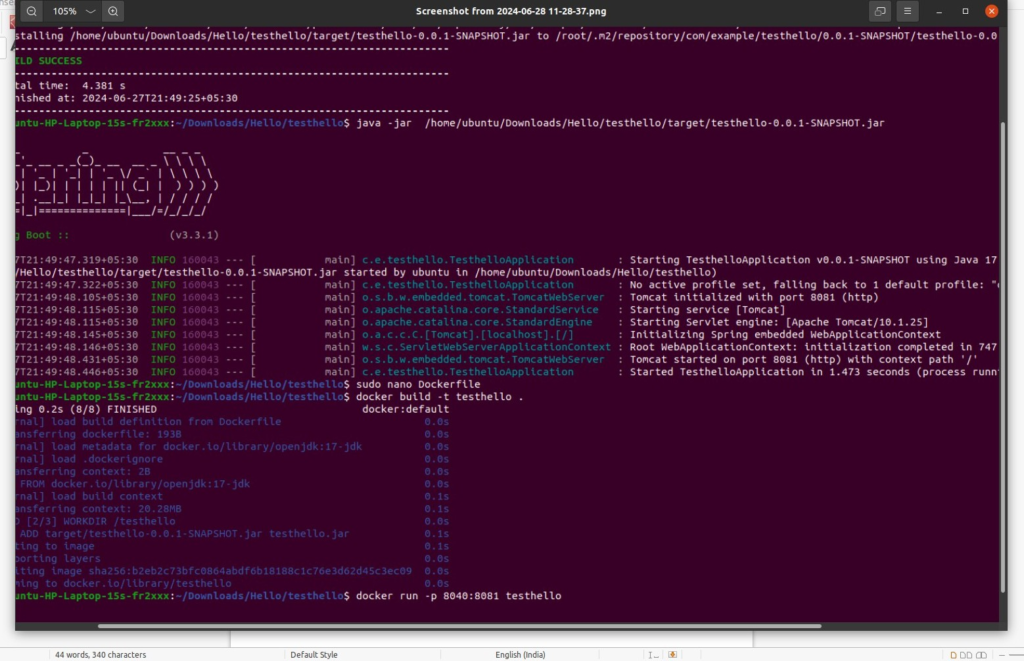
$ docker build -t testhello .
$ docker run -p 8040:8081 testhello
Step3: Setting Up Kubernetes Cluster
- Set up a local Kubernetes cluster using Minikube or use a cloud provider (e.g., GKE, EKS, AKS).
- Ensure kubectl is configured to interact with the cluster.
        $ minikube start
        $ minikube status
Step4: Creating Helm Charts
- Introduction to Helm and its components (Chart.yaml, values.yaml, templates, etc.).
- Create a Helm chart for the Spring Boot application.
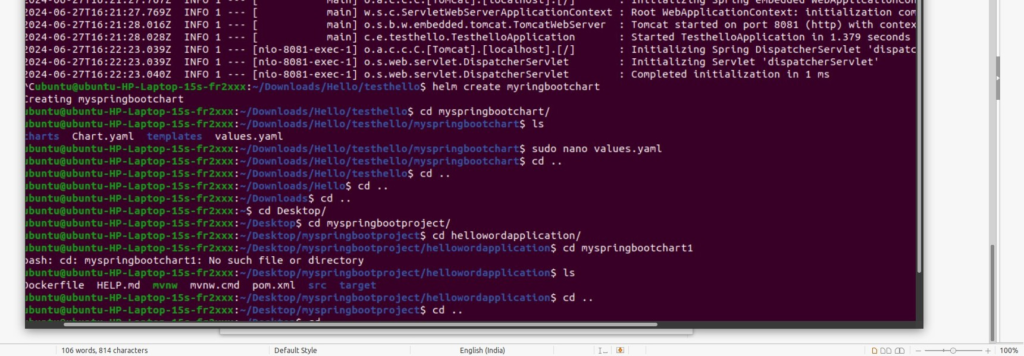
- $helmcreatemyspringbootchart
- Define the deployment and service templates.
- Customize values.yaml for different environments (e.g., development, production).
ExampleHelmchart structure:
my-springboot-chart/

├── Chart.yaml
├── values.yaml
└── templates/

                     ├── deployment.yaml
                     ├── service.yaml
$ eval $(minikube docker -env)
Again run docker build and run command
Step 5: Deploying the Application Using Helm
- Package the Helm chart.
- Install the Helm chart on the Kubernetes cluster.
- Verify the deployment and ensure the application is running.
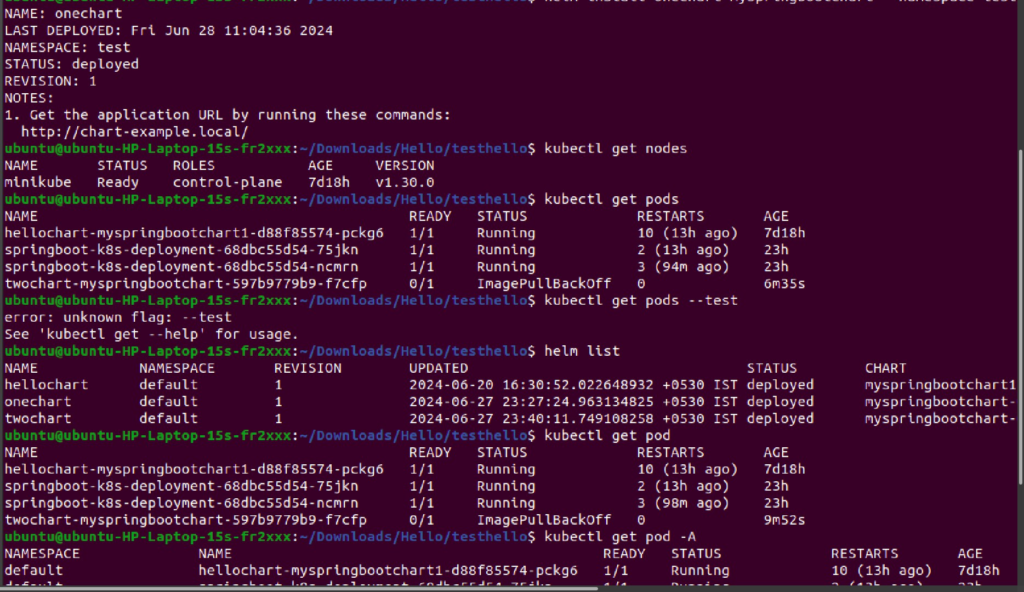
$ helm install hellochart myspringbootchart
$ kubectl get pod
$ kubectl get svc
$ kubectl get deployment
$ minikube dashboard
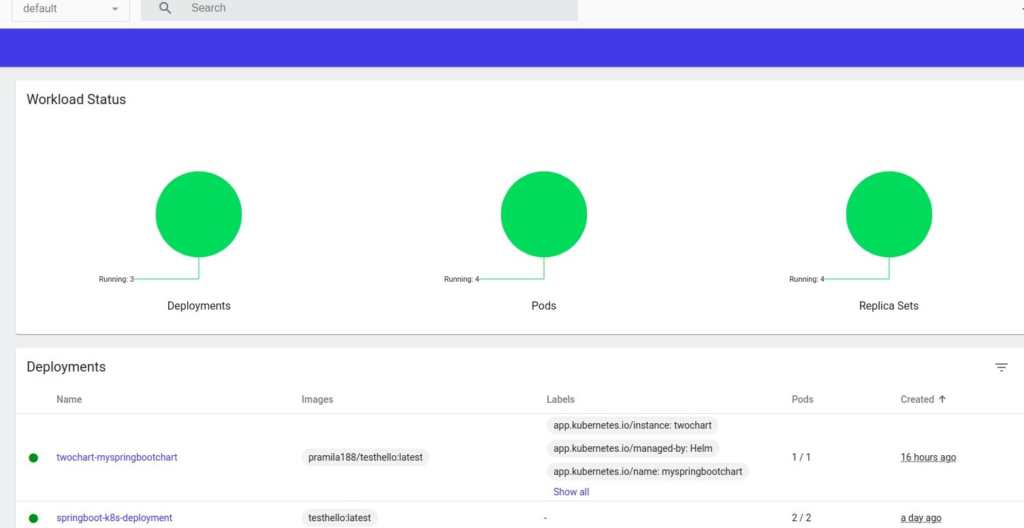
$ minikube service hellochart myspringbootchart –url
Final output:

Push this project folder into new github repo.
Step 6: Setting Up Continuous Deployment with Jenkins (Optional)
- Introduction to Jenkins and its role in CI/CD.
- Create a Jenkins pipeline to automate the build, Docker image creation, and Helm deployment.
Open jenkins dashboard create new pipeline job with added plugin maven, Docker,kubernetes, kubernetes continous deployment etc… create new pipeline job with adding project github url
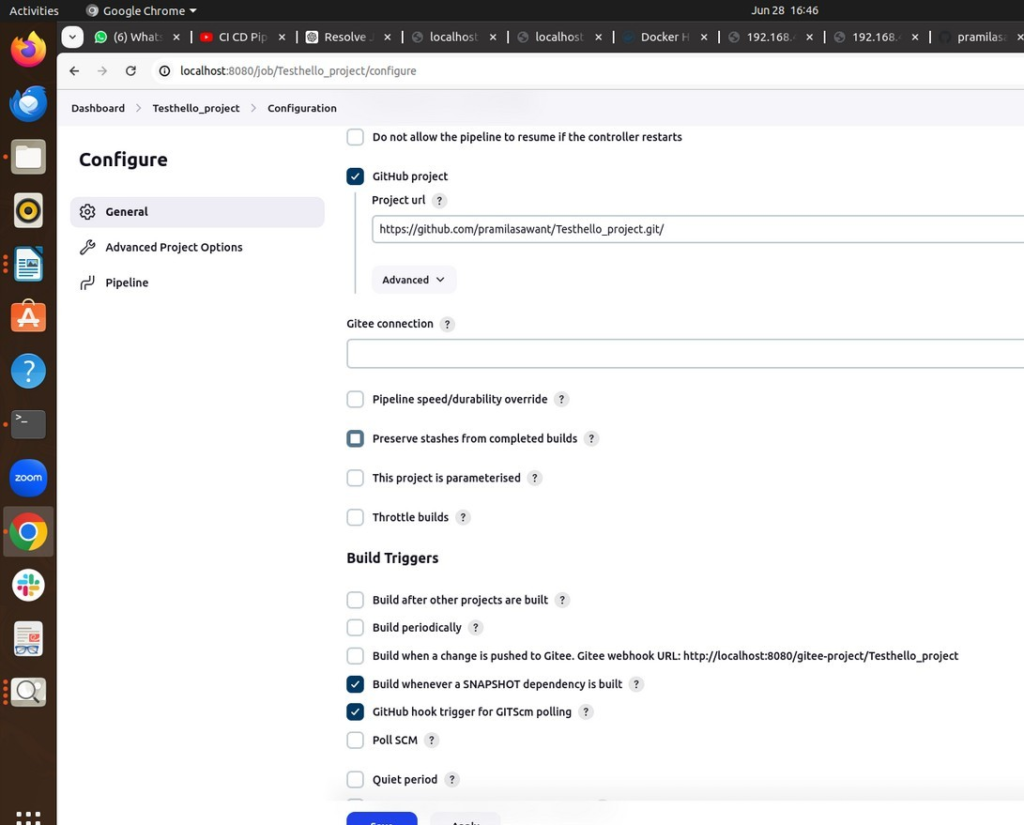
Step by step run the script:
- Clone code
- build maven project
- build and push docker image into dockerhub
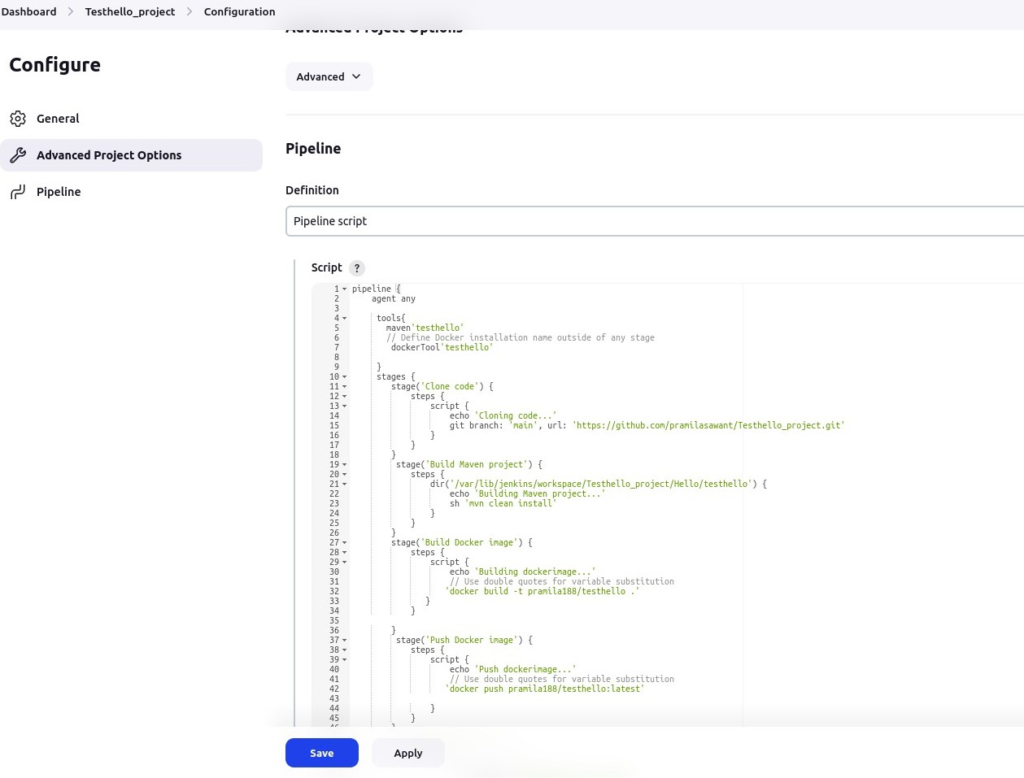
Pipeline script is as follows:
pipeline {
    agent any
    tools {
        maven 'testhello'
        // Define Docker installation name outside of any stage
        dockerTool 'testhello'
    }
    stages {
        stage('Clone code') {
            steps {
                script {
                    echo 'Cloning code...'
                    git branch: 'main', url: 'https://github.com/pramilasawant/Testhello_project.git'
                }
            }
        }
        stage('Build Maven project') {
            steps {
                dir('/var/lib/jenkins/workspace/Testhello_project/Hello/testhello') {
                    echo 'Building Maven project...'
                    sh 'mvn clean install'
                }
            }
        }
        stage('Build Docker image') {
            steps {
                script {
                    echo 'Building Docker image...'
                    // Use double quotes for variable substitution
                    sh 'docker build -t pramila188/testhello .'
                }
            }
        }
        stage('Push Docker image') {
            steps {
                script {
                    echo 'Pushing Docker image...'
                    // Use double quotes for variable substitution
                    sh 'docker push pramila188/testhello:latest'
                }
            }
        }
        stage('Deploy on k8s') {
            steps {
                script {
                    kubernetesDeploy(
                        configs: 'deploymentservice.yaml',
                        kubeconfigId: 'k8sconfigpwd'
                    )
                }
            }
        }
    }
}
Open the terminal:
$ minikube start

$ minikube status

$ eval $(minikube docker -env)
Create deploymentservice.yaml file in this project github repo.
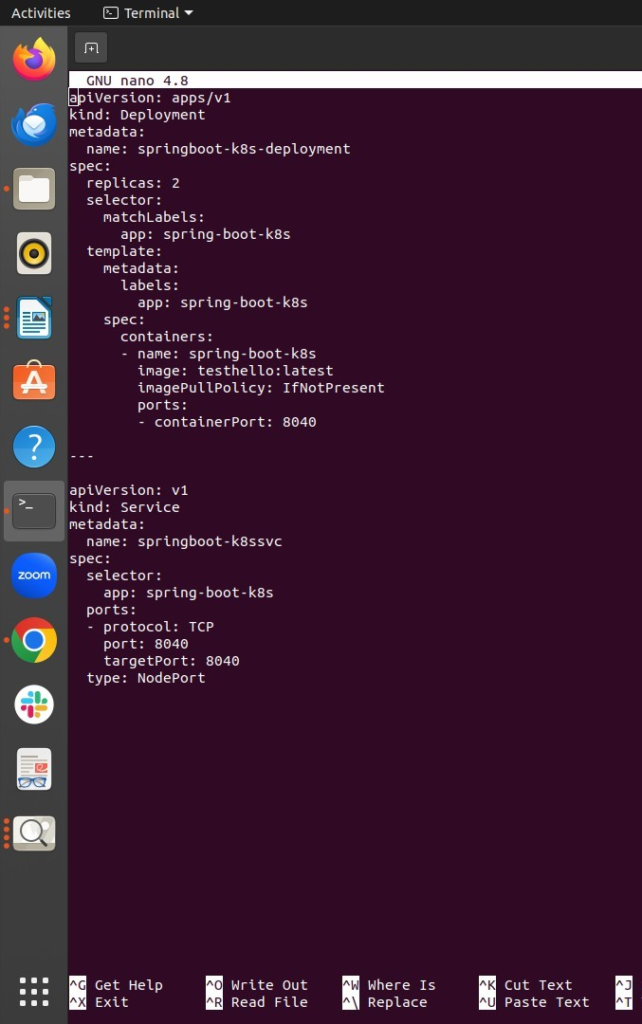
Open this pipeline job and click on pipeline syntax click into kubernetes Deploy:Deploy to kubernetes
in kubeconfig section click on jenkins and select kubeconfigpwd
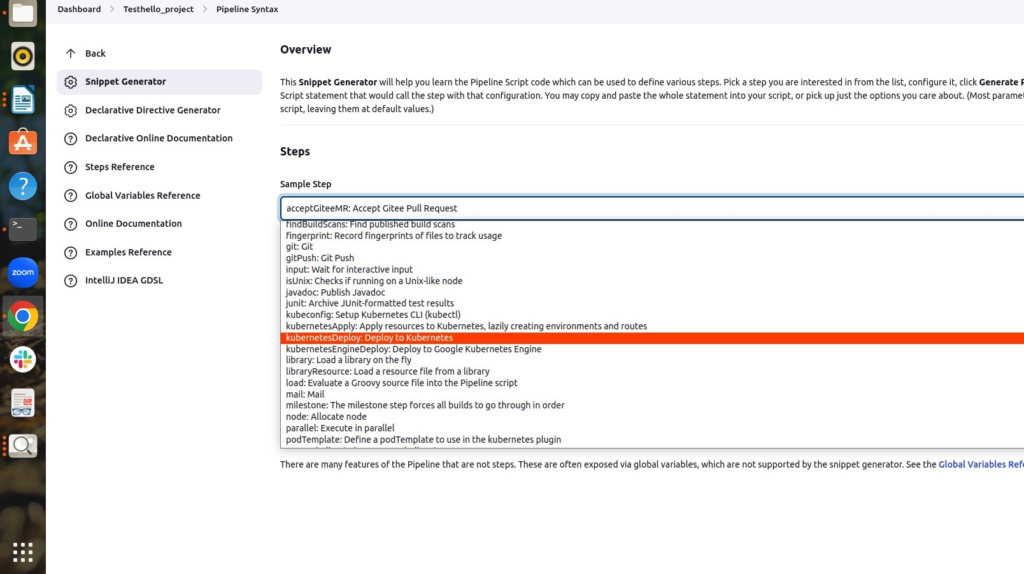

Add the Credentials:
Username: Kubernetes configuration(Kubeconfig)
Passward: kubeconfigpwd or any something click on Enter Directly
open the terminal and go to root directory
$ ls -la

show all hidden file open the .kube
$ cd .kube
$ ls

open config using
$ cat config
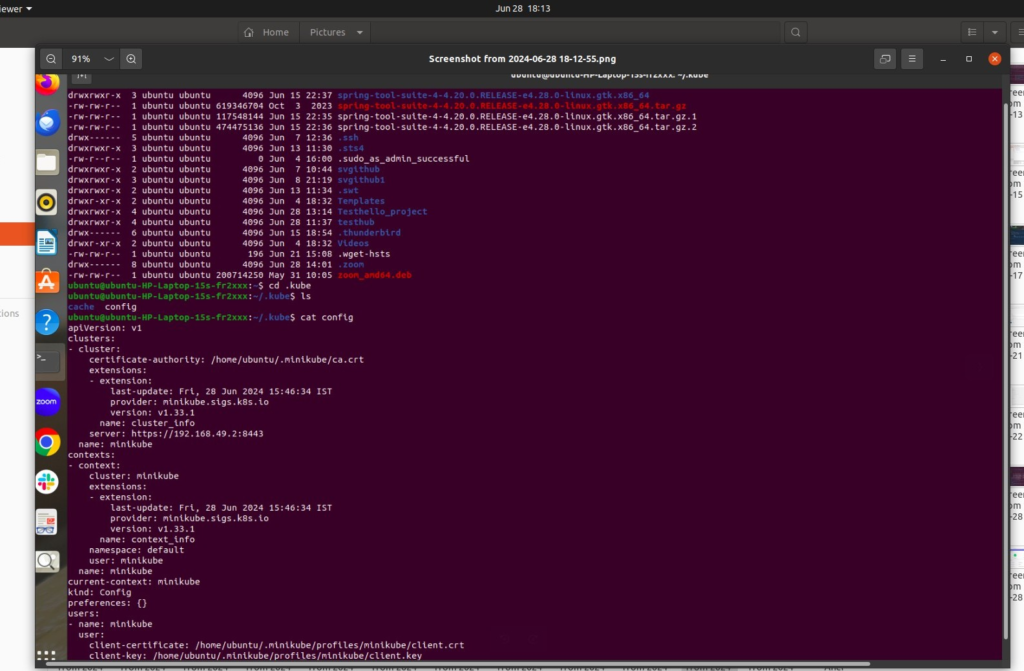
copy this config file and into highlighted box

click on Add and Generate pipeline script
copy this contetnt and paste into k8s deployment script

save the script and Build now when build success open terminal
$ kubectl get pod

$ kubectl get node

$ kubectl get deployment

$ kubectl get svc

$ minikube service service name –url

Open this url shows final output:
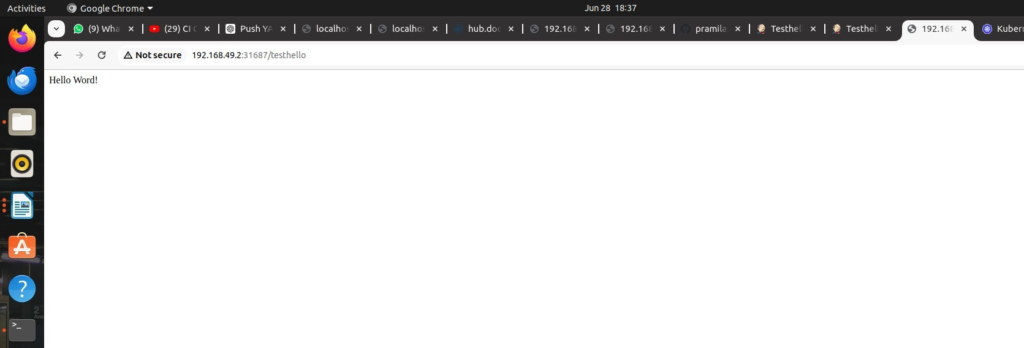
Hope this blog will help you to deploy your any application on k8s using helm and jenkins CI/CD
- Cursor AI: Why use Cursor AI? - July 9, 2025
- Grafana Setup - June 30, 2025
- What is Grafana? - June 30, 2025
