
With the brief introduction to AWS EC2 instances provided in the previous section, it’s time to get hands-on and create our very own EC2 instance!
To simplify the learning process, we’ll begin by launching a basic EC2 instance using the default configurations for Networking, Storage, and Security Groups. This practical experience will help you get comfortable with the process of launching an EC2 instance quickly and efficiently.
In the following sections, we’ll explore how to customize EC2 instances based on your specific requirements. You’ll learn how to tailor the configuration for Networking, Storage, and Security Groups to better suit your application needs.
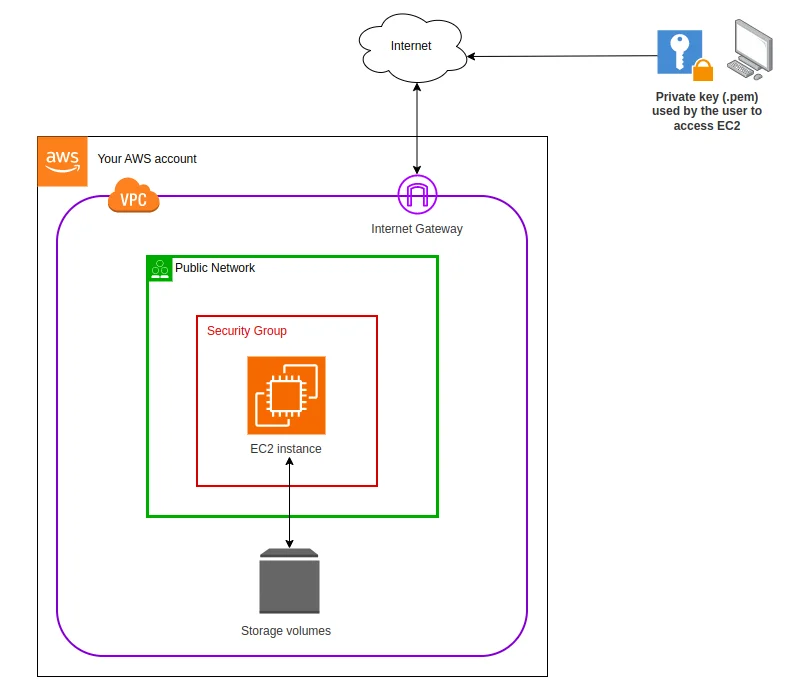
The image below illustrates an EC2 instance launched within the Public Network of a VPC, with an EBS Volume attached for storage.
Step 1: Sign In to AWS
Log in to your AWS Management Console using your AWS account credentials.
From the AWS Management Console, locate the “Services” dropdown and select “EC2” under the “Compute” section.
Step 2: AWS EC2 Instance Home Page :
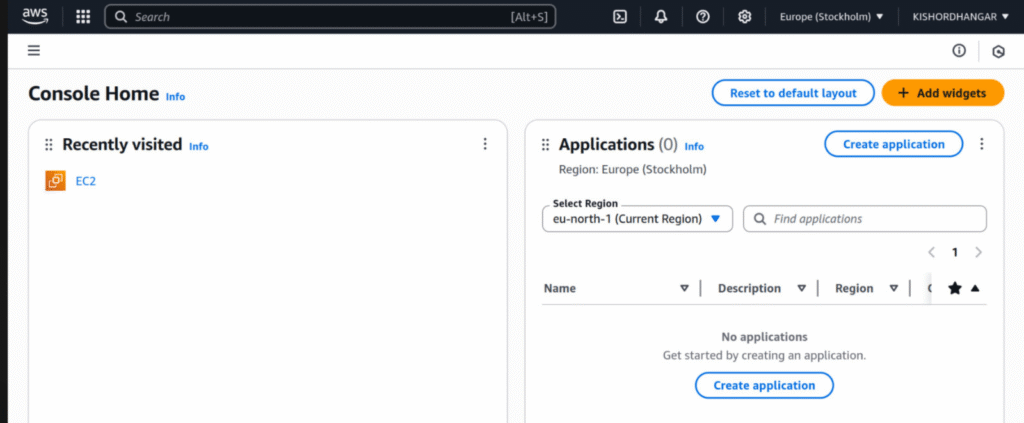
1) After signing in you will redirect to the EC2 homepage.
2) Else you can directly go to the Home Page Link
3) Else from any AWS page, click on service, and find EC2 option.
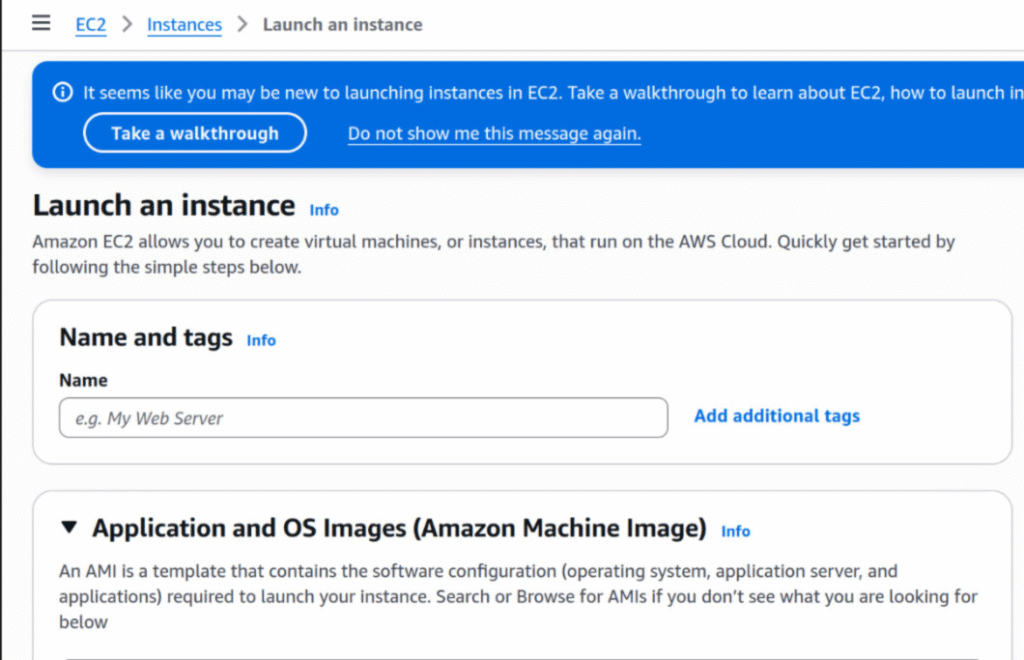
Step 3: Launch an Instance
In the EC2 Dashboard, click the “Instances” link in the left navigation pane, then click the orange “Launch Instance” button.
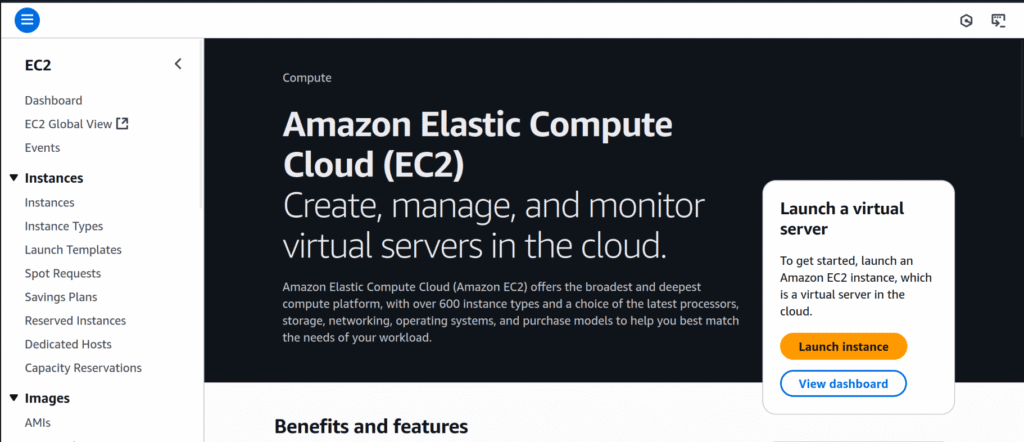
click on Launch instance > Launch instance
Step 4: Choose an Amazon Machine Image (AMI)
- Assign a name to your instance.
- Select an AMI that fits your specific requirements.
AMIs (Amazon Machine Images) are pre-configured templates that come with an operating system and essential software. Ubuntu is one of the most widely used operating systems globally due to its open-source nature, reliability, and efficiency. It’s commonly chosen for web servers, databases, and other server-based applications.
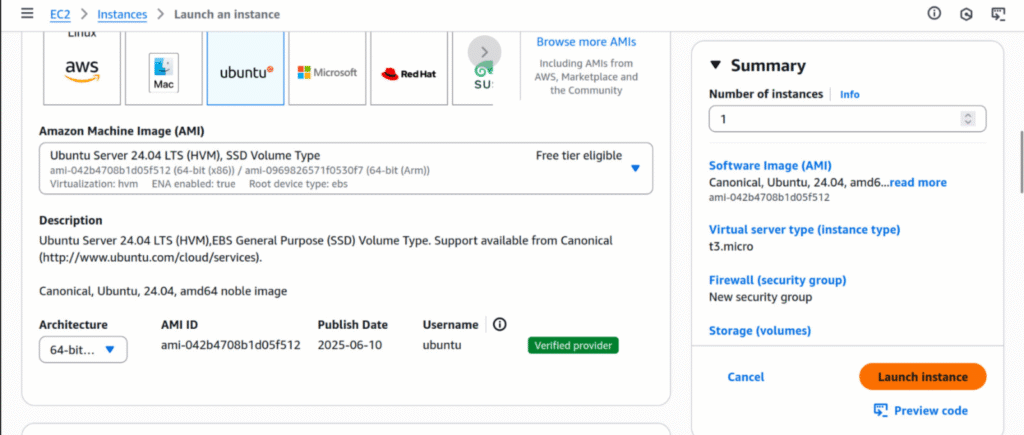
Step 5: Choose an Instance Type
- Assign a name to your instance.
- Select an Amazon Machine Image (AMI) that suits your needs.
AMIs are pre-configured templates that include an operating system and essential software. Ubuntu is one of the most popular choices worldwide due to its open-source nature, reliability, and efficiency. It’s widely used for web servers, databases, and various other applications.
Step 6: Create or Select a Key Pair
To connect to your instance securely via SSH, you need a key pair. You can either create a new one or use an existing key pair.
Important: Keep your private key file safe. If you lose it, you won’t be able to access your instance. You can add additional key pairs later if required.
- Select “Create a new key pair” and give your key a name.
- Click the orange “Create key pair” button.
A .pem file (your private key) will be downloaded to your local computer.
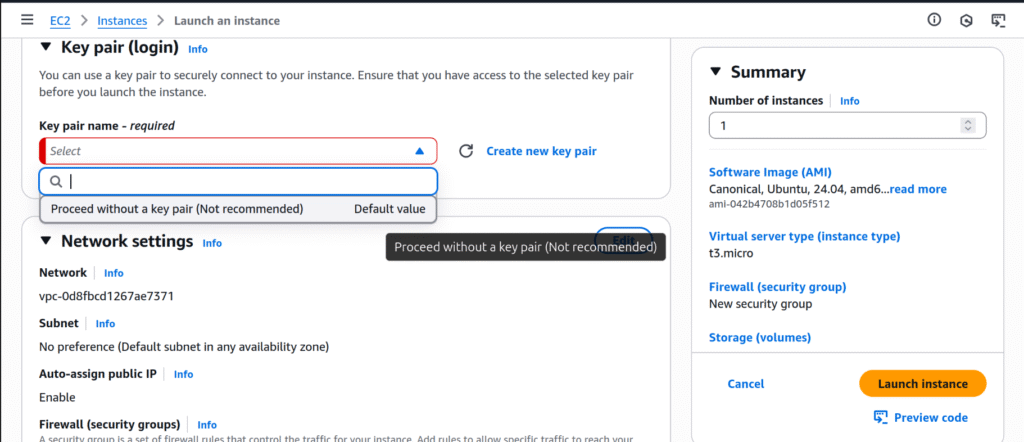
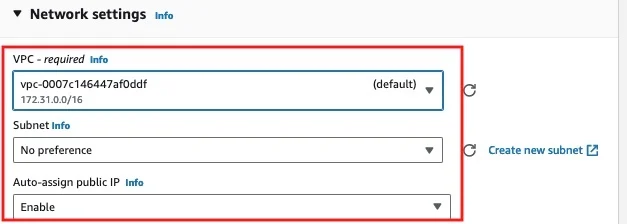
Step7: Configure Network Details
Here, you can choose the network settings (like the VPC and subnet), and more. For now, we’ll use the default VPC and subnet. Think of VPC as a private network, and we’ll dive deeper into it later.
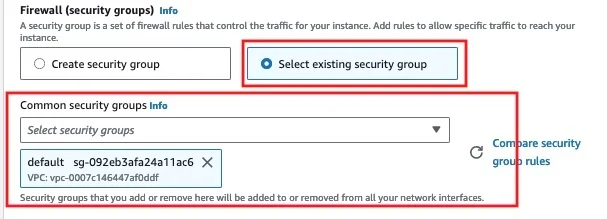
Step 8: Configure Security Group
Security groups function as virtual firewalls for your EC2 instance. They allow you to define inbound and outbound rules to control network traffic. For now, you can proceed with the default security group. We’ll explore how to customize and use security groups to enhance security in later sections.
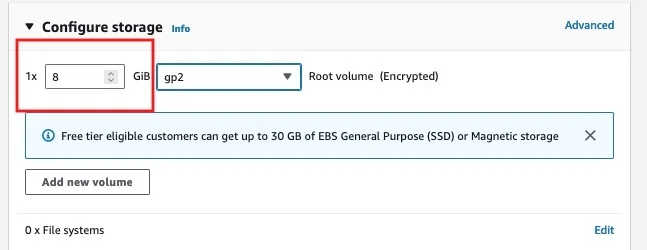
Step 9: Add Storage
Configure the amount and type of storage for your instance. You can add additional storage volumes if needed.
Step 10: Review and Launch
Review your instance configuration settings. If everything looks good, click the “Launch” button.
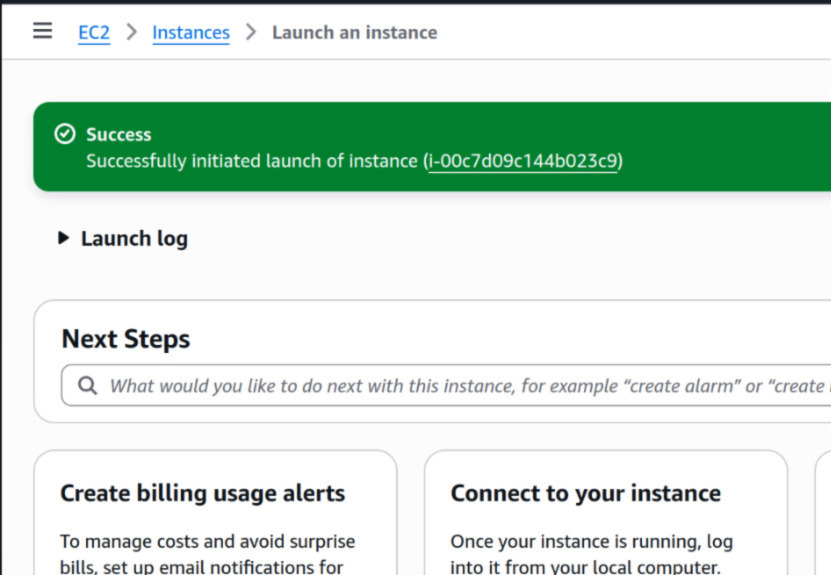
Step 10: Launch Status
As you continue exploring the EC2 service, you’ll gradually gain a deeper understanding of its various settings and features.
Once you click “Launch”, your instance will begin the startup process. You’ll see its status change to “running” on the EC2 Dashboard.

- AI Tools for Developers: Top AI Tools Every Developer Should Know in 2026 - February 12, 2026
- What is AI? 7 Powerful and Easy Facts – Complete Beginner Guide - February 12, 2026
- How to Set Up an Okta Account – Easy & Secure Step-by-Step Guide for 2026 - January 9, 2026