Introduction:
What is Vault?
HashiCorp Vault is an open-source tool designed to securely store, manage, and access secrets (such as API keys, passwords, certificates, and encryption keys) in modern distributed systems and cloud-native environments. It provides centralized secrets management, encryption as a service, and secure access management for any infrastructure, application, or service.
Prerequisites:
Before you begin, ensure you have the following:
- A running Kubernetes cluster (Minikube, EKS, GKE, etc.)
- Helm 3.0+ installed
kubectlinstalled and configured- MySQL deployed in Kubernetes
- MySQL credentials ready
Step 1: Deploy MySQL in Kubernetes
apiVersion: apps/v1
kind: Deployment
metadata:
  name: mysql
spec:
  replicas: 1
  selector:
    matchLabels:
      app: mysql
  template:
    metadata:
      labels:
        app: mysql
    spec:
      containers:
        - name: mysql
          image: mysql:5.7
          env:
            - name: MYSQL_ROOT_PASSWORD
              value: rootpassword
            - name: MYSQL_DATABASE
              value: vaultdb
            - name: MYSQL_USER
              value: vault
            - name: MYSQL_PASSWORD
              value: vaultpassword
          ports:
            - containerPort: 3306
---
apiVersion: v1
kind: Service
metadata:
  name: mysql
spec:
  ports:
    - port: 3306
  selector:
    app: mysql
2. Apply the MySQL Deployment
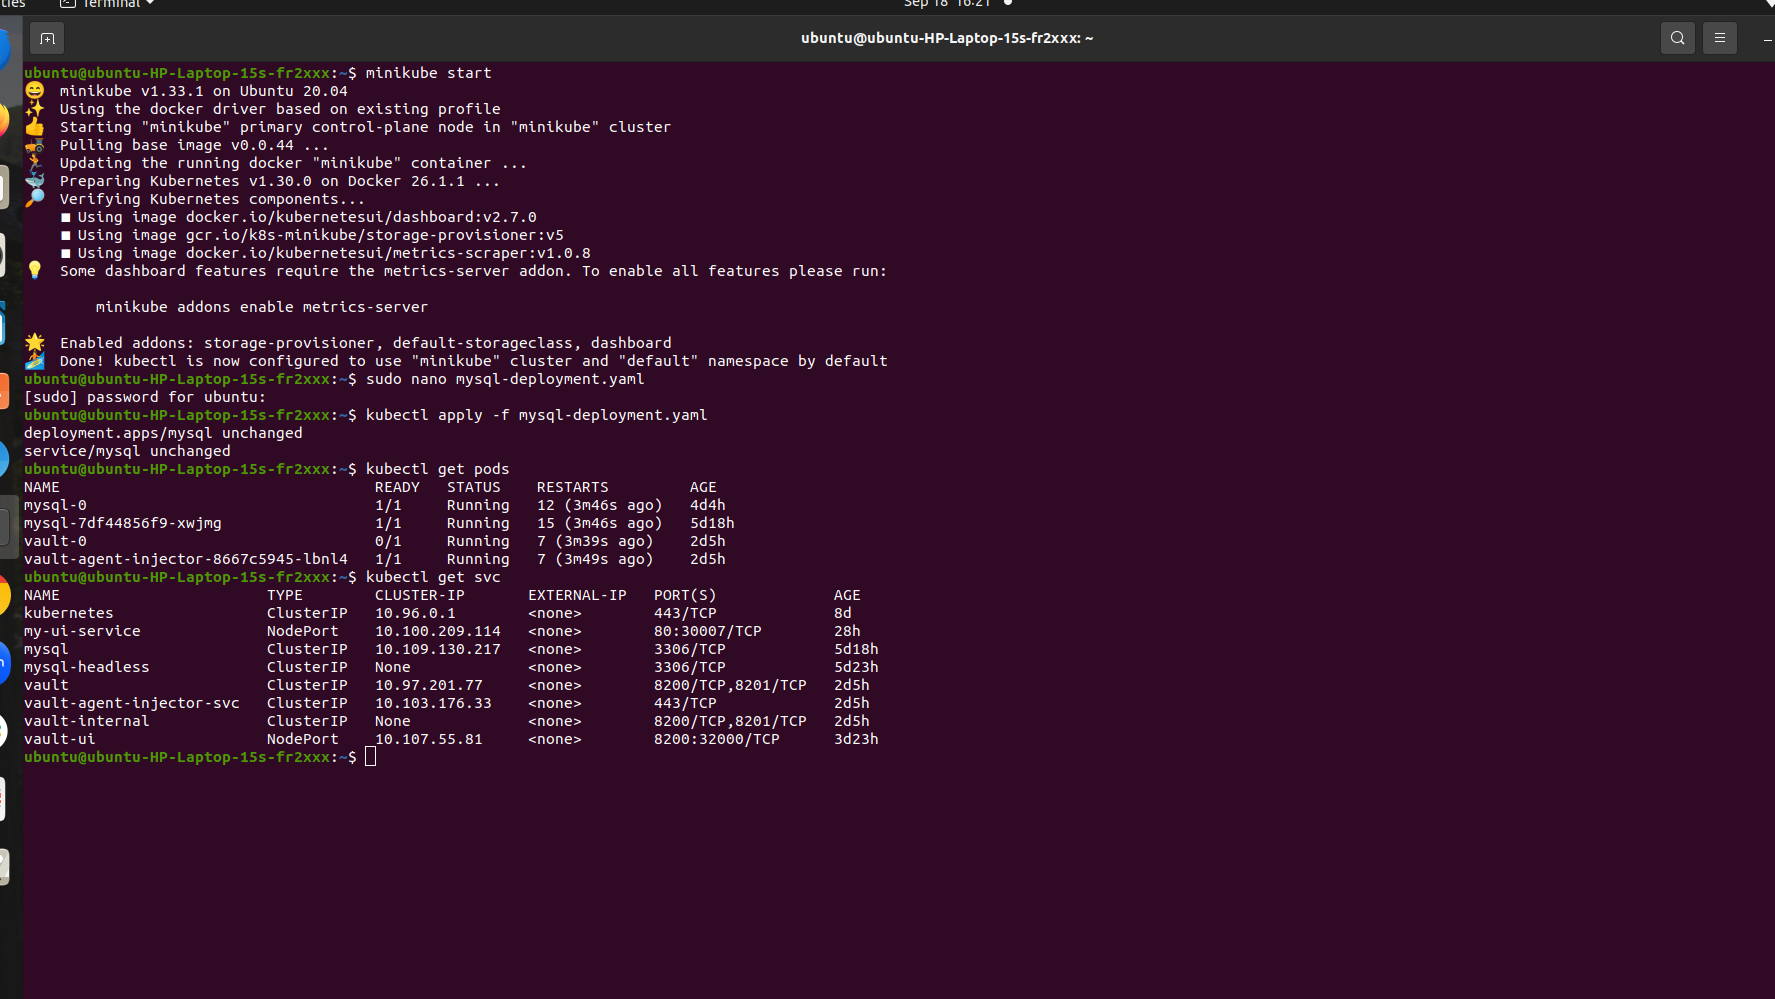
kubectl apply -f mysql-deployment.yaml
3.Verify the MySQL Pod
Check if the MySQL pod is running:
kubectl get pods
Also, check if the MySQL service is exposed:
kubectl get svc
Step 2: Install Helm and HashiCorp Vault Helm Chart
1.Add the HashiCorp Helm Repository:
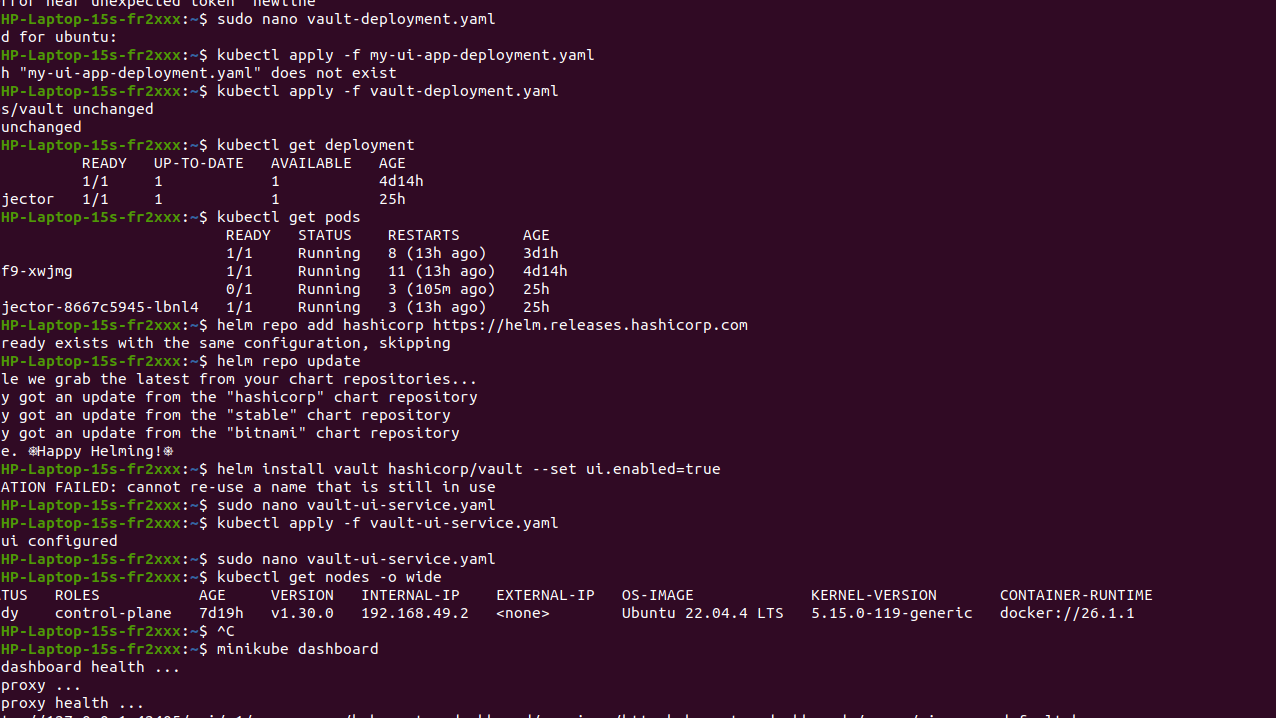
helm repo add hashicorp https://helm.releases.hashicorp.com
2. Update Helm Repository
helm repo update
3. Install Vault using Helm:
Create a vault-values.yaml
server:
  extraEnvironmentVars:
    VAULT_LOG_LEVEL: "debug"
  ha:
    enabled: false
  storage:
    mysql:
      address: "mysql:3306"
      username: "vault"
      password:
        secretRef:
          name: mysql-root-password
          key: password
      database: "vault_db"

  server:
  securityContext:
    capabilities:
      add: ["IPC_LOCK"]
Install Vault with the custom values file:
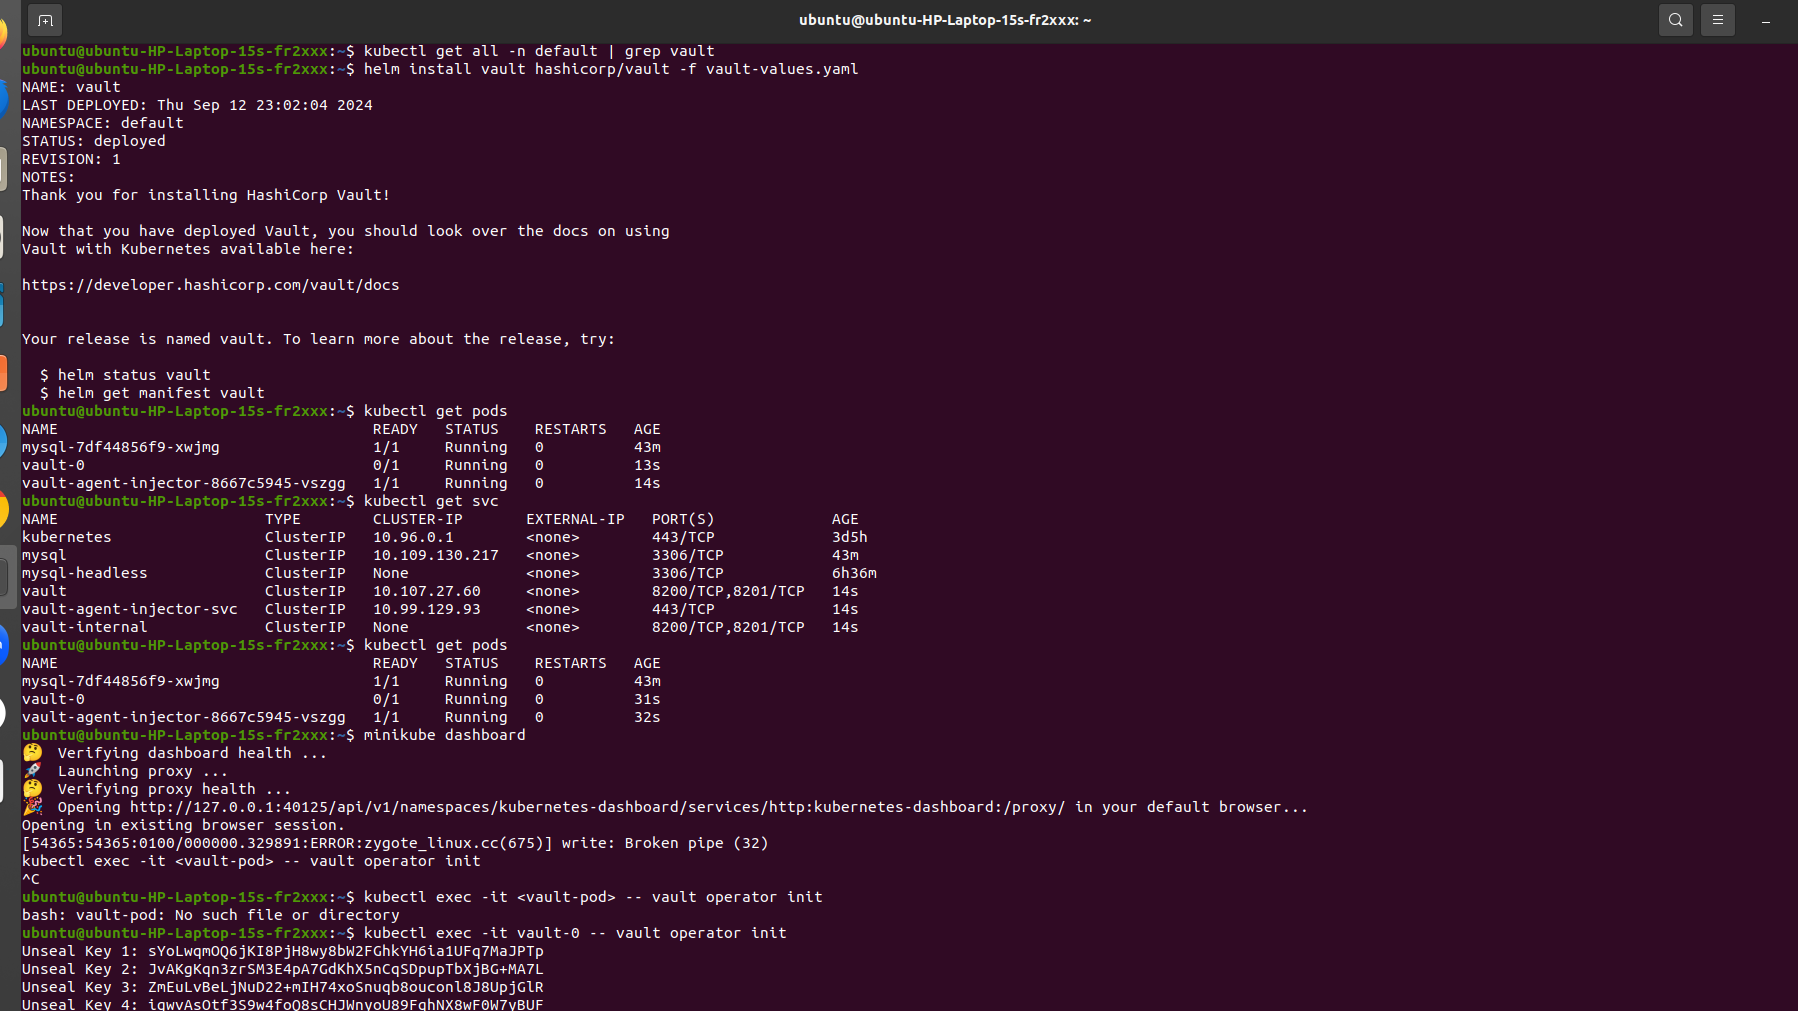
helm install vault hashicorp/vault -f vault-values.yaml
Verify Vault Installation
 kubectl get pods
 kubectl get svc
4. Deploy Vault StatefulSet deployment:
create vault-statefulset.yaml
apiVersion: apps/v1
kind: StatefulSet
metadata:
  name: vault
  namespace: default
  labels:
    app: vault
spec:
  serviceName: "vault"
  replicas: 1
  selector:
    matchLabels:
      app: vault
  template:
    metadata:
      labels:
        app: vault
    spec:
      containers:
      - name: vault
        image: hashicorp/vault:1.10.0
        ports:
        - containerPort: 8200
        env:
        - name: VAULT_DISABLE_MLOCK
          value: "true"
        volumeMounts:
        - name: vault-config
          mountPath: /vault/config
        - name: vault-data
          mountPath: /vault/data
      volumes:
      - name: vault-config
        configMap:
          name: vault-config
      - name: vault-data
        emptyDir: {}
  volumeClaimTemplates:
  - metadata:
      name: vault-data
    spec:
      accessModes: ["ReadWriteOnce"]
      resources:
        requests:
          storage: 10Gi
Apply the YAML to Kubernetes:
kubectl apply -f vault-statefulset.yaml
5. create vault-ui-service.yaml
apiVersion: v1
kind: Service
metadata:
  name: vault-ui
  labels:
    app: vault
spec:
  type: NodePort  # Or LoadBalancer for cloud environments
  ports:
    - port: 8200
      targetPort: 8200
      protocol: TCP
      nodePort: 32000  # Use any available port
  selector:
    app.kubernetes.io/name: vault
Apply the YAML to Kubernetes:
kubectl apply f vault-ui-service.yaml

Step 3: Initialize and Unseal Vault
- Initialize Vault:
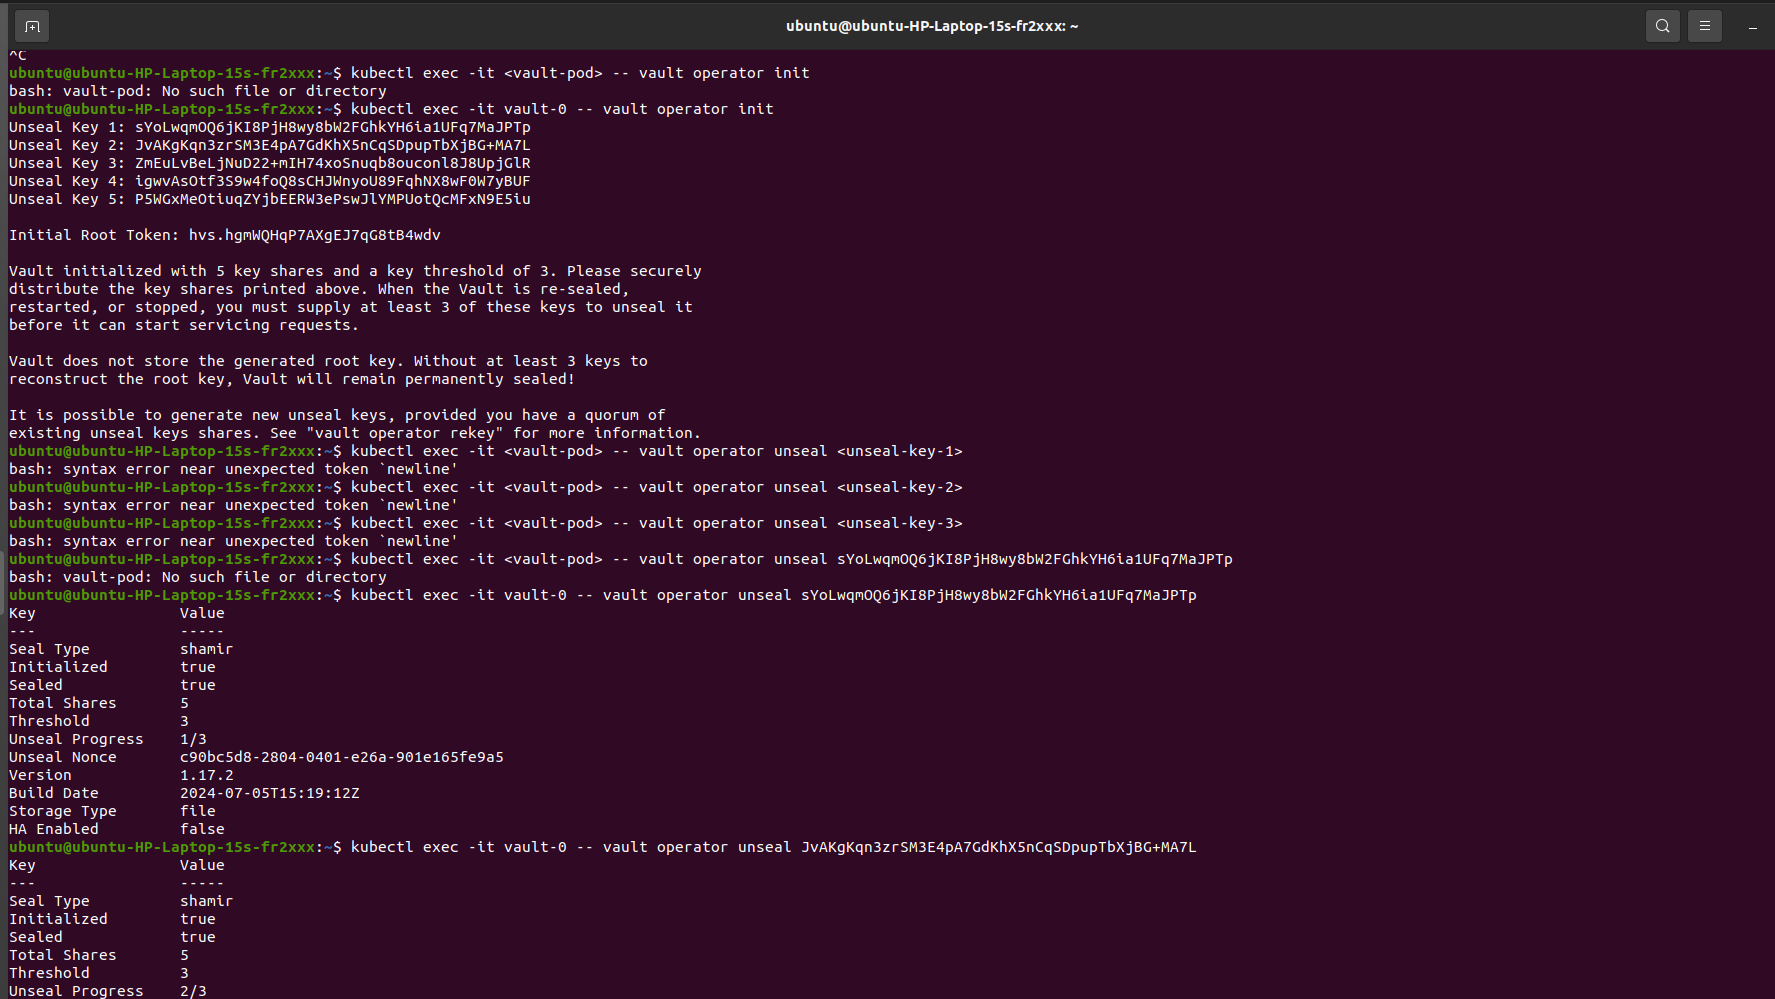
kubectl exec -it vault-0 -- vault operator init
Vault will generate unseal keys and a root token. Make sure to store these securely.
2. Unseal Vault: Use the unseal keys to unseal Vault:
   kubectl exec -it vault-0 -- vault operator unseal <unseal-key-1>
   kubectl exec -it vault-0 -- vault operator unseal <unseal-key-2>
   kubectl exec -it vault-0 -- vault operator unseal <unseal-key-3>
3. Verify Vault status:
kubectl exec -it vault-0 -- vault status

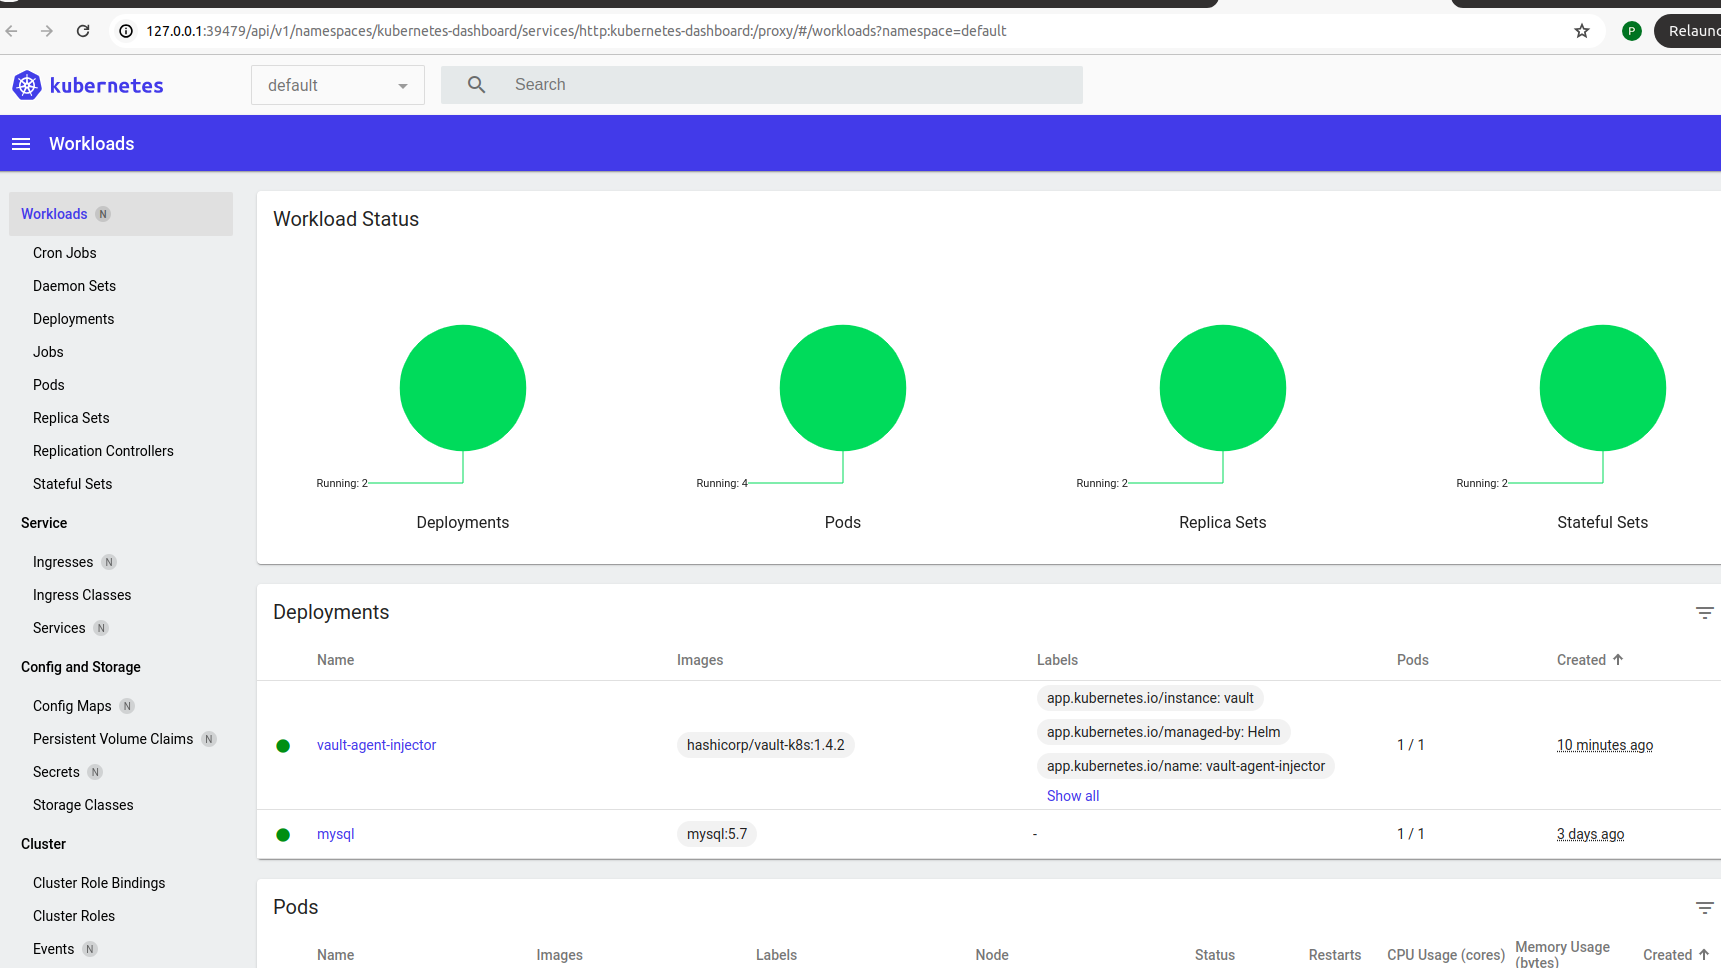
open minikube dashboard check
minikube dashboard
Step 4: Access Vault
- Access Vault via port-forwarding:
kubectl port-forward vault-0 8200:8200
2. Login to Vault:
export VAULT_ADDR='http://127.0.0.1:8200'
vault login <root-token>
OR
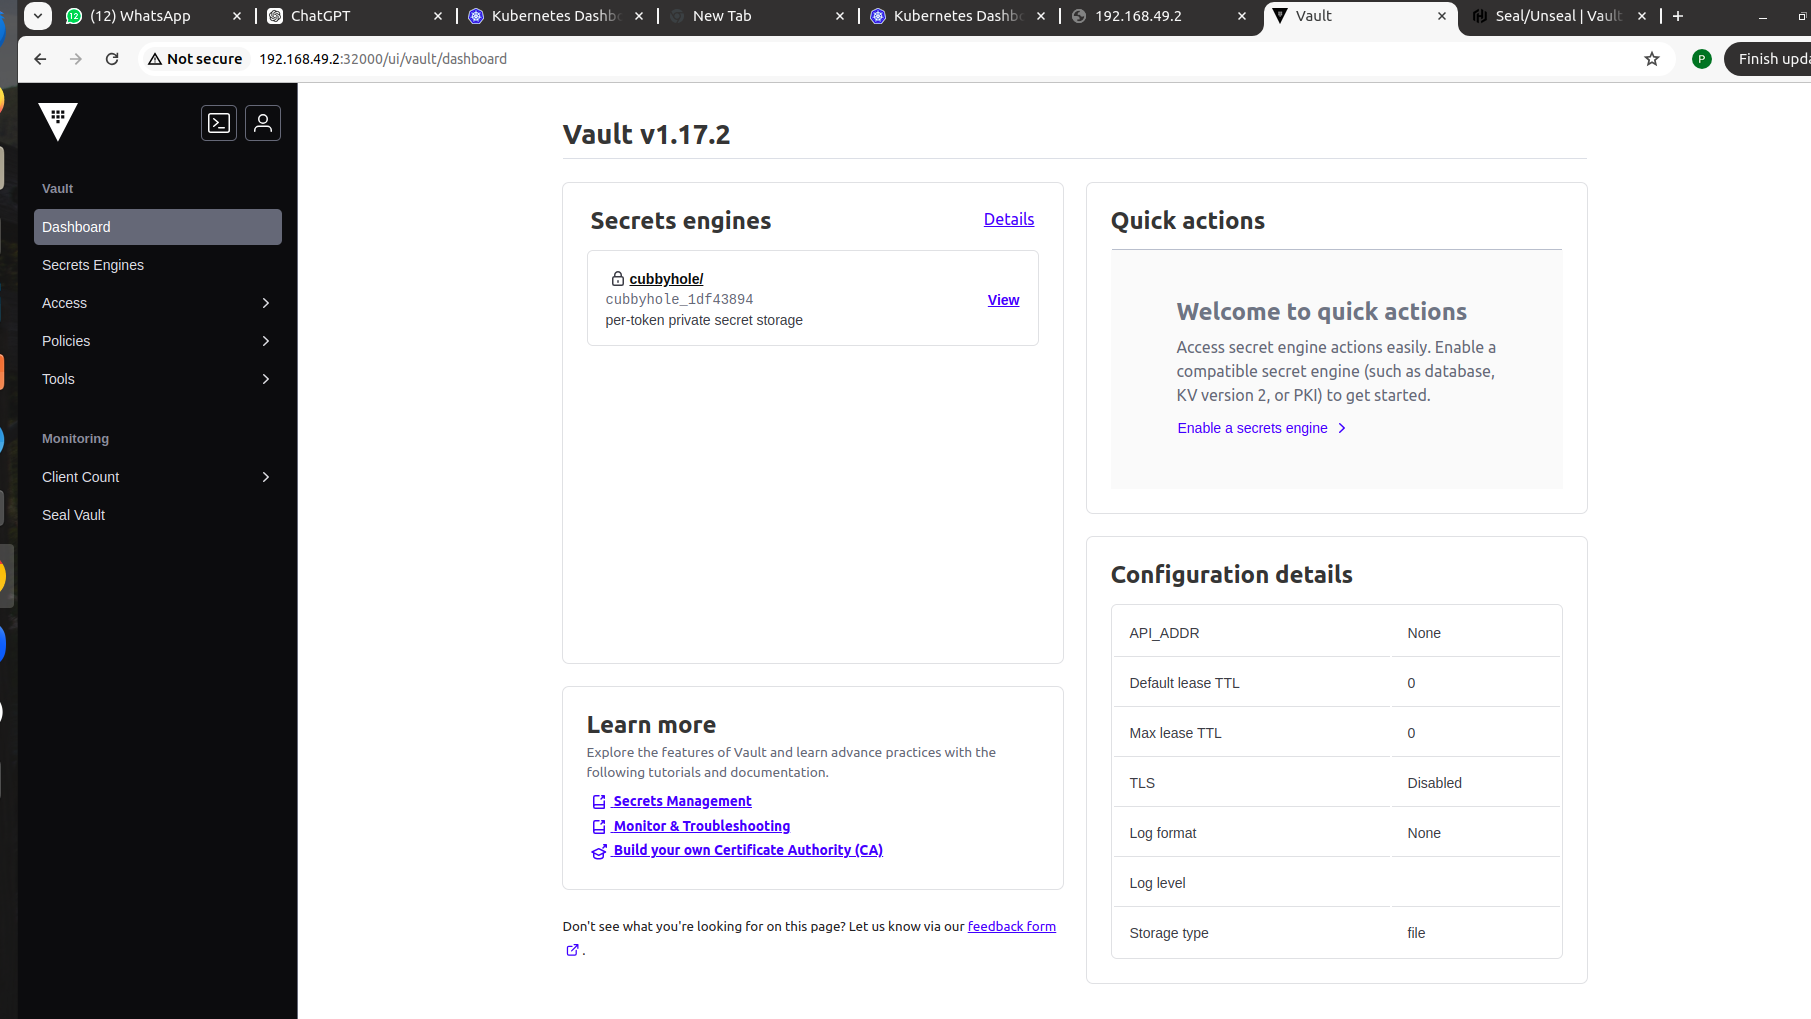
minikube ip:Nodeport of vault-ui-service

i.e  http://192.168.49.2:32000/


Enter the 3 unseal keys then ,enter root token then open the vault Dashboard
- How to Set Up an Okta Account – Easy & Secure Step-by-Step Guide for 2026 - January 9, 2026
- What is Okta? Powerful & Simple Guide to Identity and Access Management in 2026 - January 9, 2026
- Logic Building Assignments – 2025 - October 15, 2025
