

Welcome to this in-depth guide on AWS Lambda! If you’re looking to understand how to create a simple, event-driven architecture, you’ve come to the right place. We’ll be walking through how to use AWS Lambda, a serverless compute service, and how to trigger it with events from an S3 bucket.
What is AWS Lambda?
AWS Lambda is a serverless, event-driven compute service that lets you run code without provisioning or managing servers. You simply upload your code, and Lambda takes care of everything required to run and scale it. This makes it perfect for applications that respond to events, such as file uploads, database changes, or real-time notifications.
How AWS Lambda Works
Explain the event-driven model that makes Lambda so powerful.
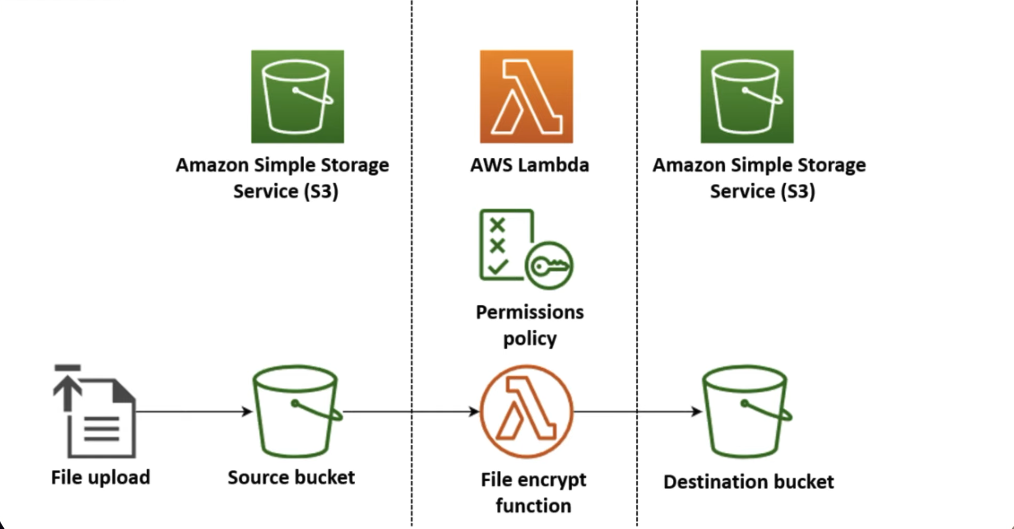
- Description: Describe the process of an event triggering a function. Events can come from various AWS services like S3, DynamoDB, or API Gateway. When an event occurs, Lambda executes your code and automatically manages the computing resources needed for that code.
- Image Placeholder: This is where you will place your diagram.
- Caption:
- Description: This diagram visually represents how a trigger (like an S3 event) invokes an AWS Lambda function, which then executes the code you’ve written.
Benefits of AWS Lambda
- Simplified Infrastructure: Lambda abstracts away the need to provision and manage servers, so your team can focus on building applications instead of managing infrastructure.
- Automatic Scaling: Lambda automatically scales your functions up or down on demand, from a few requests to thousands per second, with zero effort on your part.
- Cost Efficiency: With a pay-per-request pricing model, you only pay for the time your code is actively running, which can lead to significant cost savings compared to paying for idle servers.
- High Availability: Lambda maintains compute capacity across multiple Availability Zones to ensure your code is highly available and resilient to failures.
Use Cases
- Data Processing: Automatically process data as it’s uploaded to S3, such as resizing images, compressing files, or extracting metadata.
- Real-Time File Processing: Create a backend that processes files immediately upon upload, like in our example with an S3 trigger.
- IoT Backends: Process data streams from IoT devices in real-time.
- Web Applications: Use Lambda to build serverless backends for web and mobile applications, handling API requests via services like API Gateway.
Step-by-Step Guide: Building Your First Lambda Function
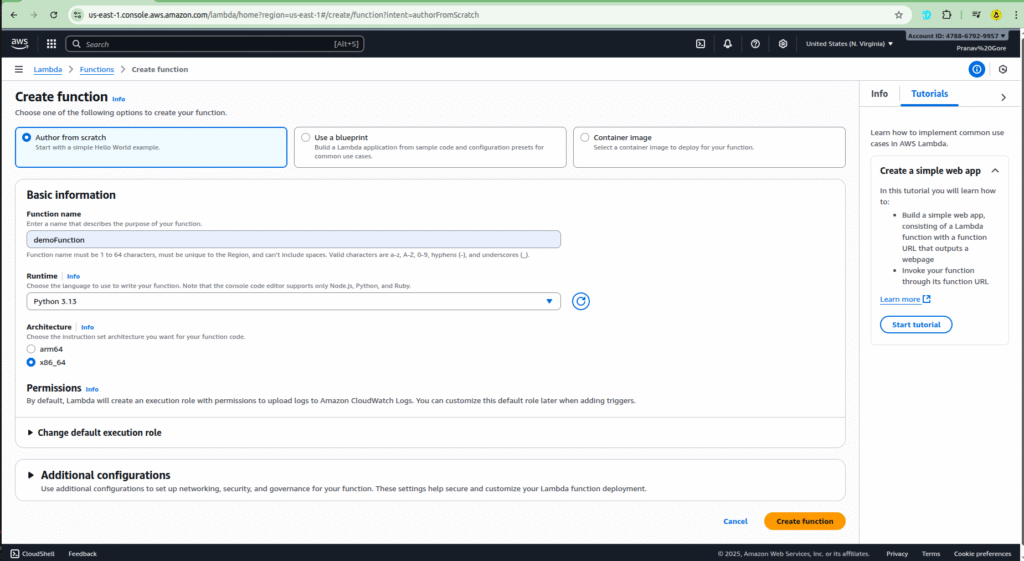
Step 1: Creating Your First Lambda Function
To get started, you’ll first need to create your Lambda function.
- Navigate to the AWS Lambda console.
- Click on Create function.
- Give your function a memorable name, such as
demo-function. - Choose your desired runtime language (e.g., Node.js, Python, etc.).
- Click Create function.
Your function is now ready!
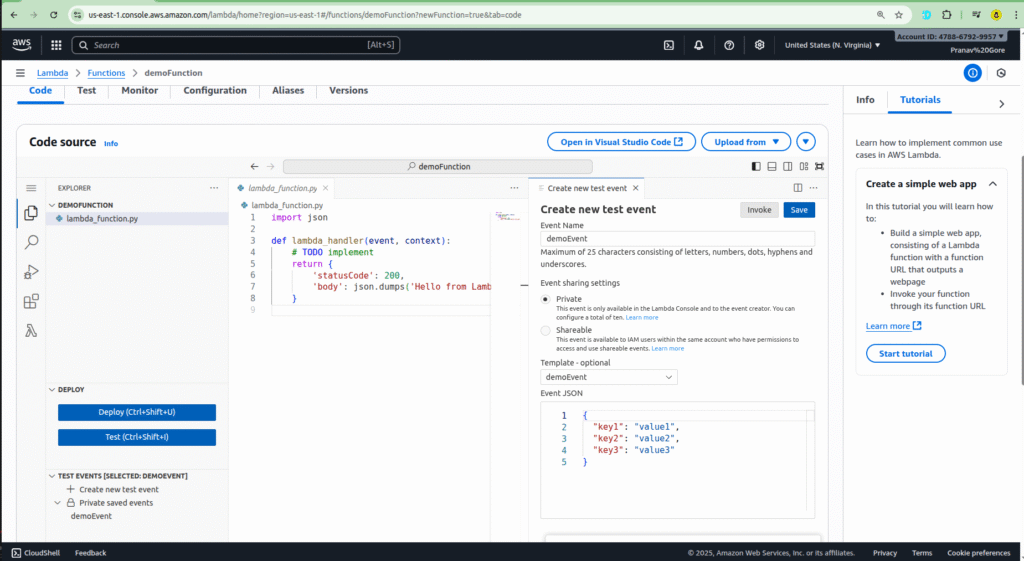
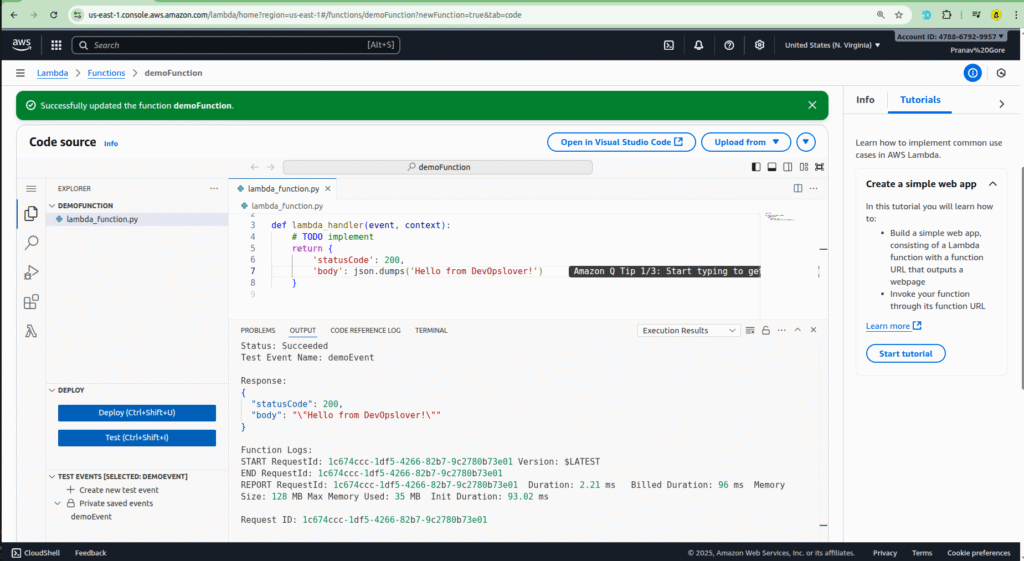
Step 2: Testing Your Function
Before you deploy your code, it’s a good practice to test it.
- In your function’s console, go to the Test tab.
- Create a new test event. You can give it a name like
demo-event. - Modify the JSON data to simulate the event you want to test.
- Click Save, and then Test to run your code with the dummy event.
Important: Remember that if you make any changes to your code, you should save and deploy it before testing again.
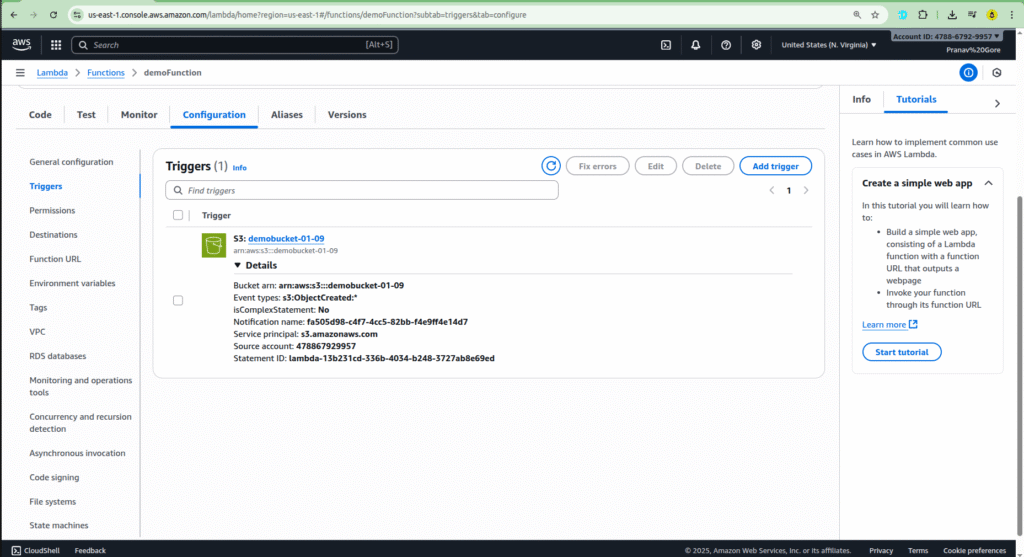
Step 3: Setting Up an S3 Trigger
One of the most powerful features of Lambda is its ability to be triggered by events from other AWS services. We’ll use an S3 bucket as our trigger. This means our Lambda function will run automatically whenever a new file is uploaded to the bucket.
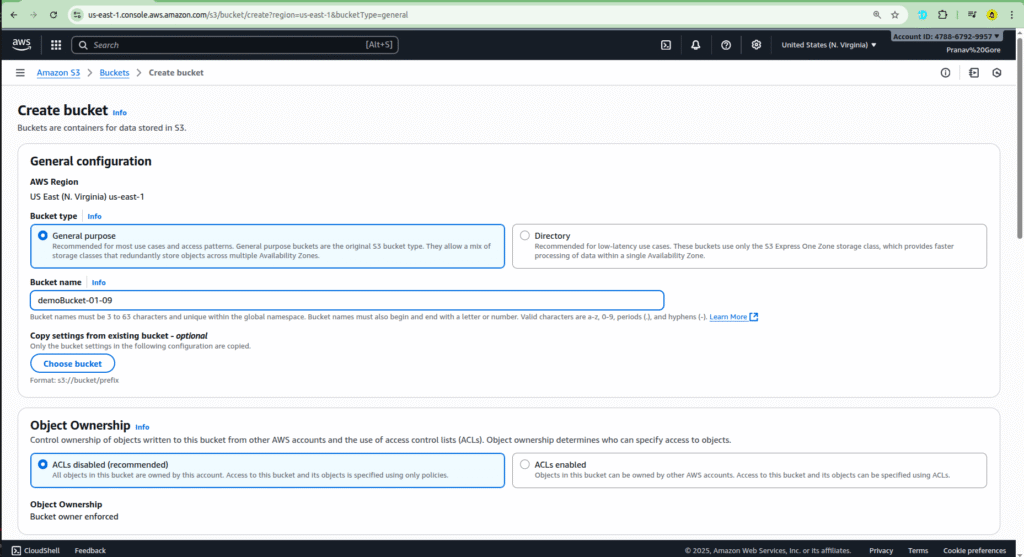
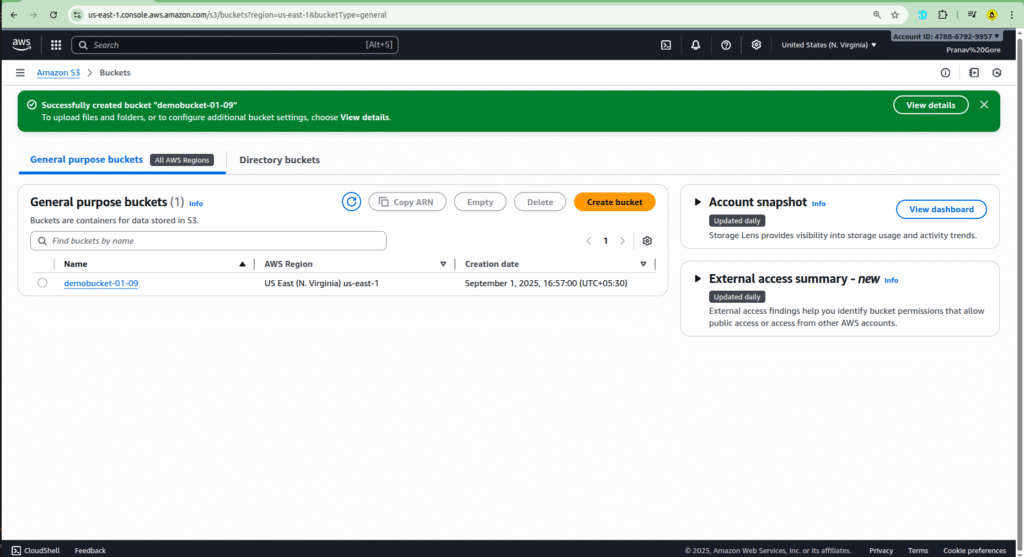
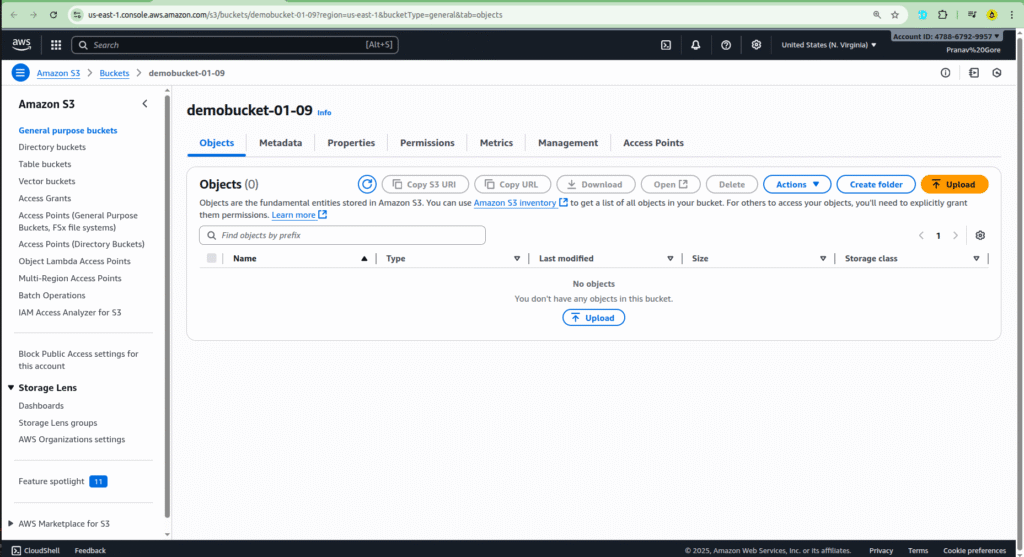
- First, you need to have an S3 bucket ready. In the S3 console, search for and create a bucket. For this example, you can name it something like
demo-bucket-01-09. - Go back to your Lambda function.
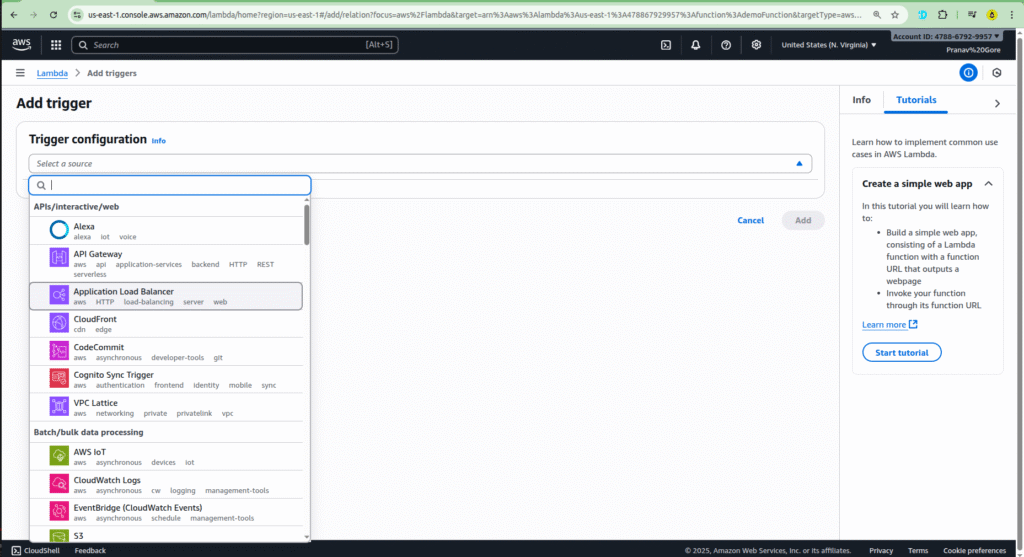
- Click on Add trigger.
- Select S3 from the list of services.
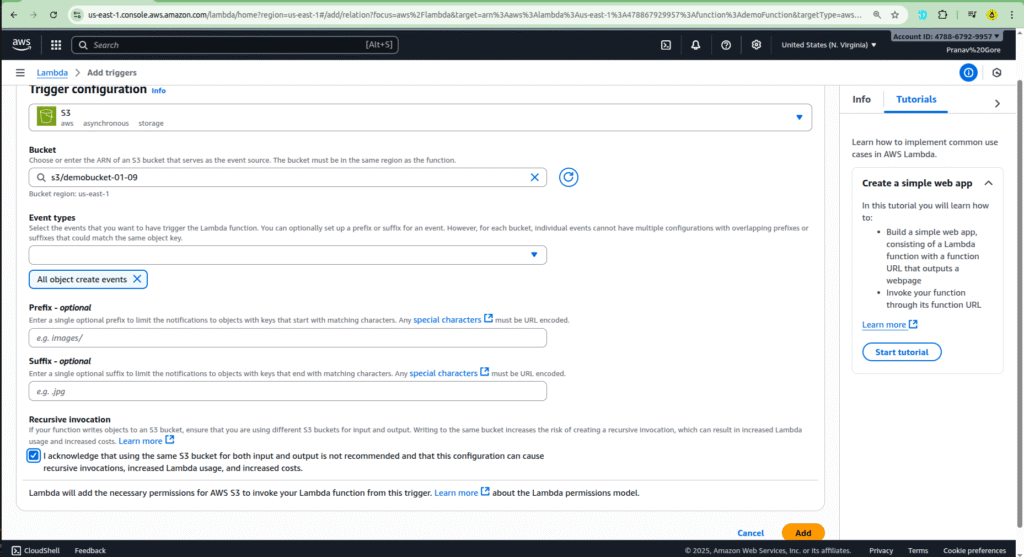
- Choose the bucket name you just created (
demo-bucket-01-09). - For the Event type, choose
All object create events. This ensures the function is triggered whenever a new object is created in the bucket.
If you need a refresher on S3, or want to learn how to create your first bucket, you can check out our previous blog post: How to Create Your First S3 Bucket.
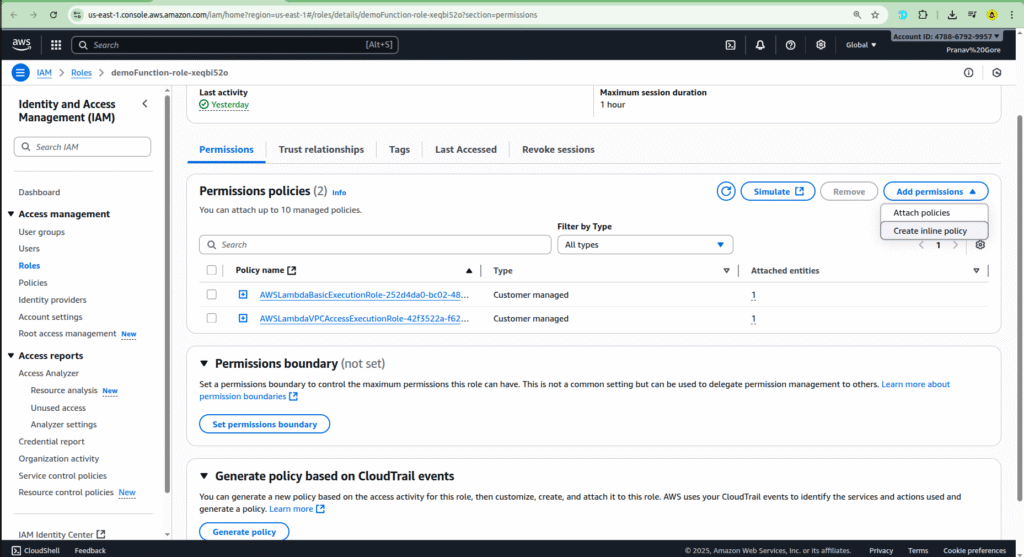
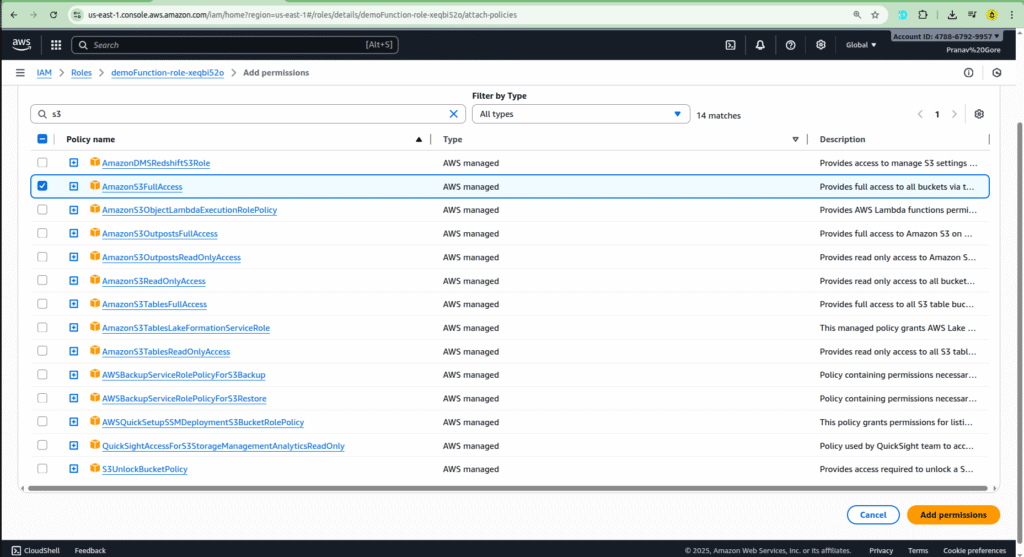
Step 4: Granting Permissions
For your Lambda function to be able to access the S3 bucket, it needs the right permissions. This is a crucial step to ensure everything works correctly.
- Navigate to the Configuration tab of your Lambda function and click on Permissions.
- Click on the Execution role link. This will open the IAM role associated with your function.
- Attach a policy that gives your function the necessary permissions, such as AmazonS3ReadOnlyAccess or AmazonS3FullAccess, depending on your needs.
This ensures that the Lambda function has a resource-based policy statement allowing S3 to trigger it.
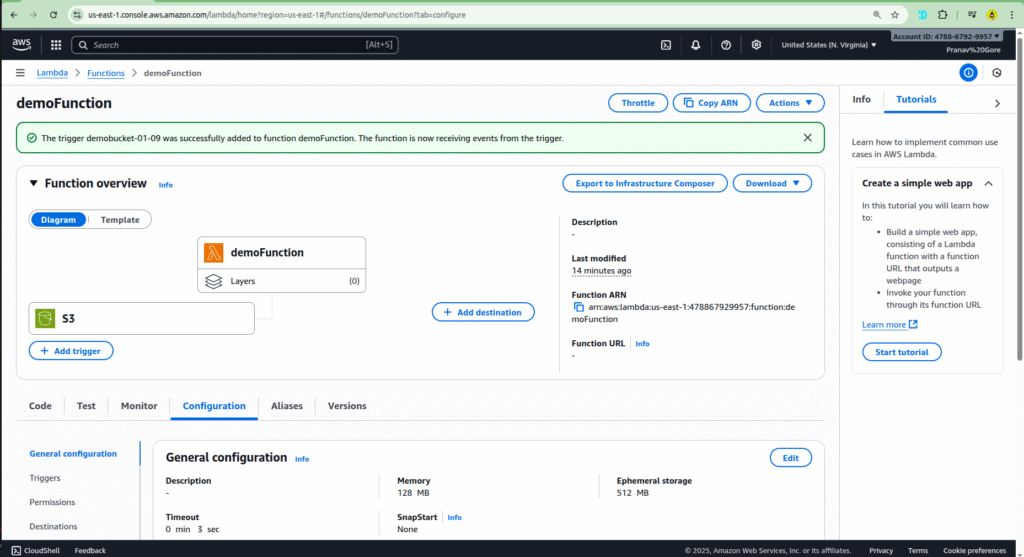
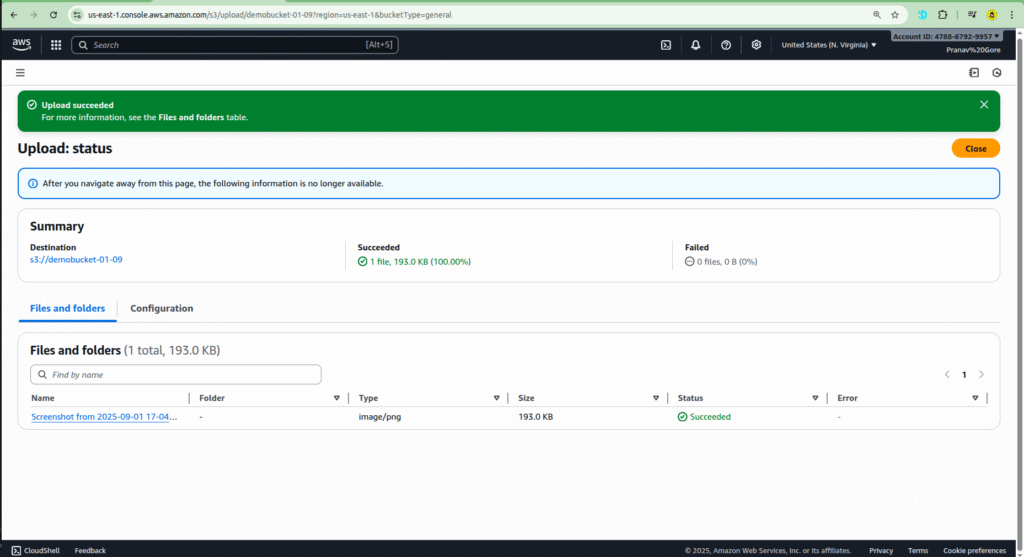
Step 5: Uploading a File and Verifying the Trigger
Now that your S3 trigger is configured, it’s time to test the entire process. The goal is to upload a file to your S3 bucket and watch as your Lambda function is automatically invoked.
- Navigate to your S3 bucket: Go to the Amazon S3 console and open the bucket you created in Step 1 (e.g.,
demobucket-01-09). - Upload an object: Click on the “Upload” button.
- Add your file: Drag and drop the image or file you want to upload into the designated area.
- Initiate the upload: Click on the “Upload” button at the bottom right. Once the upload is complete, your Lambda function should be triggered.
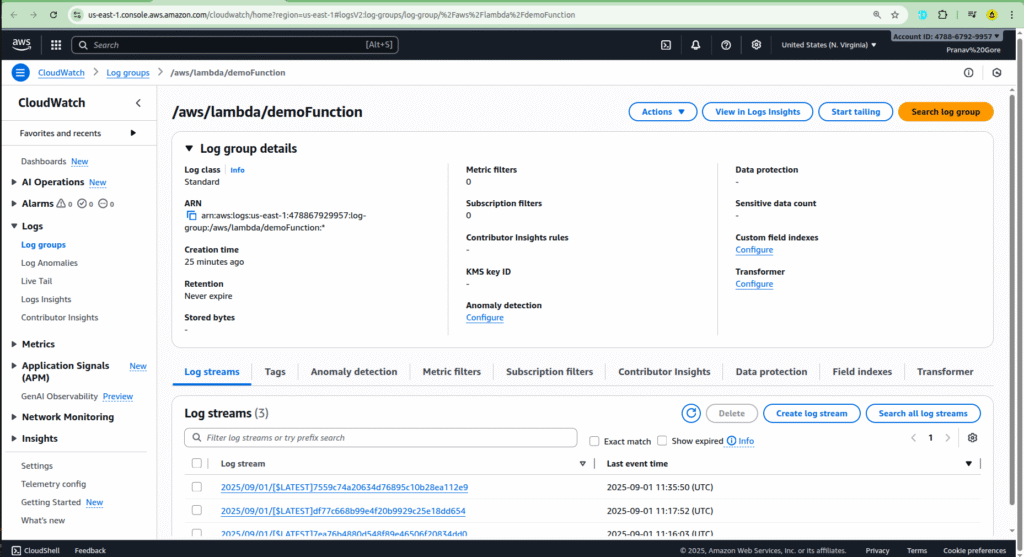
Step 6: Checking the CloudWatch Logs
To confirm that your Lambda function was invoked successfully, you need to check its logs in Amazon CloudWatch. AWS Lambda automatically sends all function logs to CloudWatch.
- Go to your Lambda function: Return to the Lambda console and select your
demoFunction. - View the logs: Navigate to the “Monitor” tab and click on “View CloudWatch logs.”
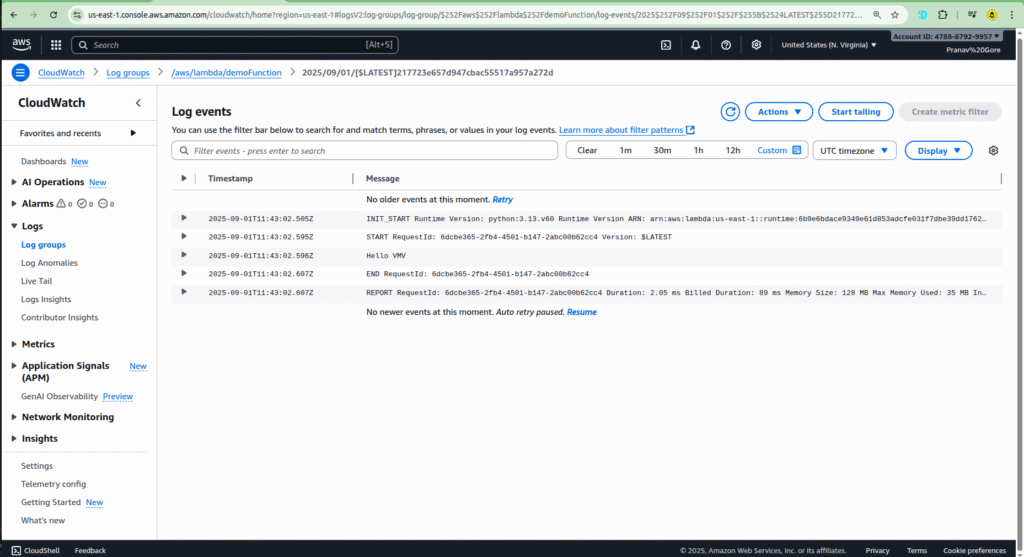
- Analyze the log stream: This will take you to the CloudWatch log group for your function. You should see a new log stream that was created when your function was triggered. Click on the most recent log stream to view the details.
- Verify the output: Within the log stream, you will see the log output from your Lambda function, including the event data that was passed from S3. This data will contain information about the file you just uploaded, confirming that the S3 trigger successfully invoked your function.
Pricing Details
Provide a simplified overview of Lambda’s pricing model.
- Description: Explain that pricing is based on two main components: requests and duration.
- Requests: The number of times your function is invoked. The first 1 million requests per month are free.
- Duration: The time your code takes to execute, measured in milliseconds, and the amount of memory allocated to the function.
- Important: Mention the generous free tier, which includes 1 million requests and 400,000 GB-seconds of compute time each month, making it very cost-effective for small projects.
Conclusion
- Description: Reiterate that AWS Lambda is a game-changer for building scalable, cost-effective, and highly available applications. Encourage readers to experiment with different triggers and use cases.
FAQs
Adding an FAQ section is great for SEO and addressing common user questions.
- Q: What is the difference between AWS Lambda and Amazon EC2?
- A: AWS Lambda handles all server management, so you just upload code. With Amazon EC2, you are responsible for provisioning and managing your own servers and infrastructure.
- Q: What programming languages does Lambda support?
- A: Lambda natively supports a variety of languages, including Python, Node.js, Java, Go, and more.
- Q: How do I handle dependencies for my Lambda function?
- A: You can package your code and dependencies in a
.zipfile, use Lambda Layers, or package them as a container image.
- A: You can package your code and dependencies in a

- AWS Lambda: A Complete Guide to Serverless Computing - September 3, 2025
- AWS Free Tier – Services You Can Use Without Paying - August 30, 2025
- AWS Management Console: Step-by-Step Beginner’s Guide (2025) - August 25, 2025