
In today’s DevOps world, automation is not just a buzzword— it’s a necessity. Among the many automation tools, Ansible stands out because of its simplicity and agentless architecture. In this guide, we’ll walk through creating your first Ansible playbook to install and configure Nginx on a remote server.
Learn how to create your first Ansible playbook to install and configure Nginx. A simple step-by-step guide for beginners in DevOps automation.
📌 Prerequisites
Before starting, make sure you have:
- Control Node (Ansible Host): Linux machine (Ubuntu in our case) with Ansible installed.
- Managed Node (Target Server): Another Linux server (could be Ubuntu or CentOS).
- SSH Access: You should be able to SSH from your control node into the managed node.
- Sudo Privileges: The remote server user must have sudo rights.
Step 1: Install Ansible on Control Node
On your control machine (Ubuntu example):
sudo apt updatesudo apt install ansible -y
If you wnat to install ansible you can check out previous blog :
A Beginner Guide To Install Ansible On Ununtu
Verify installation:
ansible --versionStep 2: Configure Inventory File
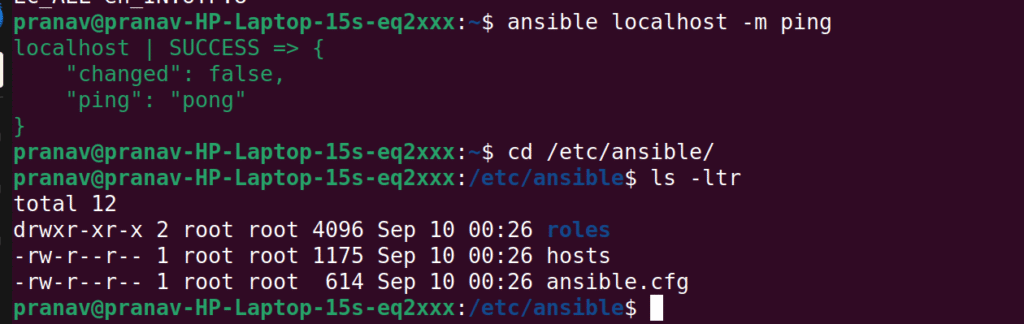
Test connection:
ansible all -m pingYou should see "pong" as a response. 🎉
Step 3: Create Your First Ansible Playbook
Now, let’s create a YAML playbook to install and configure Nginx.
mkdir -p ~/ansible/playbookscd ~/ansible/playbooks

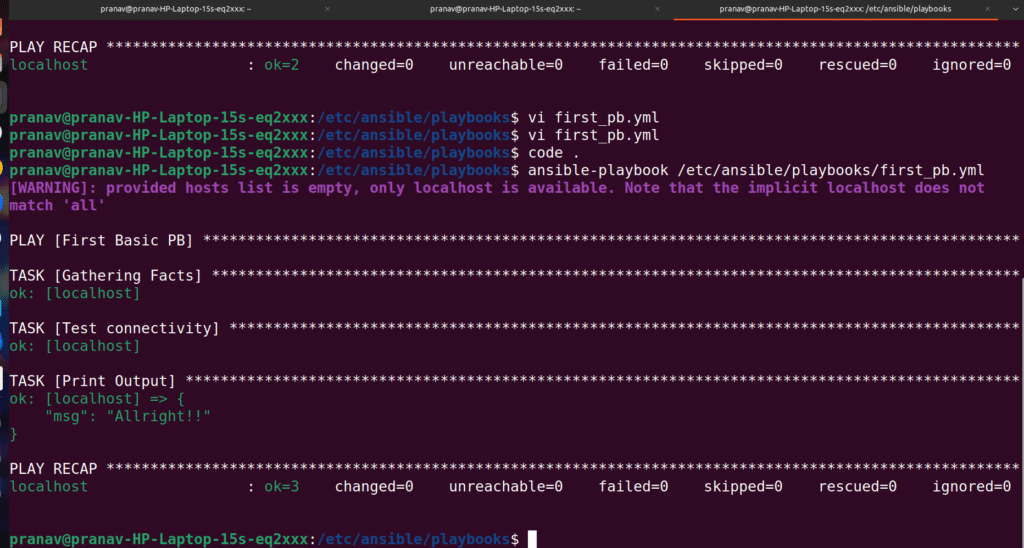
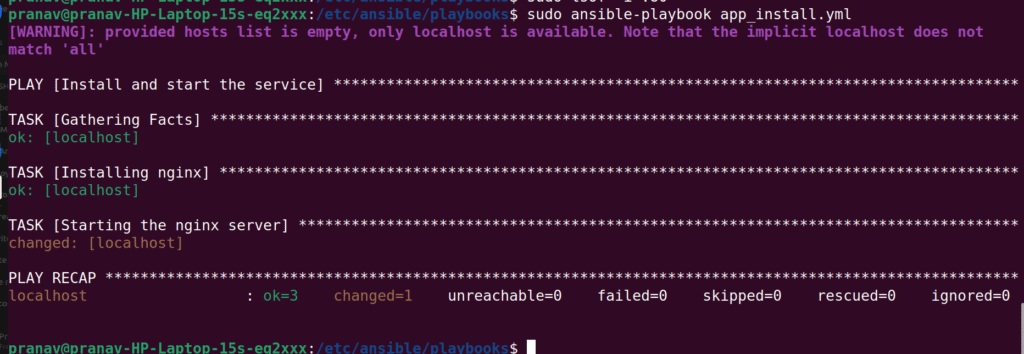
Step 4: Run the Playbook
Execute the playbook:
ansible-playbookfilename
If everything is correct, you’ll see output like:
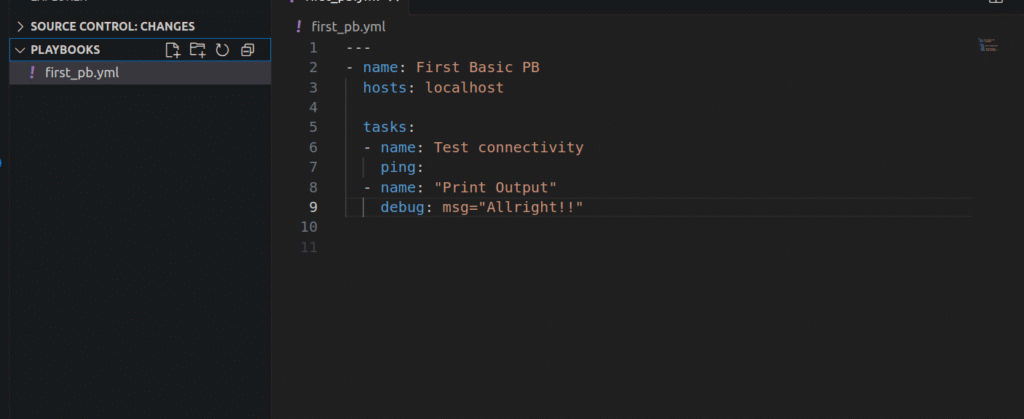
In above Description we are creating basic playbook that checks test connectivity
Now, We are Install and start the Nginx server by making another playbook like our first play we can create second playbook by using vi and navigate to it vs code okay
Step 5: Verify Nginx Installation and Running
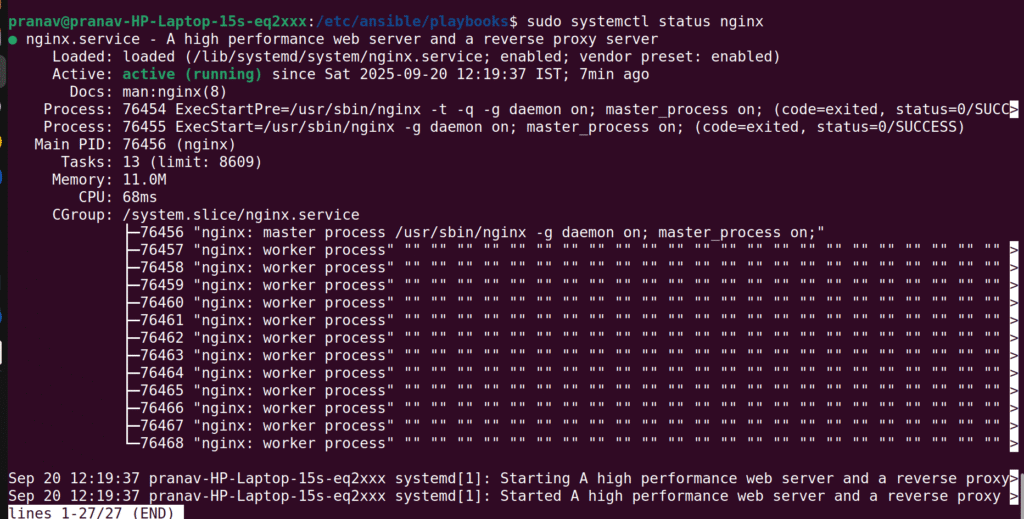
When you create your first Ansible playbook, you’ll see how automation saves time.:
Overview of the Playbook
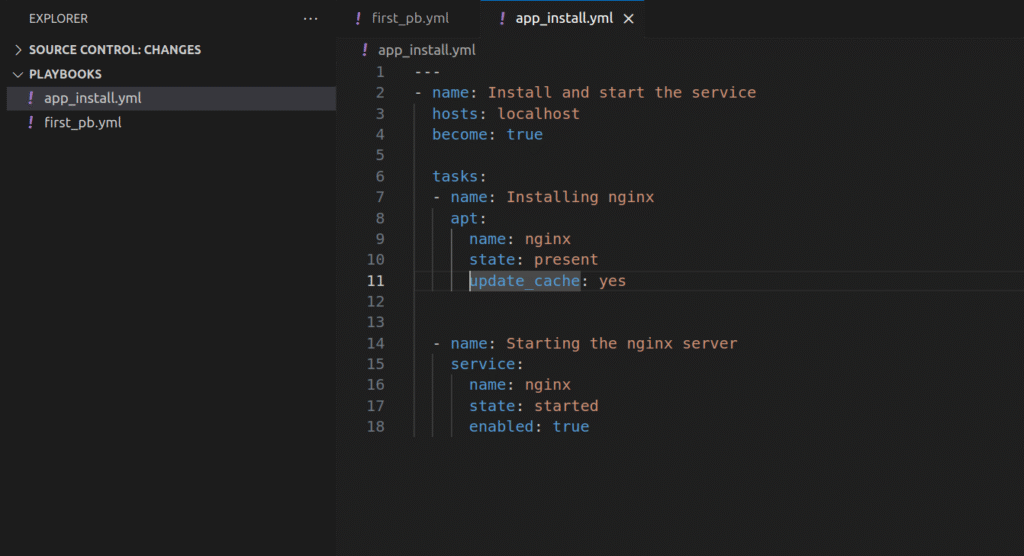
Below is the playbook to install and start Nginx on localhost. Let’s understand what each line does:
---
- name: Install and start the service
  hosts: localhost
  become: true
---→ Declares the beginning of the YAML document.- name: Install and start the service→ A human-readable title for the playbook.hosts: localhost→ Defines the target machine(s). Here, it runs on the local machine instead of a remote server.become: true→ Ensures the playbook runs with sudo/root privileges, because installing services requires elevated permissions.
tasks:
- Declares the list of tasks that Ansible will execute, one by one.
  - name: Installing nginx
    apt:
      name: nginx
      state: present
      update_cache: yes
- name: Installing nginx→ Describes the task (shown in Ansible logs while running).apt:→ Module used to manage packages on Debian/Ubuntu-based systems.name: nginx→ The package to be installed.state: present→ Ensures the package is installed (does nothing if it’s already installed).update_cache: yes→ Runsapt updatebefore installation to fetch the latest package info.
  - name: Starting the nginx server
    service:
      name: nginx
      state: started
      enabled: true
- name: Starting the nginx server→ Describes the task.service:→ Module to manage system services.name: nginx→ The service to be managed.state: started→ Ensures Nginx is running. If it’s already running, Ansible does nothing (idempotent).enabled: true→ Makes sure Nginx will start automatically on system boot.
Why Automate with Ansible?
This Ansible Playbook to Install Nginx is useful because:
- Saves time compared to manual installation.
- Ensures consistency across multiple servers.
- Idempotent – running it again won’t reinstall unnecessarily.
- Easy to extend with additional configuration tasks.
Real-World Analogy
Think of an Ansible Playbook to Install Nginx as a recipe:
- Playbook = Recipe
- Hosts = Kitchens
- Tasks = Steps in the recipe
- Modules = Ingredients/tools
Instead of repeating commands, you write them once and reuse them anytime.
FAQs
Q1: Can I run this playbook on CentOS or RHEL?
Yes, just replace the apt module with yum.
Q2: What if Nginx is already installed?
Ansible will skip reinstallation (idempotent behavior).
Q3: Can I target multiple servers?
Yes, just list them in your inventory file instead of localhost.
Conclusion
Congratulations! 🎉 You just created your first Ansible playbook that:
- Installed Nginx
- Started and enabled the service
This is just the beginning. With Ansible, you can automate entire infrastructures — from web servers to databases and even cloud deployments.

- Kubernetes Cluster Monitoring using Grafana & Prometheus - June 13, 2026
- What’s is Cloude code and Cowork ? Difference between both - May 29, 2026
- What Are Skills in Claude AI? - May 25, 2026