
How to Create an AWS Account
Introduction
Amazon Web Services (AWS) is the leading cloud platform that provides computing power, storage, databases, machine learning, and much more. Whether you’re a developer, DevOps engineer, data analyst having an AWS account opens the door to powerful cloud resources.
Amazon Web Services (AWS) offers a Free Tier account that lets you try out cloud services at no cost. This guide will help you sign up for an AWS Free Tier account and start using cloud services.
Prerequisites
Before you begin creating your AWS account, make sure you have the following ready:
- Email Address: A valid email ID is required to sign up for an AWS account.
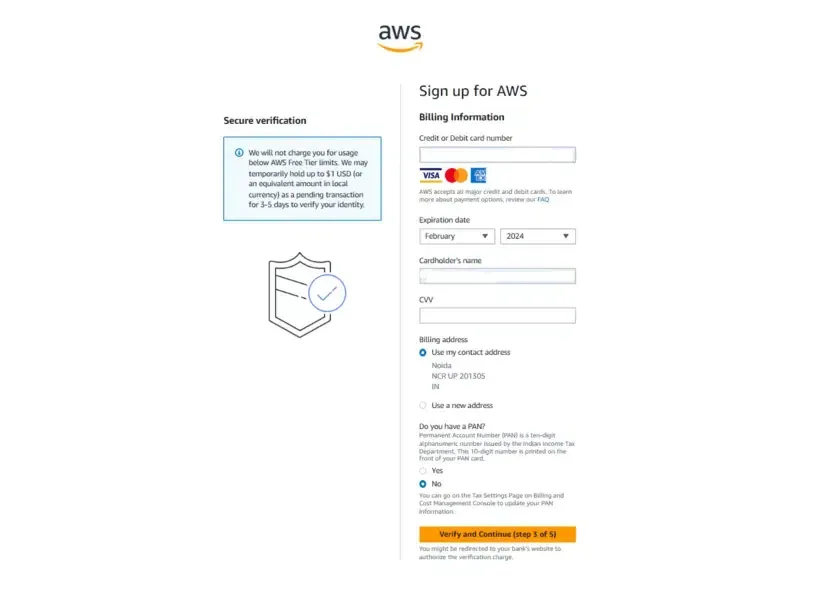
- Credit or Debit Card: AWS needs a card for identity verification. You won’t be charged for Free Tier usage, but a small refundable amount may be temporarily held.
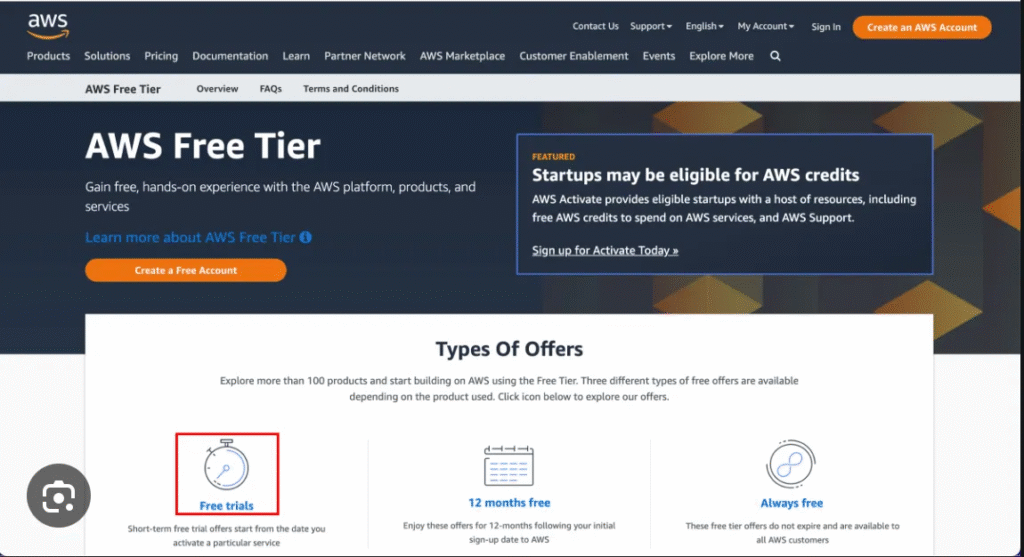
Step 1: Go to the AWS Free Tier Page
- Visit the AWS Free Tier page.
- Look through the list of free services available.
- Click the “Create a Free Account” button to begin.
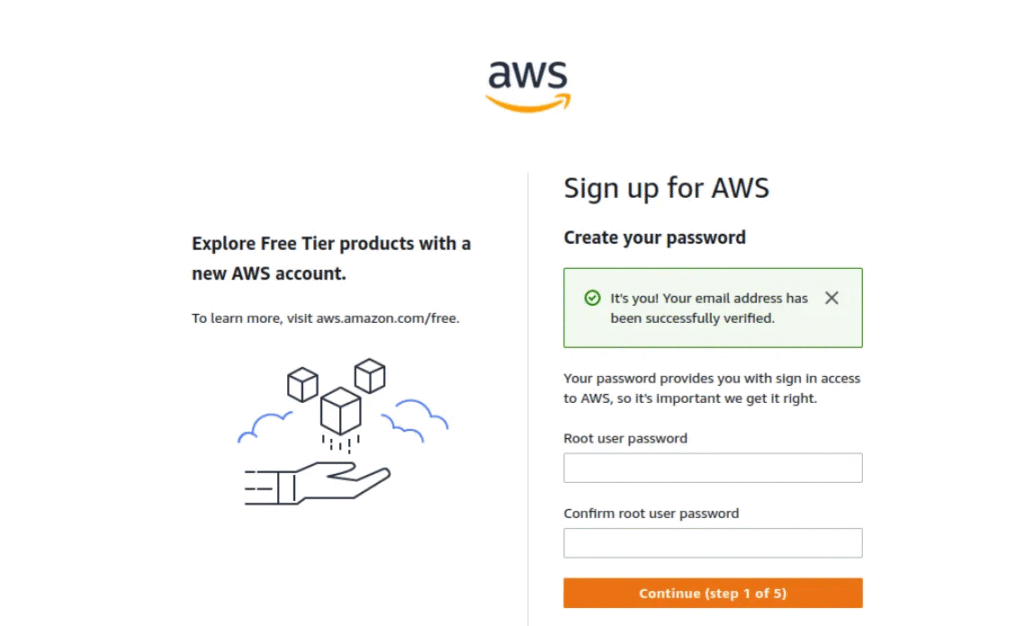
Step 2: Sign Up with Your Email
Enter your email address, choose a username, and set a strong password. Click “Continue” to proceed.
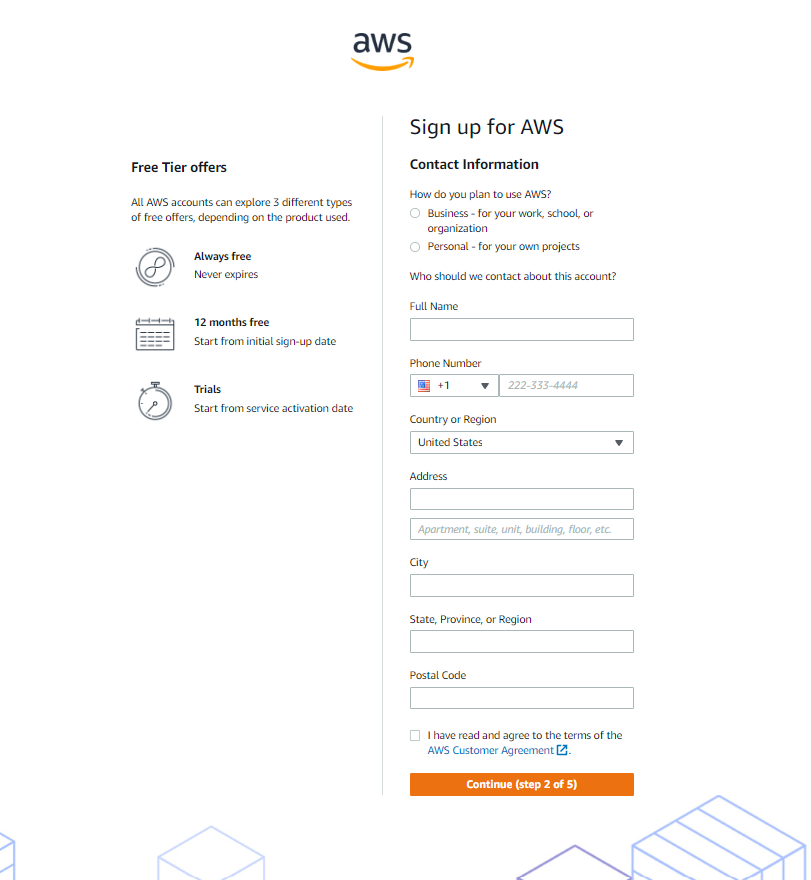
Step 3: Select Account Type
- Choose “Personal”: Select “Personal – for your own projects”, as you’re creating the account for individual use.
- Enter Your Personal Details: Provide your full name, phone number, country, and address.
- Click “Continue : Once you’ve entered all the required information, click Continue to move to the next step.
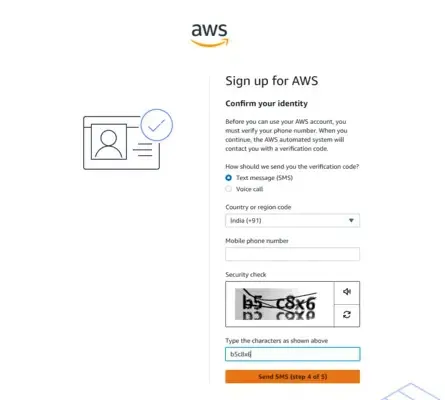
Step 4: Verify Your Identity
- AWS will send you a code by text message or voice call.
- Enter the code to complete the identity verification.
Step 5: Billing Information
- Enter billing details.
- Click “Verify and Continue”.
Step 6: Verify Your Identity
- Choose a Verification Method: AWS will ask you to verify your identity using either your mobile number or email address.
- Enter the Verification Code: You’ll receive a code via SMS or email. Enter this code on the verification screen.
- Click “Continue”: After successful verification, click Continue to move forward.
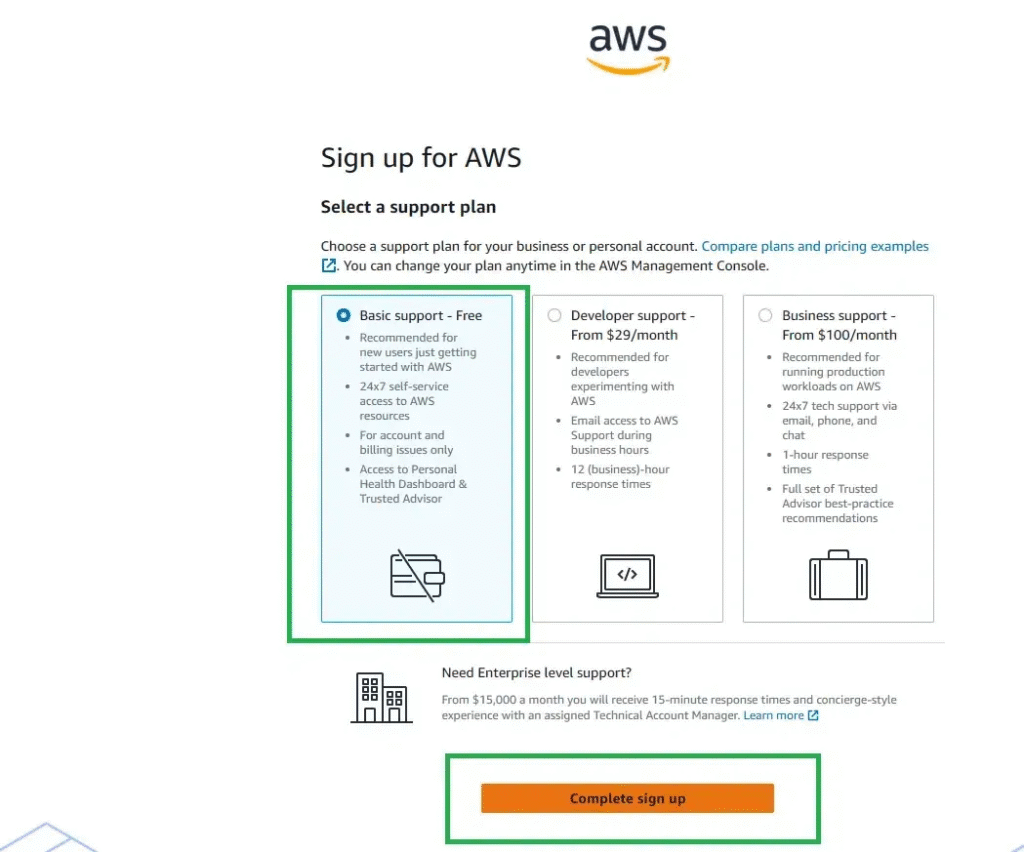
Step 7: Select a Support Plan
- Choose the Basic Support plan — it’s free.
- You can switch to a paid plan later if you need more support.
Select “Basic Support – Free”: This free plan gives you access to basic AWS support resources. It’s ideal for beginners and personal use.
- Click “Continue”: After selecting the support plan, click Continue to complete the setup.
Choose “Basic Support – Free”: Select the free support plan offered by AWS. This plan provides access to basic support resources, and it’s perfect for beginners.
- Click “Continue”: After selecting the support plan, click “Continue.”
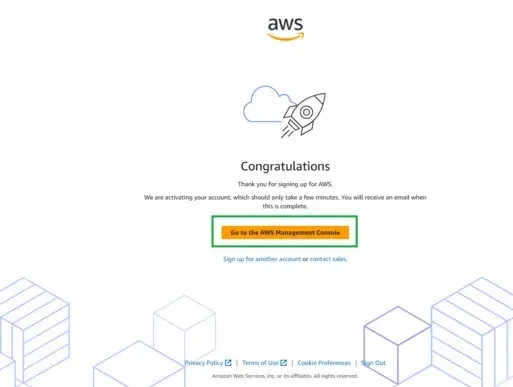
Step 8: Confirm Your Account
- Finish the Setup: After completing all the previous steps, your AWS account will be created successfully.
- Start Using AWS: You can now sign in to the AWS Management Console and begin using Free Tier services.
Enter your email address and previously-configured password.
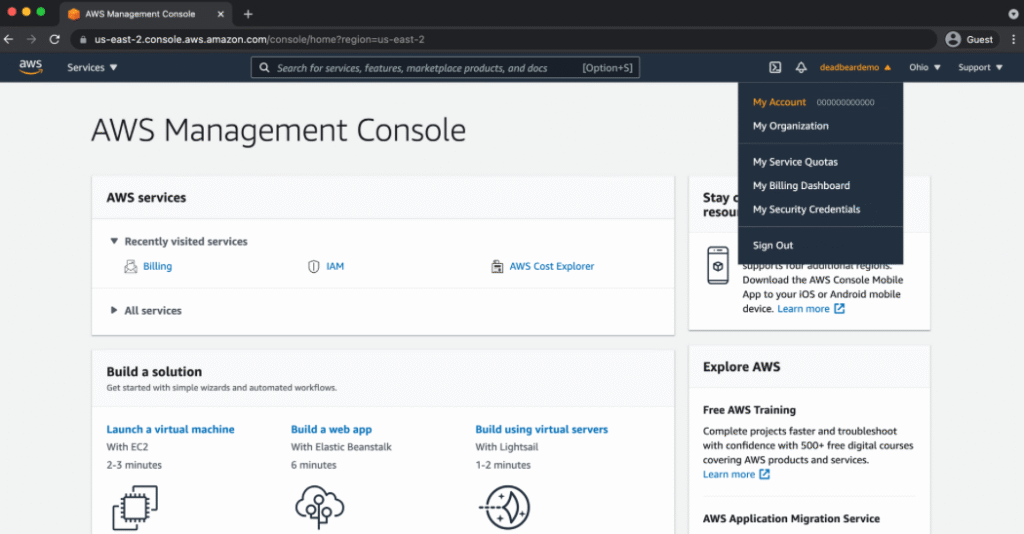
Step 9: Sign In to AWS Console
Once your account is set up, log in to the AWS Management Console to start exploring services like EC2, S3, and Lambda.

- ArgoCD Okta integration - July 2, 2026
- Jenkins Okta Integration - June 22, 2026
- Install Apache Tomcat using Ansible – Complete Guide - June 16, 2026